The Ultimate Guide to Easy and Affordable Vegan Meal Prep

Are you looking to incorporate more plant-based meals into your diet but feel overwhelmed by the thought of meal-prepping? Look no further! Our ultimate guide to easy and affordable vegan meal prep has got you covered.

Whether you’re a seasoned pro or new to meat-free eating, we’ve compiled tips, tricks, and recipes to make meal planning a breeze. Say goodbye to boring salads and bland tofu dishes and hello to delicious, nutritious meals that will leave you feeling satisfied all week long. So grab your cutting board, and let’s get cooking!

What is Vegan Meal Prep?

Vegan meal prep is the process of preparing vegan-friendly meals in advance. This can be done by cooking large batches of food at once or prepping individual ingredients to make meal assembly quicker and easier.

There are many benefits to vegan meal prep, including saving time and money, reducing food waste, and making it easier to stick to a vegan diet. Meal prepping can also help you eat healthier overall, as you can control what goes into your meals and better portion them out.

If you’re new to vegan meal prep or just looking for some easy and affordable recipes to get started with, check out our ultimate guide below. We’ve got everything from quick and easy one-pot meals to make-ahead breakfasts and lunches, plus tips on batch cooking like a pro.

Benefits of Vegan Meal Prep

If you’re looking for an easy and affordable way to meal prep vegan meals, look no further than vegan meal prep! Vegan meal prep is a great way to save time and money on your weekly grocery bill, and it’s also a healthy and delicious way to eat. Here are some of the top benefits of vegan meal prep:

1. Save time and money: Meal prepping vegan meals can save you a lot of time and money in the kitchen. Instead of spending hours cooking each day, you can batch-cook several meals and store them in the fridge or freezer for quick and easy later. This means less time spent cooking and more time saved overall.

2. Eat healthily: Vegan meal prep is a great way to ensure you eat whole foods daily. Prepping your meals lets you control what goes into them and ensure they’re packed with nutrients.

3. Reduce food waste: Another benefit of vegan meal prep is that it can help reduce food waste. When you cook in bulk, you can portion out your meals beforehand to only make what you need. This helps reduce leftovers and wasted food, which is good for your wallet and the environment.

4. Customize your meals: One of the best things about vegan meal prep is that you can customize your meals to fit your taste buds and dietary needs. Want to avoid a certain ingredient? Swap it out for something you do like! Meal prepping also allows you to experiment with different flavours and recipes to find the perfect vegan meal.

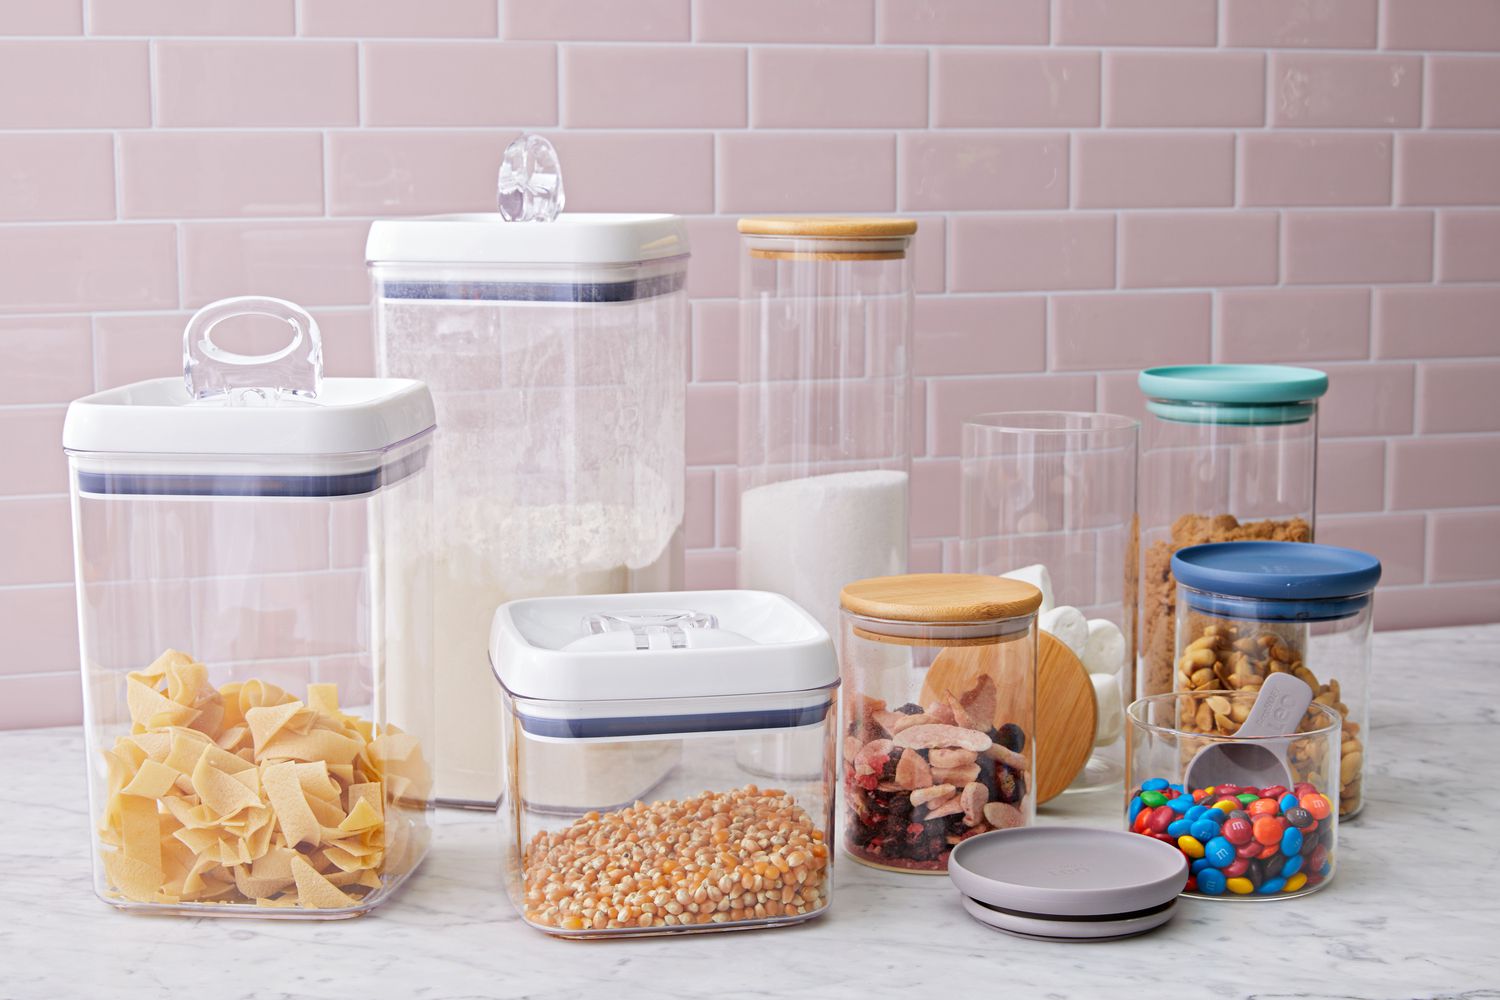
Tips for Making Vegan Meal Prep Affordable and Accessible

Here are a few key things to remember when making vegan meal prep affordable and accessible:

  1. Try to cook in bulk whenever possible. This will help reduce the overall cost of your meals.
  2. Utilize leftovers as much as possible.
  3. Take advantage of seasonal produce. Seasonal produce is typically cheaper than out-of-season produce.
  4. Buy from local farmers’ markets or Community Supported Agriculture (CSA) programs whenever possible.
  5. Try to stick to whole foods as much as possible.

Refined and processed foods tend to be more expensive than whole foods. By following these tips, you can save money on your vegan meal prep without sacrificing taste or nutrition.

Cooking and Meal Planning Strategies

Whether you’re new to veganism or have been plant-based for years, meal prep is a great way to save time and money while ensuring you always have healthy, delicious food.

There are endless ways to approach vegan meal prep, but we’ve added some tips and tricks to make it easier. From simple batch cooking to make-ahead freezer meals, there’s a method that will work for everyone.

One of the most important things to remember when meal prepping is to keep your meals varied. Just because you’re eating the same thing for lunch every day doesn’t mean it has to be boring! Mixing up your ingredients and trying new recipes will make you stay excited about your meals and less likely to fall off the vegan wagon.

Here are some of our favourite vegan cooking and meal-planning strategies:

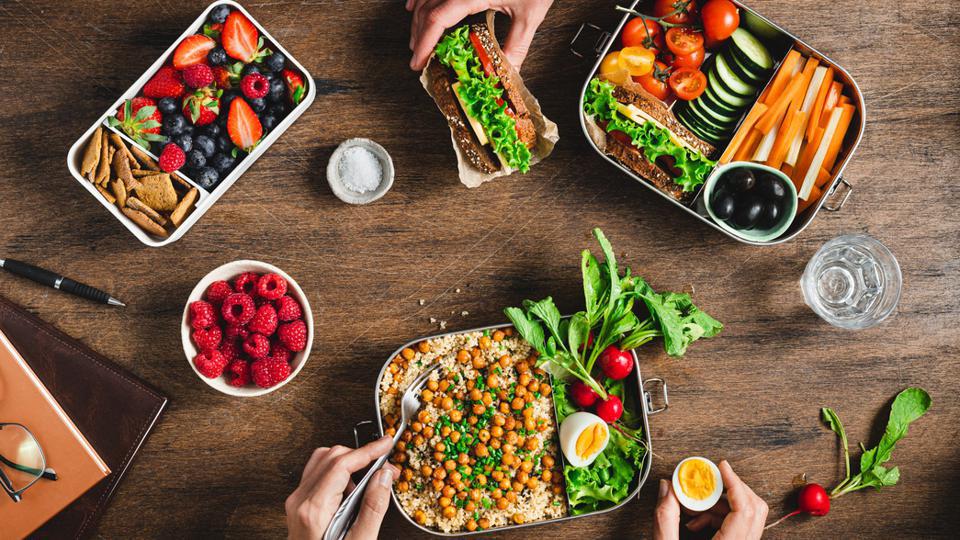
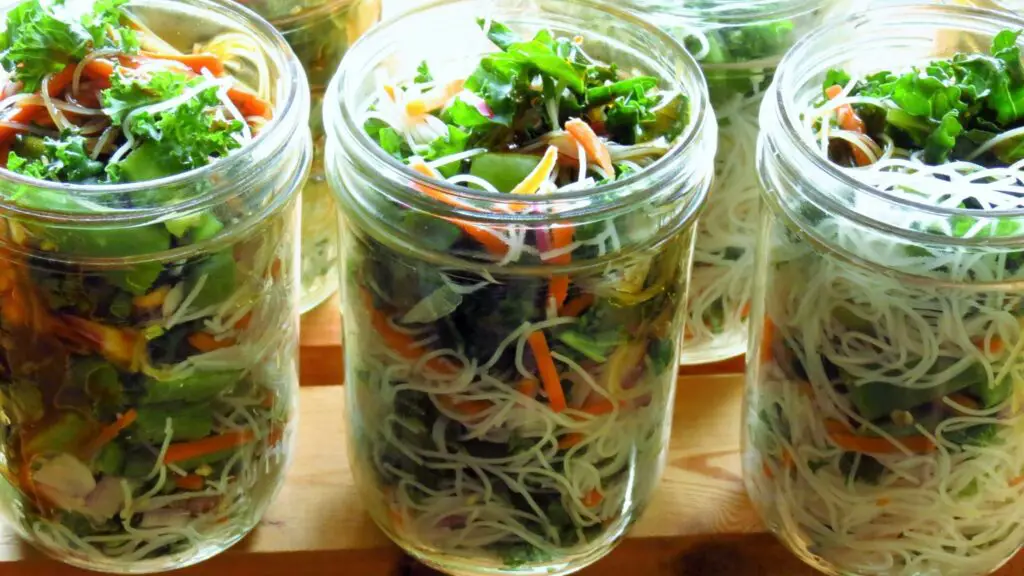
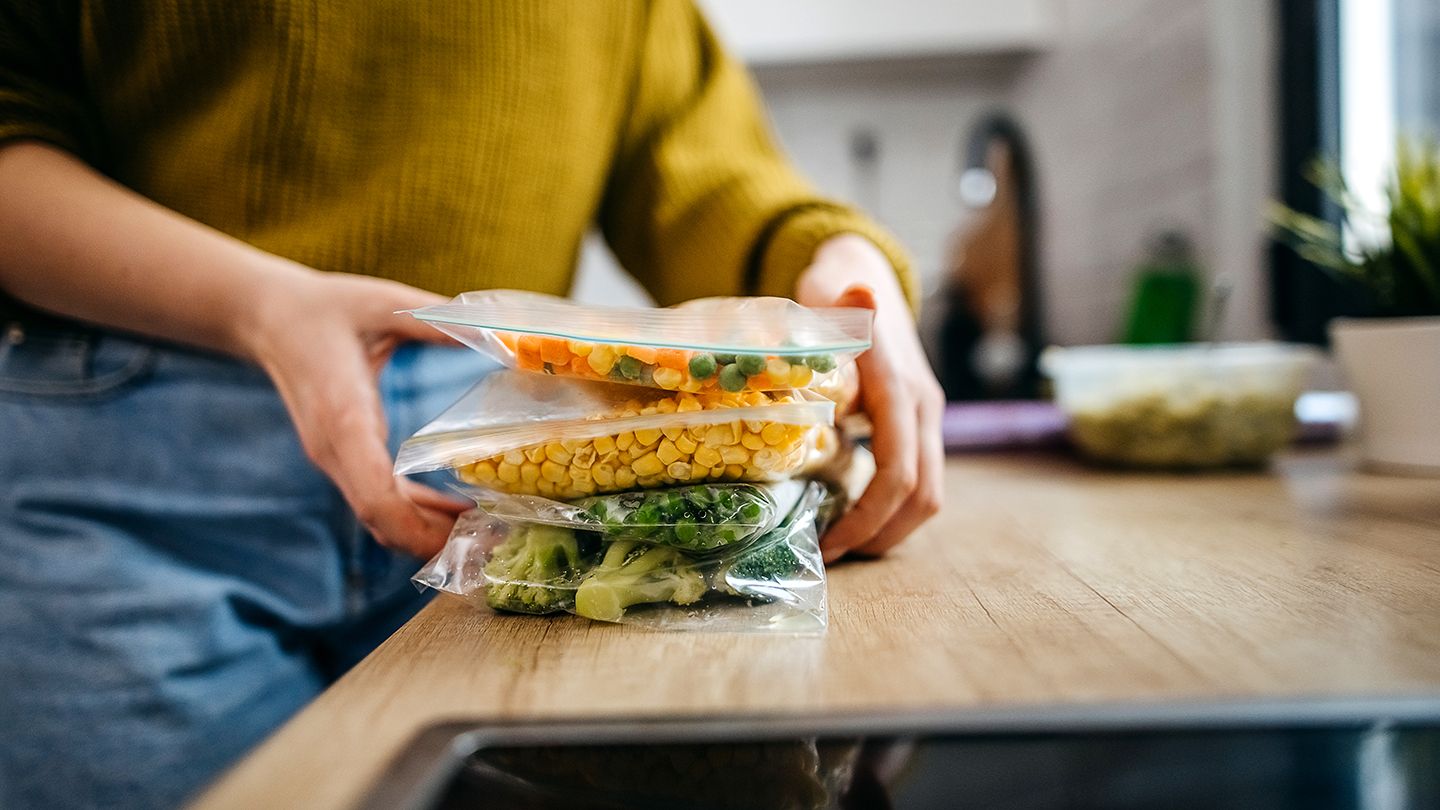
Batch cooking: This is the simplest form of meal prep and involves cooking a large batch of one or two recipes at the beginning of the week. You can then portion your food into single servings and either eat them throughout the week or freeze them later. This works well for soups, stews, casseroles, grains, and beans.

Meal planning: If batch cooking sounds like too much work, take some time each week to plan out your meals for the following days. This doesn’t have to be complicated – choose a few recipes you want to make and write out a shopping list.

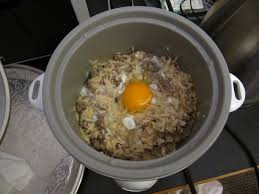
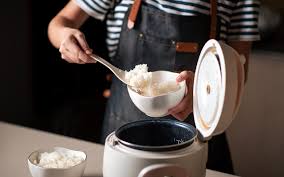
Prep ahead: You can also save time by prepping ingredients. This can include chopping vegetables, cooking grains, and soaking beans. Store them in containers in the fridge or freezer, so they’re ready to go when you need them.

Make-ahead freezer meals: There are tons of delicious recipes that freeze well, like veggie burgers, burritos, lasagna, and enchiladas. Just make a double batch and freeze the extras for another time.

Regardless of your chosen strategy, meal prep is a great way to stay on track with your vegan diet and save time and stress during the week!

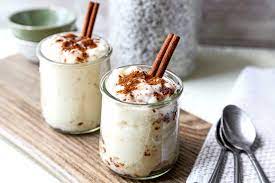
Recipes for Tasty and Affordable Meals

Assuming you have some basic kitchen supplies and appliances, here are recipes for tasty and affordable vegan meals. Many of these recipes can be made in advance and frozen for later.

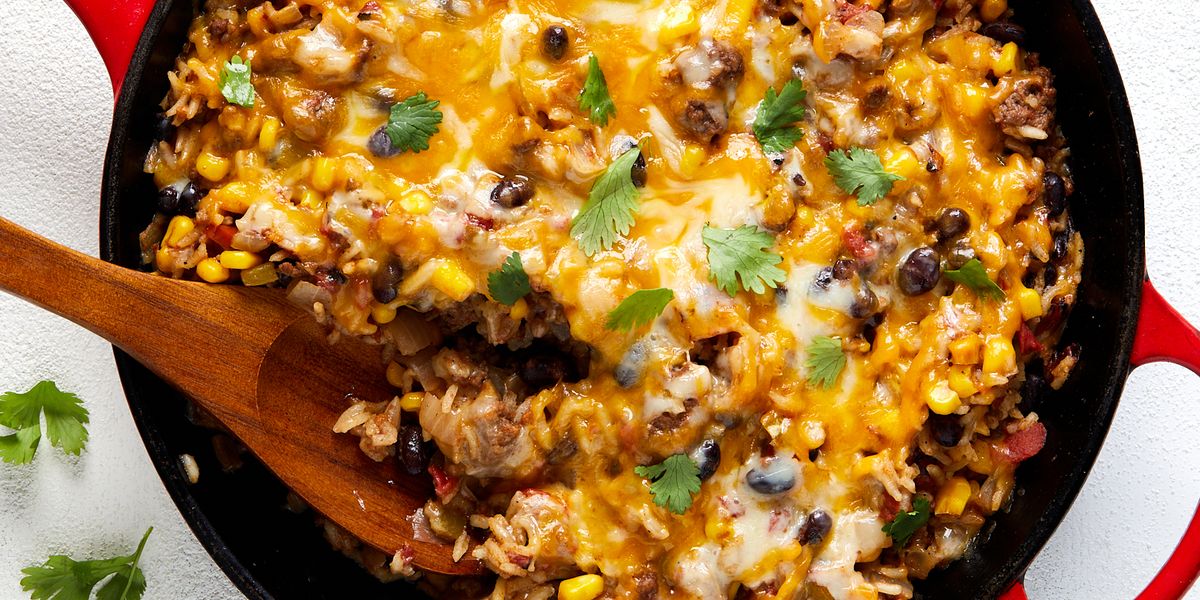
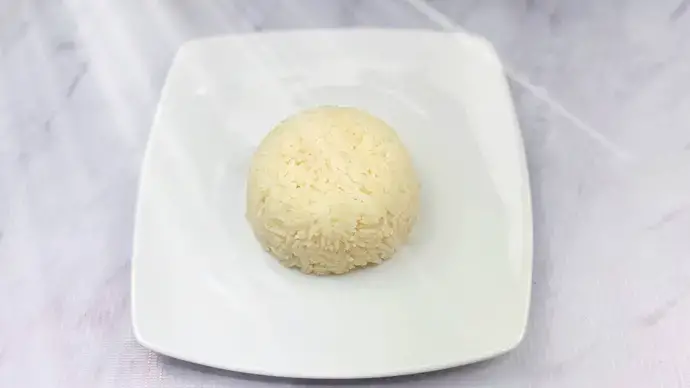
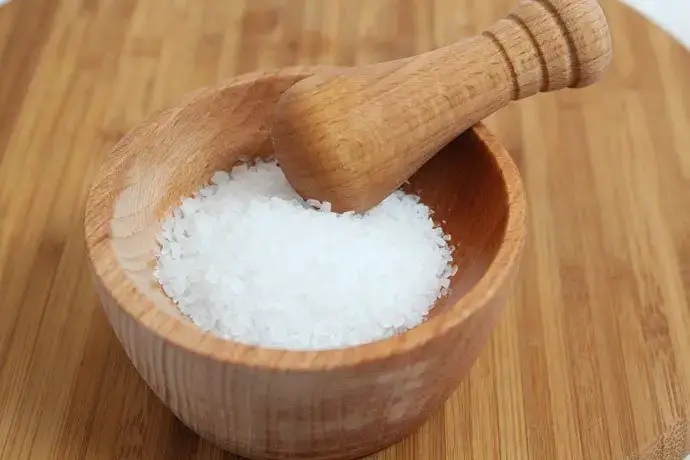
Black Bean Quinoa Burrito Bowls: In a bowl, combine cooked quinoa, black beans, corn, diced tomatoes, avocado, and cilantro. Mix lime juice, olive oil, chilli powder, and garlic powder for the dressing. Season to taste with salt and pepper.

Chickpea Curry: In a pan over medium heat, sauté onion and garlic in oil until softened. Add chickpeas, diced tomatoes, tomato paste, curry powder, turmeric, cumin, and salt. Cook for about 10 minutes or until heated through. Serve over rice or quinoa.

Roasted Cauliflower Soup: Preheat oven to 375 degrees Fahrenheit. Cut cauliflower into florets and toss with olive oil and seasonings of your choice (garlic powder, onion powder, curry powder). Roast in the oven for 25-30 minutes or until tender. Cool slightly, then blend with vegetable broth in a blender or food processor until smooth. Season to taste with salt and pepper. Serve garnished with chopped green onions or cilantro.

Veggie Kebabs:

  1. Cut vegetables of choice into cubes (bell peppers, mushrooms, onions, zucchini, etc.) and toss with olive oil and seasonings of your choice.
  2. Thread onto skewers and grill or bake until tender.
  3. Serve with a side of quinoa or couscous.

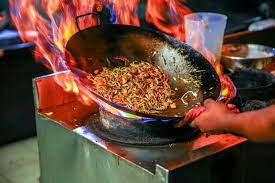
Tofu Stir-Fry: In a pan over medium heat, add tofu cubes and sauté in oil until golden brown. Add garlic, ginger, bell peppers, and broccoli florets to the pan. Cook until vegetables are softened, then season with soy sauce, sesame oil, rice vinegar, and chilli sauce. Serve over cooked jasmine rice or noodles.

Alternatives to Traditional Grocery Shopping

If you’re looking for alternatives to traditional grocery shopping, plenty of options are available. You can buy vegan food online, at vegan-friendly stores, or even at some regular supermarkets.

Several meal delivery services cater to vegans, so you can have all your meals delivered right to your door. And if you need more time, some vegan meal prep services will do all the work for you!

Conclusion

Vegan meal prep can be an amazing way to save time and money while eating healthy, delicious meals. With some planning, you can create easy and affordable vegan meals that are sure to please.

We hope this guide has given you some ideas on how to get started with vegan meal prep and tips for creating tasty dishes that your whole family will enjoy. So what are you waiting for? Get cooking!

Simple and Scrumptious: Egg-Free Baking for Beginners

Are you tired of scouring the internet for egg-free baking recipes that taste good? Are you a beginner baker who wants to create delicious treats without the hassle of working with eggs? Look no further!

This blog post will share some simple and delicious egg-free baking recipes perfect for beginners. From cookies to cakes, you’ll be amazed at how easy it is to whip up these delectable desserts without using eggs. So wear your apron and impress your friends and family with your newfound baking skills!

Introduction to Egg-Free Baking

If you have an egg allergy or are looking for a vegan baking option, you’re in luck! Egg-free baking is simple and delicious. Here’s a beginner’s guide to getting you started.

Ingredients

There are many substitutes for eggs in baking. One of the most popular is a mixture of baking soda and vinegar. Combine 1 teaspoon of baking soda with 1 tablespoon of vinegar and add to your batter like an egg.

Another option is to use fruit purees, such as mashed bananas or applesauce. For each egg called for in a recipe, substitute 1/4 cup of fruit puree.

Or, if you’re looking for a store-bought option, there are now many egg replacers on the market. Follow the package directions for substituting in your recipes.

Baking Tips

To ensure success when baking without eggs, follow these tips:

– Be careful not to overmix the batter or dough. Overmixing can result in tough baked goods.

– When using leaveners like baking soda or powder, add them just before baking. Adding them too early can cause them to lose their potency.

– Eggless baked goods often require a little extra rising time than their traditional counterparts. Allow ample time for your cakes, cookies, and quick bread to fully bake before removing them from the oven.

– Because they lack the binding quality of eggs, egg-free baked goods are more delicate than those made with eggs. Handle them with care to avoid breaking them.

You’ll be an egg-free baking pro with a little practice and experimentation!

Benefits of Egg-Free Baking

Baking without eggs may seem daunting, but it’s quite simple! And it has some great benefits too. Here are a few reasons why you should give egg-free baking a try:

1. It’s cheaper! Eggs can be expensive, so eliminating them from your baking can save you some money.

2. It’s vegan! If you’re looking for a vegan-friendly baking option, egg-free.

3. It’s allergy-friendly! Many people are allergic to eggs, so egg-free baking is the perfect solution.

4. It’s quick and easy! You don’t need to spend hours in the kitchen when you bake without eggs.

5. It’s healthier! Egg-free baking generally contains fewer calories and saturated fat than traditional recipes that call for eggs.

Substitutes for Eggs in Baking

There are many substitutes for eggs in baking, and the best one to use depends on the desired outcome. For example, if you want a light and airy cake, aquafaba (the liquid from a can of chickpeas) is a good option.

Applesauce or mashed bananas are both great choices if you’re looking for something that will add moisture to your baked goods. If you need something to bind your ingredients, using ground flaxseed or chia seeds mixed with water is an effective egg replacement.

Tips and Tricks for Egg-Free Baking

When it comes to egg-free baking, there are a few things to keep in mind to ensure success. First, use a quality non-stick baking pan or silicone baking mat – this will help prevent sticking and make cleanup a breeze.

Secondly, when measuring your ingredients, be precise – this is especially important when leavening agents like baking soda and baking powder.

Third, give yourself some extra time when baking egg-free; since there is no egg to bind the ingredients, your batter may take longer. Have fun with it! Experiment with different flavours and ingredients to find what you like best.

Recipes for Eggless Cookies, Cakes, and Breads

If you’re avoiding eggs for dietary reasons or because you’re out of eggs and can’t get to the store, know that you can still enjoy all your favourite baked goods!

There are plenty of recipes for eggless cookies, cakes, and bread. And while some may require a few more ingredients than your average recipe, they’re still simple and delicious.

To start, check out these recipes for eggless chocolate chip cookies, banana bread, and vanilla cake. You can whip up any of your favourite desserts with just a few adjustments without using a single egg. So go ahead and bake to your heart’s content – without worry!

Alternatives to Eggless Baked Goods

If you’re new to egg-free baking, you might wonder about the alternatives to using eggs in your recipes. Here are some common substitutes for eggs in baked goods:

-Applesauce: This is a great option for sweetened quick bread and cakes. You can substitute 1/4 cup of applesauce for each egg called for in the recipe.

-Banana: Another good option for sweetened quick bread and cakes, bananas can be substituted at a 1:1 ratio for eggs.

-Flaxseed meal: For each egg you need, combine 1 tablespoon of flaxseed meal with 3 tablespoons water and sit for 5 minutes before adding it to your batter or dough. This works best in denser recipes like muffins or brownies.

-Chia seeds: Similar to a flaxseed meal, chia seeds can be used as an egg replacement by combining 1 tablespoon of chia seeds with 3 tablespoons of water and letting it sit for 5 minutes before adding it to the rest of your ingredients. Again, this works best in denser recipes.

Conclusion

Baking without eggs can be a fun, creative challenge. With these tips and recipes, you have everything you need to create delicious egg-free desserts for everyone in your family.

Experiment with different ingredients and methods to find what works best for you – the sky’s the limit! Whether it’s a light brunch or an impressive dinner party dessert, now you know that egg-free baking is simple and delicious.

Meal Prep Made Easy: The Top 7 Best Food Storage Containers

Do you want to spend all your free time cooking and cleaning up after meals? Meal prep is a great solution to save time during the week, but finding the right food storage containers can be overwhelming.

That’s why we’ve researched for you and compiled a list of the top 7 food storage containers for meal prep. From glass to plastic, leak-proof to microwave-safe, these containers will make meal prep easy and stress-free. Say goodbye to last-minute takeout orders and hello to delicious homemade meals all week long!

What are the best food storage containers for meal prep?

Countless food storage containers are on the market, and deciding which is best for your needs can take time. This article will outline the top five best food storage containers for meal prep.

1. Glass Storage Container: A glass storage container is a great option to keep your food fresh and easy to see. They are also easy to clean.

2. Food Storage Containers with Lids: If you plan on Meal prepping often, it is important to get containers with lids to prevent contamination and keep your food fresh.

3. Stackable Storage Containers: If space is an issue, consider stacking your storage containers to take up less room. This will also make them easier to transport.

4. Flexible Plastic Storage Containers: F flexible plastic storage containers are another great option if you have limited space. These are lightweight and easily stacked, making them ideal for busy households or apartments.

5. Ceramic Storage Containers: Ceramic storage containers are worth considering if money is no object due to their durability and low-maintenance features.

Our Top 7 Picks

Check out these top food storage containers if you’re looking for easy meal prep!

1. Sterilite Bento Boxes: Perfect for packing healthy lunches and snacks, these boxes have multiple compartments to organize food.

2. OXO Good Grips Food Storage Containers: These containers are perfect for portioning food and ensuring it remains fresh. They also have a locking lid to keep your food safe while you’re on the go.

3. MealPrep-O-Matic Container System: This system comes with six different microwave-safe and dishwasher-safe containers, making it easy to pack your own meals without worrying about cleaning up afterward.

4. Contigo Travel Mug: Keep your coffee or tea hot while on the go with this mug, which can also be used as a water bottle when needed.

5. Rubbermaid FreshWorks 12-Pack Easy Select Food Storage Containers: This set of containers is perfect for those who want variety in their meal planning – each container has its unique shape and size so you can easily find what you’re looking for when cooking or packing a lunch.

6. Best Choice Products 17 Quart Round Classic Accessory Storage Container: If you’re looking for something larger than the other containers on this list, this option is perfect – it can fit almost anything from leftovers to whole meals!

7. Rubbermaid Commercial-Grade Food Storage Containers: If you’re looking for something that will last years and is built to withstand the rigors of commercial kitchens, these containers are perfect – they come with a 1-year warranty and are made from heavyweight plastic for durability.

Why They’re Ideal for Meal Prep

1. They’re easy to clean and store.

Food storage containers are a great way to keep your food organized and accessible and clean, and safe. They’re also easy to clean, a huge bonus in today’s busy world.

2. They’re portable.

If you’re looking for a food storage option that’s easy to take with you wherever you go, containers made from plastic are a great choice. They’re lightweight and easy to carry around, which makes them perfect for meal prepping.

3. They’re versatile.

Food storage containers can be used for various foods, making them ideal for fresh and prepped meals. You can store leftovers, snacks, meal components, or even as a container for baking ingredients or breakfast items.

4. They’re affordable.

Food storage containers are affordable and easy to find, making them an affordable option for many. Additionally, they tend to last longer than other types of food storage containers, which is another advantage in terms of cost.

5. They’re eco-friendly.

Food storage containers made from plastic are environmentally friendly, which is a major benefit. Not only are they cheaper to purchase and use than other food storage options, but they also tend to be less harmful to the environment when disposed of properly.

What to Avoid When Using These Containers

If you’re looking for an easy way to meal prep and store your food, check out these top best food storage containers. Some of them are decorative and functional, so you can be sure your food will stay fresh and tasty.

However, before stocking up on these containers, knowing what not to do with them is important. Here are four tips for using the best food storage containers:

1. Don’t Overfill Them: Make sure each container is full to the top before closing it off. This will help keep your food from going bad and attracting pests.

2. Don’t Put Anything Wet Inside: Not only will this ruin the seals on the containers, but it also increases the chances that your food will spoil. Stick to dry foods when storing them in these containers.

3. Keep Them Clean: Take care of the cleanliness of these containers by washing them regularly with warm water and mild soap. This will ensure that your food remains fresh and free from spoilage.”

Conclusion

If you want to simplify your life and make Meal prepping easier, you need to invest in some good food storage containers. Today we will outline the top 7 best food storage containers to make preparing healthy meals a breeze.

We have everything you need to get started, from glass jars and plastic containers to airtight sealers and customizable baskets! So if you’re ready to take on the challenge of healthy eating, start with these essential food storage containers.

Healthy on the Go: Fast and Easy Work Lunch Ideas for a Productive Day

Are you tired of spending your lunch break waiting for fast food? Do you want to fuel your body with nutritious meals that will energize you throughout the day?

Well, look no further! In this blog post, we’ve got some amazing work lunch ideas that are healthy, quick, and easy to prepare.

Whether you’re a busy professional or just looking for inspiration, these dishes will help you stay productive and focused all day. So grab your lunch box and start our journey toward better health!

Healthy Lunch Ideas for on the Go

Look no further if you’re looking for healthy, fast, and easy work lunch ideas! These dishes can be whipped up in minutes, leaving you with a nutritious and tasty meal.

1. Quinoa and Vegetable Bowl: This dish is packed with fiber, protein, and whole grains, making it a perfect option if you’re looking for something hearty and filling. Ingredients:

½ cup uncooked quinoa, rinsed and drained

1 cup vegetable broth

1 large carrot, peeled and diced

1 red bell pepper, diced

1 cup frozen corn

2 tablespoons chopped fresh cilantro

Salt and pepper to taste

Directions:

  1. Bring the vegetable broth to a simmer in a small saucepan over medium heat.
  2. Add the quinoa and cook until tender according to package directions.
  3. Remove from heat and let cool slightly.
  4. In a medium bowl, combine the quinoa mixture with the carrot, bell pepper, corn, and cilantro—season with salt and pepper to taste.
  5. Serve hot or cold. 

2. Lentil Sloppy Joes: Lentils are high in fiber, making them an ideal energy source for busy days. These sloppy joes also pack an impressive nutritional punch thanks to their vitamin C content. Ingredients:

2 tablespoons olive oil or avocado oil

1 onion, chopped

3 cloves garlic, minced

One 15-ounce can of lentils, drained and rinsed (or 3 cups of cooked lentils)

One 28-ounce can of crushed tomatoes

1 teaspoon smoked paprika

1 teaspoon cumin

Salt and pepper to taste

8 whole wheat buns, toasted

2 tablespoons chopped fresh cilantro

Directions:

  1. Heat the oil or avocado oil in a large skillet over medium heat.
  2. Add the onion and garlic and cook until softened about 5 minutes.
  3. Add the lentils, crushed tomatoes, smoked paprika, cumin, and salt and pepper to taste.
  4. Bring the mixture to a simmer and cook until heated through about 10 minutes.
  5. Spoon the mixture into the buns and top with the cilantro.
  6. Serve immediately.

Tips for packing a healthy lunch

If you’re looking for a quick and easy work lunch that will keep you healthy and energized, check out these ideas!

1. Bring a healthy salad or fruit tray to work. Mix some greens, sliced fruit, and nuts for a wholesome and satisfying meal.

2. Make a protein-rich snack such as grilled chicken or fish with veggies, rice, or quinoa. Include fresh fruits and vegetables for added nutrition.

3. Pack an energy bar or piece of fruit to munch on during your break. Grabbing something quickly will help you stay groggy-free until your next meeting.

4. Bring a container of unsalted cashews or almonds for snacking throughout the day. These nuts are high in protein and fiber, keeping you full longer.

Make Ahead Lunch Ideas

Packing a lunch daily is unnecessary if you keep these short and easy work lunch ideas in mind!

1. Roast chicken or turkey breast wrapped in multi-grain tortilla shells with salsa and shredded cheese.

2. Quinoa, black beans, corn salad with diced tomatoes, sour cream, and avocado.

3. Spicy tuna wraps with cucumber, red onion, and tempura flakes.

4. Mediterranean-inspired grilled chicken salad on whole grain pita bread with tzatziki sauce and crumbled feta cheese.

5. Peanut butter and jelly sandwiches on whole wheat bread with chopped banana and honeydew melon stripes for added sweetness.

5 Healthy Meal Prep Recipes for Busy Weekdays

Are you tired of scrambling last minute to throw together a healthy meal after a long day at work? Look no further! We have seven delicious and easy-to-make meal prep recipes to save time and keep your taste buds happy.

Whether trying to eat healthier or just looking for new recipe ideas, these meals are perfect for busy weekdays. So grab your apron and get ready to become a meal prep pro!

Introduction to Meal Prep

If you’re looking for healthy meal prep recipes to make your busy weekdays a little easier, you’ve come to the right place. In this section, we’ll give you a brief introduction to meal prep and share some of our favorite recipes that are perfect for prepping ahead of time.

Meal prep is a great way to save time and ensure you eat healthy, homemade meals during the week. When you take the time to prep your meals in advance, all you have to do during the week is heat and eat. No more last-minute trips to the grocery store or fast food restaurant!

There are endless possibilities for meal prepping, but we always recommend starting with simple recipes that can be easily made in bulk. These recipes should also be able to be stored in the fridge or freezer so that they’re ready when you need them.

Our favorite healthy meal prep recipes include quinoa bowls with roasted vegetables, chicken and rice soup, chili, and veggie-packed frittatas. These recipes are packed with nutrients and can be easily made beforehand – reheat and enjoy!

Benefits of Meal Prep for Busy Weekdays

  1. Meal prep can help you save time and money.
  2. Meal prep can help you eat healthier by making cooking healthy meals at home easier.
  3. Meal prep can help you avoid unhealthy eating habits, such as skipping meals or eating out too often.
  4. Meal prep can help you stay on track with your diet or weight loss goals.
  5. Meal prep can help you manage your food allergies or intolerances by making controlling what goes into your meals easier.

5 Healthy Meal Prep Recipes

If you’re looking for healthy meal prep recipes to help make your busy weekdays a little easier, you’ve come to the right place. I’ve rounded up some of my favorite recipes for meal prep, including everything from breakfast and lunch to dinner and snacks.

These recipes are easy to make and can be stored in the fridge or freezer for quick and easy meals during the week. And they’re all packed with nutrients to help keep you feeling your best. So whether you’re looking for a healthy breakfast to start your day or a satisfying dinner to end it, there’s something here for you.

So let’s get started! Here are some of my favorite healthy meal prep recipes:

Breakfast:

-Overnight oats with berries and almond milk
-Chia seed pudding with granola and fruit
-Banana pancakes with honey and almond butter
-Savory egg muffins with spinach, cheese, and ham
-Smoothie bags with frozen fruit, yogurt, and nut butter
-Omelette in a mug with veggies of choice

Lunch:

-Salad in a jar with homemade dressing
-Chicken wrap with avocado mayo and roasted veggies
-Turkey sandwich on whole grain bread with mustard and pickles
-Cobb salad with hard-boiled eggs, bacon, and ranch dressing
-Vegetarian quinoa burrito bowls with black beans, corn, tomatoes, and cheese
-Tuna salad wrap with hummus and cucumber slices

Dinner:

-Baked salmon with roasted vegetables
-Turkey chili with beans and peppers
-Stuffed bell peppers with quinoa and ground turkey
-Veggie lasagna with ricotta cheese and spinach
-Cauliflower crust pizza with pesto and tomatoes
-Slow cooker chicken tacos with homemade salsa

Snacks:

-Fruit & nut bars with dried fruit and nuts of choice
-Yogurt parfait cups with granola, chia seeds, and berries
-Trail mix bites with peanuts, almonds, raisins, and chocolate chips
-Hummus & veggie cups with cucumbers, carrots, celery, and bell peppers
-Energy balls made from oatmeal, peanut butter, honey, flaxseed meal
-Fruit & yogurt smoothie popsicles with frozen fruit and yogurt

Tips for Successful Meal Prepping

  1. Create a plan: Decide what you will make ahead of time and for how many meals. This will help you stay organized and focused while you’re cooking.
  2. Choose recipes that can be prepped in advance: Look for recipes that don’t require last-minute cooking or assembly. That way, you can do all the prep work in one go and heat or cook everything before eating.
  3. Use the proper containers: Use airtight containers to keep your food fresh. Glass or BPA-free plastic containers are ideal.
  4. Label everything: Label each container with the dish’s name, the date it was prepped, and any reheating instructions. This will save you time and hassle later on.
  5. Store properly: Store your prepared meals in the fridge or freezer depending on when you plan to eat them. Meals consumed within 3-4 days can be kept in the refrigerator, while anything beyond that should be frozen.

Conclusion

We hope these seven healthy meal prep recipes have inspired you to simplify your weekday meals and make healthier choices to help you reach your health goals.

Meal prepping is a great way to stay on track with eating healthy, and it doesn’t have to be complicated or time-consuming. With some planning and the right ingredients, you can create delicious dishes that are both nutritious and satisfying – perfect for busy weekdays!

How to Make Rice Pudding in Rice Cooker?

If it’s dessert time then you may love to try rice pudding. And if you have a rice cooker then you must try this rice cooker dessert recipe. Because making rice pudding in rice cooker takes less time and effort. It’s not like making rice pudding on a stovetop or a traditional oven.

Also, this is a very basic rice pudding recipe, so you will only need 4-5 ingredients that are common in our kitchen. And adding some additional ingredients like cinnamon powder or chopped nuts will increase the flavor of the pudding.

So, How to Make Rice Pudding in Rice Cooker?

Well, this is a very basic rice cooker recipe. And you can use any type of rice cooker from any brand for this rice pudding recipe.

How to Make Rice Pudding in Rice Cooker

At first, you need to wash and soak the rice in the water for 30 minutes. You can use any type of short or long-grain aromatic rice. Using aromatic rice will make the pudding flavorful and you will be amazed.

However, some rice may not need to wash and soak into the water. Just check manufacturer information on the rice packet about washing instructions. Also, some chefs don’t like to wash rice while makes rice pudding, because washing rice will reduce the amount of starch. And this starch is important to make the pudding thicker as well as more flavorful.

As we will cook rice and milk together, so you must care about boiling. If you are using a close-lid type rice cooker, then you must not close the lid when rice starts boiling.

And another important fact is cooking time. If your rice cooker doesn’t go to keep warm mode automatically, then you must set the right cooking time according to the type and amount of rice you are cooking.

However, for me, it takes around 20 minutes to cook the rice cooker rice cooking. And I have used my Panasonic Rice Cooker that is a 730W rice cooker with 2.2 liters capacity. And this is an open-lid type rice cooker with a steamer basket and non-stick cooking pot.

Final Words

Making rice pudding in a rice cooker is one of the simple rice cooker recipes I have ever tried. Also, the very basic rice cooker dessert recipe can be the first recipe for a newbie who wants to make a delicious dessert for dinner. So, let’s make the rice cooker rice pudding and let me know your experience in the comment section below.

What to Cook in a Wok | Top 10 Things

What to Cook in a Wok? Woks are one of the most common and also versatile kitchen items. This Chinese vessel can be used for preparing different kinds of recipes including stir-frying, deep-frying, steaming, sautéing, and many more. Cooking in a wok is a healthy way as it requires a fewer amount of fat for preparing foods.

The key factors of cooking with a wok successfully are lots of controlled, high-heat, and using high smoking point oils. In this following post, I’d like to share a list of some most common things that you can cook in a wok. So, let’s begin it.

What to Cook in a Wok | A List of Best Wok Recipes

What can you cook in a wok? Some people think that wok only can be used for preparing Asian foods like Stir-frying. However, there’s a list of top 10 recipes that you can cook using a wok. Check this out to know more.

Stir-Frying

Using a wok to prepare stir-fry is an easy and effective way to make your favorite Chinese wok recipes. The flapped shape of a wok improves the intense heat in the bottom as well as the walls. This improving heat radiates to the sides which allow both sides and walls to be used to cook ingredients properly with less oil. Stir-frying is a fast and high-heat cooking process, so you need to be careful while cooking.

Stir-Frying with Wok

Additional Tips

Steaming

Looking for healthy wok recipes? Then use your wok to steam different kinds of food such as fish, vegetables and many more things. All you just need is to add a steamer basket or rack to hold your food ingredients above the water. The sloped concave shape of the wok makes it an ideal vessel for holding a bamboo steamer basket. Using a bamboo steamer basket is the traditional cooking method of China. The useful side of a bamboo steamer is that its lid absorbs extra moisture. However, you can also use a metal steaming rack for steaming your food items.

Additional Tips

Deep Frying

A wok is a wonderful pot for deep frying. Because of its concave shape, you don’t need as much oil for deep frying. Compared to a Dutch oven, there is less possibility of boiling oil over the wok. With a wok, 2-inches oil is usually enough for deep frying, but ensure that you never fill the wok more than halfway.

Deep Frying in Wok

Additional Tips

Dry Frying

Dry frying is a cooking method in which a protein or vegetables in moderately hot oil without using any batter. As it cooks, the intense heat drives off almost all moisture concentrating the food’s taste and drying out its outside. After completing the par-frying stage, dry-fried foods are then stir-fried briefly with aromatic ingredients.

Additional Tips

Sautéing

For people who are a big fan of sautéed greens, the wok might be their best friend in the kitchen. Unlike a big sauté pan, a wok can pack in a lot more of those greens in smaller batches. Sautéing a dish means to cook it in a fewer amount of fat or oil to ensure that the food doesn’t stick to the pan. This cooking method is ideal for browning or searing foods especially vegetable items.

Additional Tips

Smoking

Smoking is possibly the most exotic and creative method for wok cooking. Unlike most other slandered pans, a wok is wide and deep enough to accommodate an internal smoking set-up. Moreover, the spacious interior of the wok provides enough room for the smoke to circulate the food.

Additional Tips

Scrambling

Making scrambled eggs with a wok is a great idea specifically for large quantities. Once you add the eggs to the hot pan, they cook almost instantly and without sticking. This simple and delicious dish is wonderfully versatile and allows you to add any leftover grains you have from your last night meals.

Additional Tips

Steaming Mussels

Mussels are undoubtedly a perfect dinner party dish; they’re quite expensive but elegant enough to impress your beloved ones. However, if you have a wok with a lid in your kitchen, it’s a great cookware item for steaming mussels. With a wok, you’ll be able to steam more mussels at the same time.

Additional Tips

Braising

Braising is might be the easiest wok-cooking technique and it’s also the most relaxed and certainly least messy. Like a Dutch oven, the wok provides all the benefits that you need for preparing the braise or stew recipe. A wok is ideal for braising as it allows you to stir the foods without resorting to them to a utensil.

Additional Tips

Making Soup

Soup is an all-time popular, satisfying, and warming dish, especially for a cold day or night. This is an ideal as well as easy wok recipe that you can prepare in a wok quicker than with any other traditional pot. The top of the wok featured a great surface area that reduces the time while making soup in it.

Making Soup with Wok

Additional Tips

Last Words

Besides cooking Asian foods, a wok has many more potential uses. If you know what you can cook with your wok you can make the best use of it. However, it’s also essential to take the best care of your wok so that you can use it after years. It’s recommended to avoid using a new wok until it’s been cleaned and seasoned properly. Moreover, it’s also suggested not to scrub the surface of the wok while washing, just rinses it, and use a soft sponger for removing residue.

How to Make Egg Fried Rice in Rice Cooker?

What is your favorite rice cooker recipe that is also easy to prepare?

For me, it’s rice cooker fried rice. Because easy to prepare and takes less than 30 minutes. For a busy day, this is a perfect side dish or even can be the main dish for lunch or dinner. However, here I’m going to share my recipe on how to make egg fried rice in rice cooker. Anyone can follow this recipe to make rice cooker egg fried rice within 30 minutes.

Egg Fried Rice in Rice Cooker

So, How to Cook Egg Fried Rice in Rice Cooker?

Almost all Asians have a rice cooker in their kitchen. And most of them use their rice cook rice. But besides rice, you can cook different foods using your rice cooker.

To make egg fried rice in a rice cooker, you can use either uncooked or cooked rice (or even leftover rice). Here I have used uncooked rice and for uncooked rice, you must use the right ratio of rice and water. Otherwise, rice will remain uncooked or get sticky.

how to make egg fried rice in rice cooker

However, following the same recipe, you can also make chicken fried rice or any type of fried rice dish.

To make this recipe simple and as I have only used my Panasonic Rice Cooker for this recipe, I have cooked everything together. But if you want, you can prepare vegetables and eggs in a frypan and cook rice in the rice cooker. Then mix them together.

But why I have used only a rice cooker?

Because I think, when people search for “how to make egg fried rice in electric rice cooker” or “how to make egg fried rice in rice cooker” that means they might have no access stovetops right now. So to make the process easier, I have used only a rice cooker.

rice cooker egg fried rice

In this egg fried rice recipe, I have used some mixed vegetables, eggs and uncooked rice. You can use frozen vegetables and sausages. And for those who want to use cooked or leftover rice, just prepare the vegetables and other ingredients first, then mix them with the cooked rice.

How to Cook Jasmine Rice in a Rice Cooker?

Jasmine rice is the perfect side dish for all kinds of Thai foods, including ground meats, spicy curries or grilled. The stickiness and sweetness of jasmine rice make it an ideal alternative to regular white rice. Moreover, you can make perfect jasmine rice quickly and easily in a rice cooker just as you would with traditional white rice. In this article, I’ve added a step by step guideline on “How to Cook Jasmine Rice in a Rice Cooker”. Let’s check it out to cook your favorite rice properly.

What is Jasmine Rice?

How to Cook Jasmine Rice in a Rice Cooker

Jasmine rice is originally from Thailand and is mostly used in Southeast Asia cooking. This is a long-grain variety of rice that has a nutty flavor and a soft, sticky texture when cooked. The grains are thicker and shorter than Basmati Rice. Additionally, this rice is about three times stickier than American long-grain rice. There are two types of jasmine rice available, white and brown. When it comes to health, brown jasmine rice has greater health benefits than white jasmine rice.

Ingredients that You Need

The following ingredients you’ll need for cooking jasmine rice in a rice cooker.

  • 2 cups of Jasmine rice
  • 2.4 cup of water for cooking and
  • Rice cooker
  • Wooden spatula

Steps on How to Cook Jasmine Rice in a Rice Cooker

It is easy to cook jasmine rice using a rice cooker. It requires less effort and time so you wouldn’t need to stand for hours near your gas stove. However, there is the best way to cook jasmine rice using a rice cooker.

Step 01: Wash the Rice

Washing Jasmine Rice

To wash the rice, add two cups of jasmine rice to the rice cooker. Fill the pot with enough cold pure water to cover the rice by at least an inch. Use your hand to gently agitate the rice for 3 to 5 minutes. This will help to remove some of the dirt and starch on the outside of the rice. Continue rinsing the rice until the water is mostly clear, about 2 to 3 times. But I washed for only once as manufactured instruction. Now use a colander or strainer to free the rice from water. Shake the rice well to remove the excess water.

Step 02: Add the Rice and Enough Amount of Water to the Rice Cooker

Adding water to the Jasmine Rice

Once the jasmine rice is clean, place it inside the pot of the rice cooker. After that, pour one cup of clean and cold water over the rice. For jasmine rice, it is best to use a 1:1 ratio of rice to water. But you must remember that the Jasmine rice to water ratio always will not be 1:1. It may be changed on several facts like Rice origin, rice cooker, cooking time, etc.

For me, I have used Royal Umbrella Thai Jasmine Rice and the water ratio for this rice is 1:1.2. That mean’s, I have to use 1.2 cups of water for 1 cup of Jasmine rice. Anyway, I have added 2.4 cups of water for 2 cups of Jasmine rice.

Step 03: Mix a Little Amount of Salt

Mix a Little Amount of Salt

If you’d like to season the rice before it cooks, you can add ½ teaspoon of salt to the rice cooker. Use a wooden spoon to stir the salt into the rice and water so all of the ingredients are well-mixed. However, adding the salt is an additional step, you can skip it if you want.

Note: I haven’t used any salt during cooking.

Step 04: Turn on The Rice Cooker

Once you have mixed the rice, water, and salt in the rice cooker, put the lid on and turn on the rice cooker. The cooking time depends on the rice cooker brands and their capacity for boiling. The standard time for cooking jasmine rice properly is 20-30 minutes depending on how much rice you are cooking. After turning the rice cooker on, it will automatically go to the “Keep Warm” mode when cooking is done. Once this is done, keep the rice cooker in the “Keep Warm” mode for 10-15 minutes.

Step 05: Let the Rice to Rest for at Least 10 Minutes

Allow the rice to rest for at least 10 to 15 minutes. Do not remove the rice from the cooker. Make sure to leave the lid on the cooker when the rice is resting.

Step 06: Fluff the Rice with a Wooden Spatula

Once the rice has rested for several minutes, mix the rice up a bit using a wooden spatula. This will help to remove any lingering moisture and give the rice a fluffier texture.

Step 07: It’s Time to Serve

Cooked Jasmine rice in the rice cooker

After you have fluffed the rice, use the spatula to carefully put it in a bowl. Serve the rice to your family while it is still warm as a side to your favorite meat main course.

Comparing Jasmine Rice with Others

Jasmine Rice Vs White Rice

One of the main differences between jasmine and white rice is how they look and smell. White rice is very sticky and often used in Asian dishes. It can have either a short, medium or long grain, while jasmine rice has only a long grain. However, they have a distinct similarity also. Both are processed and have its husk, bran, and germ removed. This means both of the rice are stripped of many nutrients, including fiber.

Basmati Rice Vs Jasmine Rice

It is very easy to confuse raw basmati and jasmine rice. Both of them are long-grain varieties, and both contain a compound that can give them a popcorn-like aroma. However, they have some remarkable differences also between them. Basmati rice hails from the foothills of the Himalayas in Pakistan and northern India. This is long-grain rice mostly used in Indian, Middle Eastern, and Persian cooking.

Jasmine rice, on the other hand, is a very fragrant long-grain rice from Thailand. It has a subtle floral aroma and commonly used in Southeast Asian dishes.

Is Jasmine Rice Good for You?

A 1/4-cup serving of dry jasmine rice has 160 calories, 36 grams of carbohydrates, 3 grams of protein, and less than 1 gram of fat, which is about the same amount found in a 1/4-cup serving of dry long-grain white rice. They each also have only 1 gram of fiber and minor amounts of vitamins A, C and D, and iron. When it is about your health, you’re not getting any extra benefits by switching to jasmine rice. However, you can add a little extra nutrition to your diet using brown jasmine rice instead of white. Because of whole grain, the brown rice version retains its bran and germ that automatically ups the fiber and nutrient content.

Last Thought

All rice cooker brands provide a guideline on to use their products. Make sure that you have checked the guideline (especially temperature setting) before using the rice cooker. Finally, one more tip for you never takes the lid off the rice cooker to check on the jasmine rice when it’s cooking. This can slow down the Jasmine rice cooking process or leave you with chewy rice.

Rice Cooker Soup | Simple Rice Cooker Chicken Soup Recipe

A simple rice cooker soup recipe can make your cooking easy and enjoyable. You can make different types of soup using your rice cooker. And here, I’m going to talk and make chicken soup. I have also used some vegetables and eggs in this soup recipe. And you are always free to customize the ingredients list as you wish.

Rice Cooker Soup

So How to Make Rice Cooker Soup?

The process is quite simple and easy. A newbie cooker also can make soup following this simple rice cooker soup recipe. And you can also make chicken broth or stock following the same cooking method.

However, to make chicken soup in the rice cooker, I have used some boneless chicken, carrot as veggie and egg. And some other ingredients that are commonly used for making chicken soup.

At first, I have cooked chicken and vegetables with some ingredients. This comes out like chicken broth or stock. Then I removed the chicken pieces and shredded them. After that, I have added other chicken soup ingredients including eggs and shredded chicken. And finally cooked for few minutes to make the final dish.

Rice cooker chicken soup

However, following this cooking method, you can make vegetables soup, egg drop soup, chicken noodles soup, fish soup, rice soup, etc. using a rice cooker.

The only one thing you must remember is that cooking time can be different for different rice cookers. Also, the amount of ingredients you are using for a recipe is also a major fact for cooking time. So you must adjust the cooking according to your rice cooker power, size and your recipe. My 730W Panasonic Rice Cooker takes almost 30 minutes to make this rice cooker chicken soup.

Final Words

Rice cooker soup can be made using different ingredients and different cooking methods. And you will fall in love with your rice cooker after cooking something different than rice. I have already tried several recipes in my rice cooker and almost all of them come out perfectly.