Fueling Your Family with Healthy Meal Prep: Recipes and Strategies to Try Today

Are you tired of scrambling to put together last-minute meals for your family? Do you need help finding the time and energy to cook nutritious food during busy weekdays? If so, look no further!

In this blog post, we’ll share some effective meal prep strategies and delicious recipes to fuel your family with healthy food all week. Whether you’re a seasoned meal prepper or new to the game, there’s something here for everyone. So let’s begin our journey towards healthier eating habits – your taste buds (and wallet) will thank you!

Introduction to Healthy Meal Prep

If you’re like most families, preparing healthy meals is a challenge. It can be hard to come up with something that everyone will enjoy, and it’s even harder to get everyone to eat something that isn’t unhealthy. But there are ways to make meal prep easier and healthier for your family. In this article, we’ll give you tips on how to fuel your family with healthy meal prep recipes.

One of the best ways to make meal prep easier is having pre-made meals. This way, you don’t have to worry about creating something new or finding time to cook while running around after your kids. You can also use these recipes to create your own dishes.

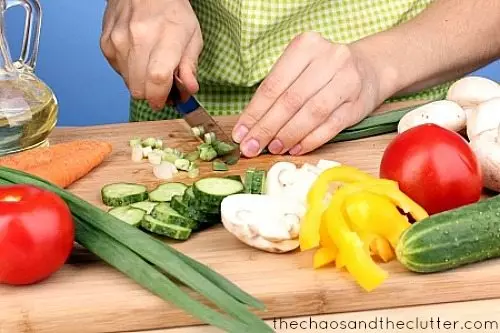
Another tip is to keep things as simple as possible. If you can find staples your family enjoys and combine them in different ways, you can create many delicious dishes without spending much time in the kitchen. For example, roasted vegetables and lean protein are a great combination because they both pack a lot of nutritional value into one dish.

Finally, remember portion control when eating out or eating at home. When guests come over, try setting guidelines for how much food each person should eat so that everyone feels satisfied without overeating. This way, no one has to feel left out or guilty about being unable to finish their plate!

Recipes for Every Meal

Were you looking for recipes to help you fuel your family with healthy meal prep? Here are a few ideas to get you started!

1. Quinoa and Bean Burrito Bowls: A protein-rich, fiber-loaded meal that is perfect for the on-the-go.

2. Roasted Butternut Squash Soup: Warm and comforting soup made with autumnal spices that will fill you up without weighing you down.

3. Grain-Free Chicken Teriyaki Rice Bowls: Delicious and healthy chicken teriyaki rice bowls are perfect for a quick and easy meal.

4. Veggie Black Bean Tacos: Soft tacos filled with nutritious black beans, topped with crispy avocado and tomatoes.

Tips for Successful Meal Prep

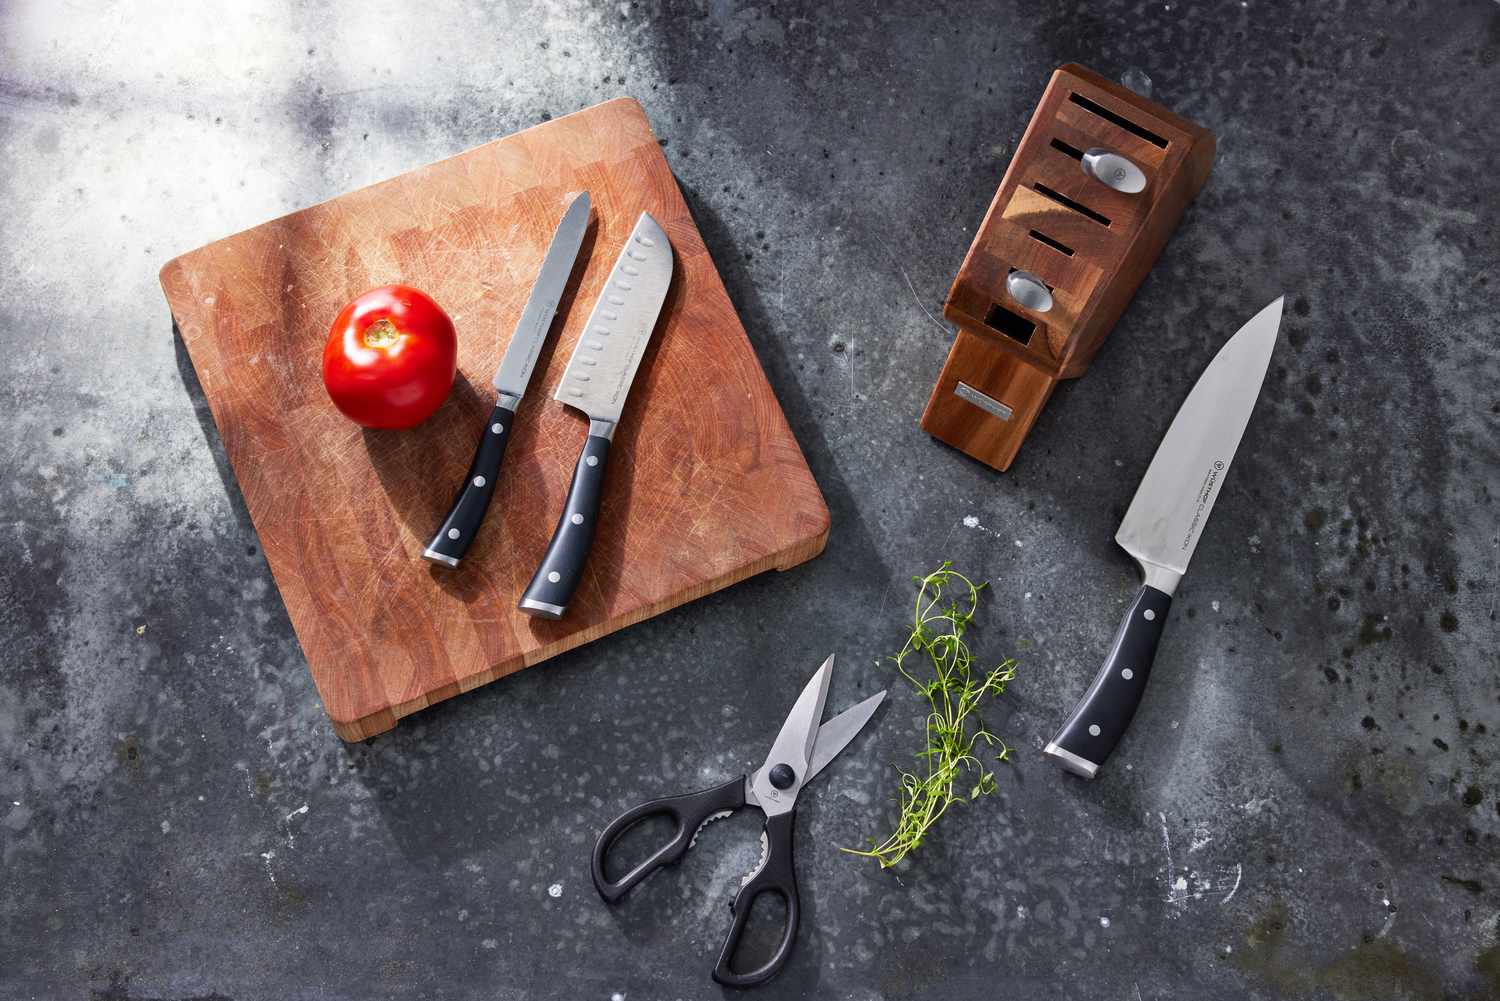
No doubt, meal prepping can be a time-saving strategy for conscientious cooks. But with so many different recipes and cooking methods, figuring out which recipes work best for your family can be daunting. In this guide, we’ve gathered some tips for successful meal prepping to help you create delicious and nutritious meals that everyone in your family will love.

1. Start with a plan
Before you start cooking, take some time to map out your plan. What type of meals do you want to make? Do you want to prep individual dishes or entire meals? How many people will you be feeding? Once you know what you want, start assembling your ingredients.

2. Keep it simple
When it comes to meal prep, simplicity is key. If a recipe calls for multiple ingredients, stick to simpler versions that most people already have on hand. This way, there’s less chance of something going wrong, and your food will taste better because of fewer surprises.

3. Check the labels
Before you start cooking, check the labels and ensure all of the ingredients in your pantry and fridge are safe for eating. This includes things like canned goods, boxed foods, and frozen items like ice cream and frozen dinners. If there’s anything in the pantry or fridge that you don’t want to eat, put it away until you can safely consume it.

4. Store leftovers carefully
Once you’ve cooked a meal, remember to store the leftovers carefully. Most meals will keep for several hours in the fridge, but be sure to label and date the containers so you know when they’ve been eaten. And if you plan on freezing the food, defrost it slowly and evenly so it doesn’t become soggy or freezer burn.

5. Plan ahead
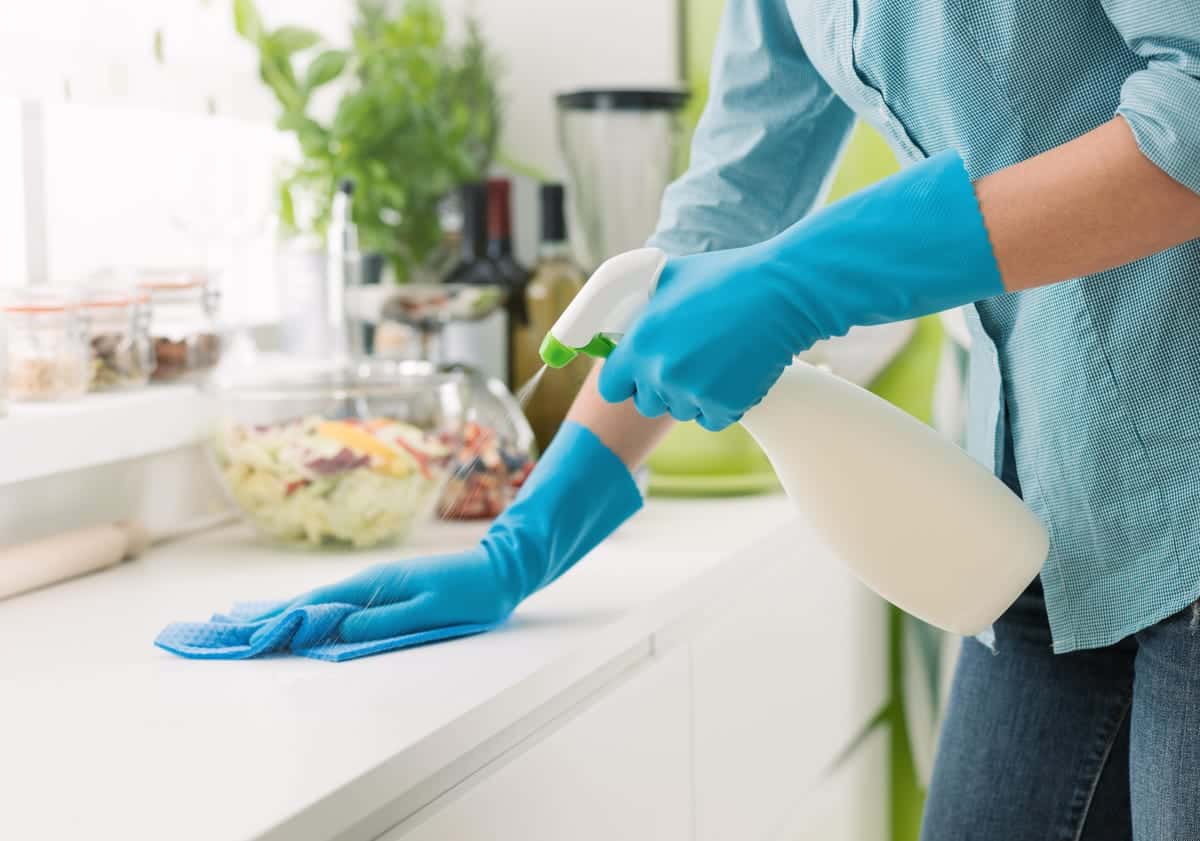
When prepping meals, remember to factor in time for cooking and cleaning up afterward. Make sure to allocate enough time to cook all ingredients, wash dishes, and put everything away before prepping the next meal. This way, you’ll have fewer distractions while cooking and less stress when eating.

How to Store and Reheat Meal Prep Leftovers

Regarding meal prepping, there are a few key things to remember. First, ensure you have enough containers and storage space for all your ingredients.

Second, plan your meals to know exactly what you need, and don’t waste time cooking when you can save the food for another day.

Finally, reheat your leftovers quickly and evenly in the oven or microwave to remain warm and delicious. Here are some recipes and tips to help you get started:

1) Make Ahead Quinoa Bowls: Quinoa is a great option for weeknight meal prep because it cooks quickly and is full of protein and fiber. Combine cooked quinoa with chopped vegetables, seeds, and nuts to make a quinoa bowl. This recipe makes four servings.

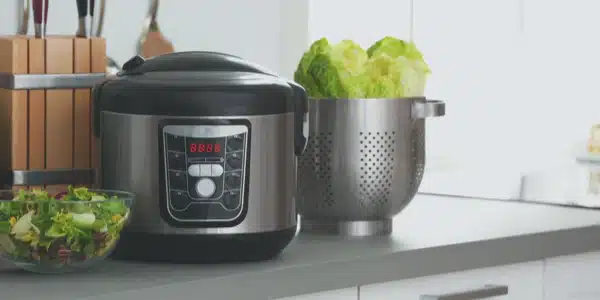
2) One-pot Wonders: There’s nothing worse than coming home from work to a kitchen that smells like peanut butter and fried chicken because you forgot to cook dinner last night. One solution is to make one big pot of dinner all at once so everything can simmer together while you care for other things. This recipe makes six servings.

3) Slow Cooker beef tips: Slow cooker meals are always a hit with family members because they’re easy to put together—all you have to do is throw everything into the pot and wait! This recipe makes six servings, but feel free to adjust the amount according to your needs or what you have.

4) One-pot pasta sauce: spaghetti and sauce are classic meals that can be made quickly and easily in a pot. This recipe makes four servings, but feel free to double or triple the recipe if you have more people to feed.

5) Sheet pan meals: Sometimes, it’s easier to cook everything on one sheet pan and then assemble everything into bowls or plates. This recipe makes four servings, but feel free to adjust the amount according to your needs or what you have.

Conclusion

There’s no doubt that meal prepping can be time-consuming and challenging, but it can be made much easier with the right tools and strategies. In this article, we’ve shared some recipes and tips to help you start your healthy meal prep journey.

From easy weeknight meals to nutritious snacks for the on-the-go, we hope our recipes will help you make meal prepping more manageable and rewarding. So what are you waiting for? Get cooking!

Preserving Your Produce: Strategies for Keeping Fruits and Vegetables Fresh

Are you tired of watching your beautiful, fresh produce waste after a few days? Do you need help keeping fruits and vegetables from spoiling before you can use them?

Don’t worry – we’ve got you covered. In this blog post, we’ll share some tried-and-true strategies for preserving your produce to stay fresh and delicious for as long as possible. Say goodbye to wasted food (and money) and hello to longer-lasting, healthier meals!

Introduction to Produce Storage

Assuming you’ve already picked or purchased your products, it’s time to think about how to store them properly. The key to preserving your fruits and vegetables is keeping them at the right temperature and humidity while ensuring adequate ventilation. Here are some tips for how to store different types of produce:

– Store most fruits and vegetables in the crisper drawer of your refrigerator. This is typically the coolest and most humid place in the fridge.

– Exceptions: Fruits that emit ethylene gas (such as apples, bananas, pears, and tomatoes) should be stored away from other produce, as their gas will cause other fruits and vegetables to ripen prematurely. These fruits can be stored on the countertop or in a separate crisper drawer.

– Leafy greens like lettuce and spinach should be wrapped in a damp paper towel or placed in a perforated plastic bag before storing in the crisper drawer. This will help keep them from drying out.

– Herbs can be stored in a glass of water on the countertop or in the fridge (depending on whether you want them to last longer or retain their flavor). Just make sure to change the water every few days.

– Berries should be stored in a single layer on a paper towel-lined plate or container so they don’t squish each other and become moldy. Raspberries, blackberries, and strawberries are particularly delicate and should be eaten within a day or two of purchase.

– Root vegetables like potatoes, onions, and garlic should be stored in a cool, dry place like a pantry or cabinet. Avoid storing them in the refrigerator, as this can spoil them faster.

Tips for Storing Fruits and Vegetables

There are a few key strategies to remember when preserving your fruits and vegetables. Here are some tips for storing your produce so that it stays fresh:

1. Store fruits and vegetables in separate storage containers. This will help prevent cross-contamination and ensure that each type of produce stays fresh for as long as possible.

2. Be sure to wash all fruits and vegetables before storing them. This will remove any dirt or bacteria that could cause spoilage.

3. Store fruits and vegetables in a cool, dark place. Heat and light can cause produce to deteriorate quickly, so storing it in a cool, dark location such as a pantry or basement is best.

4. Inspect your products regularly and remove any items starting to spoil. This will help prevent the spread of rot to other pieces of produce.

5. Use these storage tips for raw and cooked fruits and vegetables. Proper storage is essential for maintaining the quality of both cooked and raw produce.

Best Practices for Maintaining Freshness

There are a few key things to remember when preserving the freshness of your fruits and vegetables. First, always wash your produce thoroughly before storing it. This will remove any dirt or bacteria that could cause spoilage.

Second, store your produce in a cool, dark place away from direct sunlight or heat sources. This will help to keep it fresh for longer. Be sure to use ripe or overripe fruits and vegetables as soon as possible so they don’t go to waste.

Following these simple tips, you can enjoy fresh produce all year!

Refrigeration vs. Room Temperature Storage

When it comes to preserving your fruits and vegetables, a few different storage options are available. You can store them at room temperature, in the fridge, or the freezer. Each option has its pros and cons that you should take into consideration.

Room temperature storage is ideal for fruits and vegetables that are not too delicate and can withstand heat. This includes items like apples, oranges, tomatoes, and potatoes. The downside to this method is that your produce will ripen faster at room temperature, so you’ll need to keep a close eye on it and use it quickly.

Refrigeration is a good option for fruits and vegetables that are more delicate and need to be kept cool. This includes items like berries, leafy greens, and cucumbers. The benefit of this method is that your product will last longer in the fridge. However, some fruits and vegetables can lose flavor or texture when refrigerated, so it’s important to research before storing anything in the fridge.

Freezing is a great way to preserve your produce if you will be using it later. Fruits and vegetables can be frozen, although some do better than others. Berries, leafy greens, and herbs tend to freeze well, while tomatoes can get mealy when frozen. Freezing is a good option if you want to store your produce for an extended period or if you have a large amount that needs to be preserved.

Ultimately, it will depend on the type of fruits and vegetables you’re storing and how soon you plan to use them. Refrigeration is best for delicate produce that needs to last longer, while room temperature storage is ideal for items you’ll be using immediately. Freezing is your best bet if you need a long-term solution or have a lot of produce that needs to be preserved.

Using Technology as a Tool for Preserving Produce

Technology can be a powerful tool when it comes to preserving your produce. From keeping track of when your produce was picked to automatically adjusting storage conditions, there are several ways that technology can help you keep your fruits and vegetables fresh.

One way to use technology to preserve your produce is to track when it was picked. This information can create a schedule for when products should be used or frozen. For example, if you know that strawberries only last 10 days after being picked, you can use them within that time frame or freeze them later.

Another way technology can help preserve your produce is by automatically adjusting storage conditions. For example, some refrigerator models have a setting that raises the temperature when berries are placed inside since they tend to mold quickly at lower temperatures. This small adjustment can extend the life of your berries by a few days.

Technology can also be used to create customized storage solutions for your produce. For example, suppose you have space in your fridge for a drawer dedicated to herbs. In that case, there are now fridge models with drawers that maintain optimal humidity levels for herbs – meaning they’ll last longer before wilting.

Many apps and websites now offer tips and tricks for preserving produce. Whether it’s finding recipes for using up ripe fruit before it goes bad or getting alerts when items in your fridge are nearing their expiration date, these resources can help you make the most of your produce while it’s still fresh.

Overall, technology can be a powerful tool for preserving your produce. You can ensure you’re getting the most out of your fruits and vegetables by keeping track of when items were picked, adjusting storage conditions, and taking advantage of resources like apps and websites.

Conclusion

Preserving your produce is a great way to ensure you get the most out of your fruits and vegetables. Following the strategies outlined in this article, you can keep your produce fresh and flavorful for longer. You’ll enjoy fresh fruits and vegetables all year round with proper storage, preparing, and freezing techniques!

How to Maximize Your Small Apartment Kitchen Space on a Budget

Welcome to the ultimate guide to maximizing your small apartment kitchen space without breaking the bank! As someone who has lived in tiny apartments with kitchens barely larger than a closet, I understand the struggles of trying to cook and store everything in such limited space.

But fear not; clever hacks and budget-friendly solutions can transform your cramped cooking area into a functional and stylish oasis. Whether you’re an aspiring chef or looking for ways to make meal prep easier, this post will give you the tips and tricks to turn your small kitchen into a dreamy culinary haven. So let’s get started!

Introduction

If you live in a small apartment, you know that kitchen space is often expensive. But even if your kitchen is small, you can still make the most of it! With some creativity and strategic planning, you can maximize your small kitchen space on a budget.

Here are some tips to get you started:

1. Make use of vertical space.

One way to maximize a small kitchen is to utilize vertical space. Install shelves or hanging racks to store items that take up valuable countertop or cabinet space. This will give you more room to work and make meal preparation easier.

2. Use multipurpose appliances and furniture.

Appliances like slow cookers, air fryers, and toaster ovens can work with several larger appliances, freeing up valuable countertops and storage space. Similarly, furniture like bar carts and rolling islands can serve multiple purposes in a small kitchen. Use them for extra prep space, storage, or a makeshift dining table when needed.

3. Get creative with storage solutions.

Look for creative ways to store items in your small kitchen. Install hooks or wall-mounted baskets to hang items like pots and pans, dish towels, and utensils. Utilize the back of cabinet doors with storage racks or shelves. Invest in expandable drawer organizers to corral smaller items like spices and condiments.

These tips can help you maximize your small apartment kitchen space on a budget without sacrificing style or functionality. You can make the most of your small kitchen with a little creativity and some strategic organization!

Kitchen Storage Solutions

If you’re like most people, your kitchen is one of the busiest rooms in your home. It’s the center of meal prep and family gatherings, so having a functional and organized space is important. If your kitchen is small, you may need more storage for all your needs. But with a little creativity, you can maximize your space and make it work.

Here are some kitchen storage solutions to help you make the most of your small apartment kitchen:

1. Use magnetic strips to store knives and other metal utensils.

2. Hang pots and pans from a pot rack or ceiling-mounted hooks.

3. Install shelves or racks above the stove or sink to store spices, oils, and other cooking essentials.

4. Keep often-used items within reach by storing them in clear containers on an open shelf.

5. Use under-cabinet storage baskets or drawers to store food items, pots, pans, lids, plastic wrap, and aluminum foil.

6. Use vertical space by hanging mugs from hooks underneath cabinets or installing a pegboard to hold cooking utensils.

DIY Apartment Kitchen Projects

If you live in a small apartment, you know that the kitchen can be one of the hardest rooms to keep organized and functional. But with a little creativity, you can make the most of your space and have a stylish and practical kitchen. Here are some great DIY projects to help you maximize your small apartment kitchen space on a budget:

1. Create more counter space by installing or floating shelves above your counters. This will give you extra space for storing cookbooks, spices, and other cooking essentials.

2. Maximize storage space by using every nook and cranny. Install cabinet organizers or use mason jars to store dry goods on open shelves. Utilize vertical wall space by hanging pots and pans from hooks or racks.

3. Give your kitchen a fresh look with new hardware. Replace old cabinet knobs and drawer pulls with something more modern or unique.

4. Add a pop of color with paint or wallpaper. A fresh coat of paint can brighten up any room, and adding wallpaper to an accent wall can add personality and style to your kitchen without breaking the bank.

5. Bring in some greenery with herb gardens or potted plants. They will add life to your kitchen, and herbs can also be used for cooking!

Tips for Organizing Your Kitchen on a Budget

If you’re like most people, your kitchen is probably the busiest room in your home. It’s the center of activity for cooking, entertaining, and spending time with family and friends.

If your kitchen is small, you may not have enough space to complete everything. But with a little creativity and careful planning, you can maximize your small kitchen space on a budget.

Here are some tips for organizing your kitchen on a budget:

1. Keep it simple. When it comes to kitchen organization, less is usually more. That means resisting the urge to buy many gadgets and gizmos you’ll never use. Stick to the basics and only buy what you need.

2. Get organized with storage containers. A few well-chosen storage containers can help you keep your counters clear and your cabinets organized. Look for stackable containers that fit into one another to save space.

3. Use wall space wisely. If your kitchen has limited countertop or cabinet space, use your walls by hanging pots and pans, utensils, or even spices. You can also use magnetic strips to hold knives or other metal items off the countertops.

4. Be smart about appliances. If your kitchen is small, consider removing bulky appliances you don’t often use, such as a second fridge or a different oven. Instead, opt for smaller appliances that do double duty, such as a toaster oven or a food processor.

5. Utilize the back of cabinet doors. If your cabinets are deep enough, you can use the back of the door for extra storage. Hang hooks for storing mugs and utensils, attach baskets or shelves for spices or canned goods, or even mount a magnetic strip for knives or other metal items.

6. Take advantage of drawer dividers and organizers. Keep things like cutlery and cooking utensils organized with drawer dividers or organizers. You don’t have to buy expensive ones; you can easily make your own from cardboard or foam board.

7. Maximize vertical storage space. Consider adding a few simple shelves to wall space that’s not being used for something else, such as above the refrigerator or stovetop. This is also a great place to store cookbooks and other items that must be added to drawers or cabinets.

Creative Ideas to Make the Most of Your Space

If you’re lucky enough to have a small kitchen in your apartment, there are plenty of ways to make the most of your space. You can turn your tiny kitchen into an efficient and stylish cooking space with a little creativity.

Here are a few creative ideas to help you make the most of your small apartment kitchen:

1. Use magnetic strips to store knives and other metal utensils. This will free up valuable countertop space.

2. Install shelves or racks above your stove and countertops to store spices, oils, and other cooking essentials.

3. Invest in a small dishwasher. This will save you time and energy when washing dishes by hand.

4. Use vertical space by hanging pots and pans from hooks on the wall. This will declutter your stovetop and give you more room to work.

5. Utilize multipurpose appliances like slow cookers and pressure cookers to save space on your counters. These devices can work with several kitchen appliances in one compact unit.

Conclusion

With these tips, you can make the most of your small apartment kitchen and maximize its space without breaking the bank. Invest in quality items that are multi-functional and will last a long time. Rearrange the furniture to take advantage of every inch of space, use vertical storage solutions for even more room, and add wall-mounted shelves for convenience. Finally, don’t forget about lighting – it can go a long way in making your kitchen feel bigger than it is!

5 Minute Lunch Recipes for Busy Working Moms

Are you a busy working mom struggling to find time for lunch? Do you often resort to fast food or unhealthy snacks because you need more time or energy to prepare a meal?

Well, fear not! We’ve got your back with these quick and easy 5-minute lunch recipes that will keep you energized and satisfied throughout the day.

Say goodbye to boring sandwiches and hello to delicious, nutritious meals that won’t break the bank or take up too much of your precious time. Let’s get started!

Introduction to 5-Minute Lunch Recipes for Busy Working Moms

If you’re a working mom, you know how difficult it can be to find the time to make a healthy lunch for yourself and your family. That’s why we’ve compiled a list of our favourite 5-minute lunch recipes that are both healthy and delicious!

From savoury sandwiches to fresh salads, there’s something for everyone on this list. So next time you feel short on time, don’t sacrifice your health – try one of these recipes instead!

Benefits of Eating Healthy During the Work Day

Finding the time to make a healthy lunch can be hard when you’re a busy working mom. But eating a nutritious lunch is important for your health and productivity. Here are some benefits of eating healthy during the workday:

1. Boosts Energy Levels

A healthy lunch will give you the energy to power through your afternoon. An unhealthy lunch will leave you feeling sluggish and tired.

2. Improves Concentration

Eating a nutritious lunch will help you stay focused and concentrated at work. An unhealthy lunch will make paying attention and getting your work done easier.

3. Keeps You Feeling Full

A healthy lunch will keep you feeling full until dinner time. An unhealthy lunch will leave you feeling hungry and snacky throughout the afternoon.

4. Reduces Stress

Eating healthy can help reduce stress levels, which is important if you’re overwhelmed with work. An unhealthy lunch will only make your stress worse.

5. Supports Healthy Habits

Eating a healthy lunch daily is an easy way to develop healthier habits that benefit your overall health and well-being.

Quick and Easy Recipes for On-The-Go Lunches

Finding time to cook a healthy lunch can be tough if you’re a busy working mom. But with these quick and easy recipes, you can have a delicious and nutritious meal on the go in no time!

From simple sandwiches to hearty soups, these recipes will fill you up without taking hours to prepare. And since they’re all made with healthy ingredients, you can also feel good about what you’re eating.

So next time you’re short on time but still want a tasty lunch, try one of these recipes and see how easy it is to eat well on the go!

Tips for Meal Planning Ahead of Time

1. List your family’s favourite meals and rotate them often. Planning will help you save time and money by avoiding last-minute trips to the grocery store.

2. Use your weekends to prep for the week ahead. Cook large batches of meals or cook individual components that can be easily assembled later in the week.

3. Invest in quality storage containers to properly store your pre-made meals. This will help them stay fresh and delicious until you’re ready to eat them.

4. Meal planning doesn’t have to be complicated or time-consuming. Start with baby steps and work up as you get more comfortable with the process.

Strategies for Eating Healthy When You’re Short on Time

In today’s busy world, finding the time to make a healthy lunch can be tough. If you’re a working mom, you might not have the luxury of taking a long lunch break to cook a nutritious meal. But don’t worry – plenty of quick and easy recipes will help you get a healthy lunch on the table in no time.

Here are some strategies for eating healthy when you’re short on time:

1. Make sure you have the right ingredients on hand. Having healthy ingredients like fruits, vegetables, and Lean proteins available will make it easier to throw together a healthy lunch when you’re short on time.

2. Plan. Take some time on the weekend to prep your ingredients for the week ahead. That way, when it comes time to make lunch, all you have to do is assemble everything – no cooking required!

3. Get creative with leftovers. Don’t let those leftovers go to waste – turn them into a delicious and healthy lunchtime meal. There are endless possibilities for leftover-based lunches, so get creative and see what you can develop!

4. Keep it simple. When you’re short on time, complex recipes are off the table. Stick to simple recipes that can be made in minutes – chances are, they’ll be just as tasty (and far healthier) than anything you could order.

Conclusion

Working moms are constantly busy and often need more time for lunch. We hope our five-minute lunch recipes have inspired you and given you plenty of ideas for quick, tasty meals you can whip up on the go.

With these simple recipes, you no longer need to worry about what to eat during your lunch break or resort to buying expensive takeout. So why not try one of these delicious recipes today?

From Chopping to Slicing: The Best Knife Sets for All Your Kitchen Needs

Do you need help with dull and ineffective knives in the kitchen? Look no further! This blog post will explore the best knife sets on the market for all your chopping, slicing, and dicing needs. 

Whether you’re a seasoned chef or just starting these top-rated sets will make your culinary adventures easier and more enjoyable. Say goodbye to frustration and hello to precision with our comprehensive guide!

What are the different types of knives?

There are many different types of knives, each with its unique purpose. Here is a breakdown of the most common types:

Chef’s Knife: A chef’s knife is the perfect tool for precision cutting. It has a thinner blade and is designed for slicing and dicing.

Paring Knife: A paring knife is similar to a chef’s knife but has a shorter blade for finer tasks like peeling fruits and vegetables.

Serrated Knife: A serrated knife has teeth on the blade, making it ideal for cutting tough materials like meat and cheese.

Hammer Knife: A hammer knife is shaped like a baseball bat and is best used for chopping hard objects like bone or ham.

What are the best knife sets for specific purposes?

There are various knife sets out there that can be tailored to fit different needs in the kitchen, so it can be tough to know which set is right for you. This article will discuss some of the best knife sets for specific purposes and what each one is good for.

Chef’s Knife Set: This set is perfect for someone who wants a basic set of knives for chopping and slicing. The chef’s knife is often considered the most important in the kitchen, as it can do many tasks quickly and easily.

Paring Knife Set: Knives are great for cutting small fruits and vegetables. It also has a sharp blade that makes it useful for carving meat or fish.

Utility Knife Set: A utility knife set contains a variety of blades that are versatile tools that can be used in various ways. Some common features of a utility knife set are a serrated blade and a saw blade.

Kitchen Shears: Kitchen shears are perfect for quickly cutting small ropes or cords or even lashing ingredients together while cooking. They come in handy when cutting something quickly without ruining your hands or the object you’re trying to cut.

How to choose the best knife set for you

If you’re in the market for a new knife set, there are a few things to consider. Size and blade type are two important factors to consider, but there are other factors, like how often you’ll use the knives and what type of kitchen you work in. This article will discuss these factors and help you choose the best knife set for your needs. 

Regarding size, it’s important to consider what sort of jobs you’ll be doing with your new set of knives. For example, a smaller set might be better suited for your needs if you’re mostly chopping vegetables or fruits.

However, a larger set may be a better choice if you plan on using your knives more extensively for tasks like slicing meat or poultry. It all depends on your individual kitchen and personal preferences. 

Blade types are also important to consider when choosing a knife set. For most people, an 8-inch chef’s knife is a perfect size. However, if you’re more interested in cooking Asian cuisine or specializing in certain cutting techniques (like filleting fish), then a 10-inch chef’s knife might be more appropriate. Again, it all depends on your individual needs and cooking style. 

Another factor to consider when purchasing a new knife set is how often you plan on using them. A lower-quality set may be fine if you only use them occasionally when cooking at home. However, if you use your knives more often in a professional kitchen setting, you’ll want to invest in a higher-quality set that will last longer. 

Finally, consider the type of kitchen you work in. An affordable set of knives may be enough if you’re primarily in a residential kitchen setting and need access to professional-grade knives.

On the other hand, if you work in a professional kitchen and always use high-end knives, it might be worth investing in a better knife set. Again, it all depends on your specific needs and cooking style.

Conclusion

If you’re looking for the best knife sets to equip your kitchen, look no further! We’ve gathered some of the best knife sets on the market today to have everything you need to prepare delicious meals without the hassle.

Whether you’re a beginner or an experienced cook, we’ve got a set perfect for you. So what are you waiting for? Get ready to rock your kitchen with these amazing knives!

Simple and Delicious Crockpot Meals to Satisfy Your Hunger Pangs

Are you tired of cooking the same old boring meals every week? Do you crave variety but need more time to spend hours in the kitchen? Then look no further than your trusty crockpot!

With just a few simple ingredients and patience, you can create mouthwatering dishes that will satisfy even the hungriest appetites. From savoury stews to succulent roasts, these easy crockpot recipes will surely become staples in your meal rotation. So grab your slow cooker, and let’s get cooking!

Introduction to Crockpot Cooking

If you’re new to crockpot cooking, it’s important to understand the basics before getting started. A crockpot is a slow cooker that uses moist heat to cook food. This means that the food is cooked slowly over some time, typically 4-8 hours.

The biggest benefit of crockpot cooking is that it’s an easy and convenient way to cook a meal. You can set it and forget it, which is perfect for busy weeknights or weekends when you don’t have much time to spend in the kitchen.

Another benefit of crockpot cooking is that it allows you to create complex flavour profiles with minimal effort. By cooking food slowly over a long period, the flavours have a chance to meld together and develop depth. This is why crockpot dishes often taste even better the next day.

To start with crockpot cooking, all you need is a crockpot, some basic ingredients, and a little patience. Once you’ve mastered the basics, you can create delicious and satisfying meals that your whole family will love.

Benefits of Slow-Cooker Meals

Slow-cooker meals are a great way to get a hearty, satisfying meal without spending hours in the kitchen. Just set it and forget it! Here are some other benefits of slow-cooker meals:

1. They’re budget-friendly. Slow-cooker meals are typically very inexpensive since you can use cheaper cuts of meat, and they don’t require much prep time.

2. They’re perfect for busy weeknights. Set your slow cooker before you leave for work in the morning, and dinner will be ready when you get home. No need to spend time cooking after a long day!

3. They’re healthy. Slow cooking helps retain nutrients in food, so you can be sure you’re getting all the goodness out of your ingredients.

4. They’re easy to customize. Don’t like one of the ingredients in a recipe? Swap it out for something else! Slow-cooker meals are very versatile and can be tailored to your taste preferences.

5. They can feed a crowd. Slow-cooker meals are great if you’re hosting a party or have family over for dinner because they can be made in bulk and served easily.

Types of Crockpot Recipes for Two

There are many different types of crockpot recipes for two that you can make. One popular type is soup or stew. This is a great meal to have during the colder months. Another type of recipe that is popular is a casserole.

This dish usually has meat, vegetables, and pasta in one pot. It is a great meal to make ahead of time and then reheat when ready to eat it. You can also make Crockpot desserts! These are usually very simple to make and only require a few ingredients.

Sample Recipes for Healthy Eating

There are a lot of people out there who think that healthy eating has to be boring. But that’s just not true! There are so many ways to make delicious, healthy meals that are easy to prepare. And one of our favourite ways to do this is with a crockpot.

Here are some of our favourite healthy crockpot recipes:

-Chicken and quinoa soup: This soup is packed with protein and fibre, making it a filling and satisfying meal. Plus, it’s super easy to make – throw everything in the crockpot and let it cook!

-Beef stew: This hearty stew is perfect for a cold winter day. It contains nutrients, including iron, potassium, and vitamin C. And it’s also pretty darn tasty.

-Vegetarian chilli: Chili is always a good option for a warm, filling meal. This vegetarian version is packed with beans and vegetables, making it a great plant-based protein and fibre source.

-Crockpot apple crisp: You can even make dessert in the crockpot! This apple crisp is healthy enough to eat for breakfast or as a snack but indulgent enough to satisfy your sweet tooth.

Tips for Getting the Most Out of Your Crockpot Meal

When it comes to crockpot meals, the key is to plan. This means deciding what to make and gathering your ingredients before cooking. It also helps to have a general idea of how long each recipe will take to cook so that you can plan accordingly.

Once you have everything ready to go, the actual cooking process is pretty simple. Add all of your ingredients to the crockpot, set it on the appropriate setting, and let it do its thing. One important tip is to resist the urge to open the lid too frequently. Heat escapes every time you do it and can lengthen the cooking time.

Assuming everything goes according to plan, you should have a delicious and satisfying meal at the end of the day. To get the most out of your crockpot meal, serve it with fresh bread or a salad for a complete meal. And if there are any leftovers, they make great lunch or dinner options for the rest of the week!

Conclusion

Slow cooking is the way to go if you want delicious and satisfying meals without spending much time in the kitchen. With these simple and delicious crockpot meals, you can easily whip up dinner in no time.

Whether it’s a classic like chilli or something unique like pulled pork tacos, there’s something for everyone! So next time your family wants an easy meal that tastes great, grab your slow cooker and create one of these amazing dishes.

The Ultimate Guide to Keeping Your Kitchen Clean and Sanitized

Welcome to the ultimate guide for keeping your kitchen clean and sanitized! Whether you’re a seasoned chef or just learning to cook, maintaining a spotless kitchen is essential.

After all, it’s where we prepare food and nourish ourselves and our loved ones. In this post, we’ll share practical tips and tricks on how to keep your kitchen sparkling clean while ensuring top-notch hygiene.

From cleaning supplies to daily routines, we’ve got you covered with everything you need to know so that your kitchen remains a healthy and happy space for everyone who uses it!

How to keep your kitchen clean and organized

If you’re like most people, your kitchen is one of your home’s least-organized and clean places. And it’s not hard to see why. With all the dishes, pots and pans, and appliances crammed onto the countertops, it can be hard to find anything when needed.

But don’t worry; there are plenty of ways to clean and organize your kitchen without spending hours scrubbing pots and pans. In this guide, we’ll show you how to keep your kitchen clean and organized without spending much time on chores.

First, get a place for everything. If you have a lot of dishes, pots and pans strewn all over the kitchen countertops, you will need help finding what you’re looking for. Instead, organize your kitchen by putting all your cooking tools in a dedicated drawer or cabinet. This way, you can easily find what you need while minimizing your time looking for it.

Next, make sure everything has a place where it belongs. Stacks of dirty dishes can quickly become overwhelming; instead of stacking them up in the sink like crazy people do on TV shows, try putting them into one big dishpan or pot so they can all be washed at once. Similarly, please put all your silverware in one spot so it doesn’t take up floor space when unused.

Finally, keep the surfaces clean.

Tips for cleaning appliances

Cleaning appliances can be a hassle, but keeping your kitchen clean and sanitized is worth it. Here are some tips for cleaning appliances:

1. Use warm water and mild soap. Hot water can damage surfaces.

2. Scrub the appliance with a soft cloth or sponge. Do not use harsh chemicals or abrasive cleaners on any metal surfaces.

3. Rinse the appliance off thoroughly with cool water after cleaning.

4. Store appliances in a dry location when not in use to prevent rusting or corrosion.

How to clean utensils and cookware

When it comes to keeping your kitchen clean and sanitized, you can take a few key steps to help keep your food safe.

The first step is to remove any food residue from your utensils and cookware. To do this, use a mild dish soap and water combination. Make sure to rinse everything off completely before storing.

Next, keep your counters and kitchen cabinets clean by regularly wiping them down with a damp cloth. Be especially careful to clean behind appliances and in cracks and corners.

Consider investing in a kitchen cleaner that targets bacteria and grime for particularly dirty areas. These cleaners can be found at most stores or online.

Lastly, always use hand sanitizer when handling food or cleaning your hands. This will help prevent the spread of food-borne illnesses.

Cleaning tips for the fridge, cabinets, countertops and walls

1. Keep a cleaning schedule: If you want your kitchen to stay clean and sanitized, make a schedule for cleaning it. Set aside specific times each week or month for cleaning and maintenance. This will help you stay on top of things and keep your kitchen looking its best.

2. Clean with a disinfectant: When cleaning the kitchen, use a disinfectant to finish the job quickly and effectively. Disinfectants are effective at killing bacteria and removing any food debris that may be present. Use a product specifically for this purpose, as nondisinfectant cleaners can be harmful if used incorrectly.

3. Use a dishwasher: A dishwasher is an incredibly efficient way to clean dishes, pots, and pans. It’s also great for keeping the kitchen clean and sanitized since its scrubbing removes food residue from dishes and utensils. Just be sure to run the dishwasher sparingly, as overuse can lead to wear and tear on appliances and even damage floors or walls.

4. Clean with vinegar: Vinegar is another great option for cleaning kitchens – not only does it kill bacteria, and it has antibacterial properties that help keep surfaces clean and free of germs. Mix equal parts vinegar with water before using it to clean surfaces, then wipe down with a cloth afterwards for extra protection against germs.

5. Use a broom and dustpan: For general cleaning tasks like sweeping and dusting, use a broom and dustpan. These tools are effective at removing dirt, debris and dust from surfaces. Just be sure to sweep and dust in a direction that will lead to less buildup on the floor – this will help keep your floors clean and free of debris.

How to clean the stovetop

If you cook a lot, your kitchen stovetop is bound to get dirty. It’s easy to forget about it, but if left unchecked, food and grease will build up and make your stovetop difficult to clean. Before getting started, give yourself some helpful tips on how to clean the stovetop:

-Wipe down the surface with a dry cloth.
-Use a spatula or wooden spoon to scrape off any food particles or residue.
-Use a cleaner designed specifically for stovetops.
-Rinse off the surface with water and dry off with a towel.

Decluttering your kitchen supplies

If you’re like most people, your kitchen is a mess. Pots and pans are piled high, food wrappers and cans are scattered around, and dirty dishes are stacked in the sink. You might be tempted to ignore the mess and hope it magically disappears. But that won’t work.

Here’s how to declutter your kitchen supplies:

1. Start by organizing your pots and pans. It’s easy to forget where you stored a separate pan or pot, so take time to categorize them. You can group them by type (stovetop, oven, etc.), size (small, medium, large), or function (utensils for cooking). This will make it easier for you to find what you need when cooking and make the kitchen look prettier too!

2. Clean up your countertops. It may seem like a small thing, but keeping your counters clean will help reduce the amount of food residue left behind after cooking. Plus, it just looks nicer! To clean your counters, start by wiping down the surface with a dry cloth, then use a mild soap solution to wash away any dirt or grease buildup. Let the soap dry completely before adding any cleansers or polish – this will keep your counters shiny and new!

3. Clear out your refrigerator shelves. Food residue can accumulate on top of refrigerator shelves over time, meaning that food particles will be left on the food you’re storing inside the fridge. This not only makes your fridge look messier, but it can also make your food taste unpleasant. To clean your refrigerator shelves, start by grabbing a cleaning cloth and wiping down the surface of the shelves. Next, use a mild soap solution to remove dirt or grease buildup. Finally, dry the shelves completely before adding any cleansers or polish – this will keep them shiny and new!

4. Clean up your dishwasher. Like your refrigerator, food can accumulate in your dishwasher over time. This can lead to greasy dishes and water spots on your dishes – not to mention a messy kitchen! To clean your dishwasher, spray it with a household cleaner and then load it with dirty dishes. Run the dishwasher according to the manufacturer’s instructions, then rinse all dishes and utensils in hot water. Finally, dry all of the surfaces in the dishwasher before adding any cleansers or polish – this will keep it looking shiny and new!

Summary

If you’re like most people, your kitchen is a disaster area. Not only is it a mess, but it’s also incredibly difficult to keep clean. Thankfully, there’s an easy solution: clean and sanitize your kitchen regularly! Here are the three steps you need to take to make this happen:

1. Clean Everything Once a Week

This may seem like a lot, but it’s pretty easy. Spend one day a week cleaning everything in your kitchen: the counters, the cabinets, the appliances, and even the floor. This will help to organize things and make your kitchen easier to use.

2. Sanitize Everything Every Week

Just as with cleaning, sanitizing every week doesn’t require much effort. You must pour some bleach or dish soap into a spray bottle and spritz everything down. Let it stand for a few minutes before wiping it all off. Doing this will help prevent food poisoning and other illnesses from spreading in your kitchen.

3. Store Food Properly to Avoid Germs

One of the biggest sources of bacteria in your kitchen is the food itself. To avoid getting sick, always store food properly: in sealed containers that can’t be opened easily, away from heat sources, and out of sight (unless you’re using them for cooking). This will help keep your kitchen germs-free and make cleanup much easier!

The Ultimate Guide to Sous Vide Machines Under $200

Are you looking to take your cooking game to the next level? Have you heard about sous vide cooking but don’t want to break the bank on a machine?

Look no further! In this ultimate guide, we’ll be exploring the best sous vide machines that are both affordable and effective. Say goodbye to overcooked steaks and underdone chicken and hello to perfectly cooked meals every time. Let’s dive in!

Introduction to Sous Vide Machines

Sous vide a machine is a kitchen appliance that allows you to cook food in a sealed plastic bag submerged in water. The machine heats the water to a precise temperature and circulates it around the food, cooking it evenly and accurately. This cooking method is very popular with professional chefs, resulting in perfectly cooked food every time.

Sous vide machines are becoming increasingly popular with home cooks as they are relatively inexpensive and easy to use. In this guide, we will look at some of the best sous vide machines on the market that are available for under $200. We will also provide tips on using sous vide machine and what foods are best suited for this cooking method.

What to Look for When Buying a Sous Vide Machine Under $200

When it comes to sous, vide machines, keep a few things in mind before purchasing. Here are a few things to look for when purchasing sous vide machine under $200:

-Heating element: Make sure the machine you’re considering has a powerful heating element. The last thing you want is for your food to be undercooked.

-Size: Sous vide machines come in all different sizes. If you plan on cooking for large groups, get a machine big enough to accommodate your needs.

-Controls: ease of use is important for sous vide machines. Look for a machine with simple controls that are easy to understand and use.

The Benefits of Sous Vide Machines

If you’re like most people, the thought of cooking sous vide may be intimidating. After all, it is a cooking method that involves using a vacuum sealer for cooking food in plastic bags submerged in water. However, sous vide machines have many benefits that make them well worth the investment, especially if you love to cook.

Here are some of the top benefits of sous vide machines:

1. They’re incredibly versatile.

Sous vide machines can cook virtually anything, from meats and seafood to fruits and vegetables. This means you can use your machine to create endless meal possibilities.

2. They’re easy to use.

Despite their versatility, sous vide machines are quite easy to use. Once you have your ingredients prepped, all you need to do is seal them in a bag and submerge them in water. Then, just set the timer and let the machine do its thing.

3. They produce consistent results.

Because sous vide machines cook food slowly and evenly, they can produce extremely consistent results. This means you can expect your food to come out perfectly cooked every time – no more dry chicken or undercooked steak!

A Guide to the Best Sous Vide Machines Under $200

Are you looking for sous vide machine that doesn’t break the bank? Look no further than this guide to the best sous vides machines under $200!

Sous vide a fantastic cooking method that allows you to cook food perfectly every time. And while it may seem like a fancy kitchen gadget, sous vide machines are affordable. There are several great options available for under $200.

So whether you’re a home cook wanting to up your game or a professional chef looking for a bargain, read on for our picks of the best sous vide machines under $200.

Tips & Tricks for Using a Sous Vide Machine

Sous vide machines are becoming increasingly popular in home kitchens, as they offer a convenient and foolproof way to cook perfect meals. But if you’re new to sous vide cooking, the process can seem daunting. Here are some tips and tricks for getting the most out of your sous vide machine:

1. Preheat your water bath before adding your food. This will help ensure that your food cooks evenly.

2. Season your food generously before cooking it sous vide. The flavours will be more concentrated after cooking, so don’t be afraid to go heavy on the seasoning.

3. Use freezer bags instead of vacuum-sealed bags. They’re cheaper, easier to work with, and they’ll still provide an airtight seal.

4. Invest in a good quality thermometer. This is essential for making sure your food cooks at the correct temperature.

5. Don’t overthink it! Sous vide cooking is very forgiving, so your meal will likely still turn out delicious even if you make a mistake.

Recipes

Sous vide machines are becoming increasingly popular in home kitchens as they offer a simple and effective way to cook food. This guide will look at some of the best sous vide machines under $200.

There are a few things you’ll want to consider when it comes to sous vide machines. The first is the size of the machine. A smaller machine will suffice if you’re only cooking for one or two people. However, if you’re cooking for a larger group, you’ll need a large machine to accommodate your needs.

The next thing to consider is the features of the machine. Some machines come with more bells and whistles than others. For example, some machines have automatic shut-off features, while others do not. Decide what features are important to you and look for a machine that offers them.

Consider your budget. Sous vide machines can range in price from around $100 to over $1,000. If you’re on a tight budget, plenty of great options are available for under $200. This guide will look at some of the best sous vide machines under $200.

Alternatives to Sous Vide Machines Under $200

You can cook food sous vide without using a machine in a few different ways. One popular method is to use a crockpot or slow cooker. You’ll need to purchase sous vide immersion circulator for this method.

Another option is to use a stovetop pot or electric kettle. Again, you’ll need an immersion circulator for this method as well. You can also use a cooler chest with an ice bath and an immersion circulator.

If you’re looking for alternatives to sous vide machines under $200, consider these great options!

Conclusion

Sous vide machines are the perfect way to cook flavorful and succulent food with minimal effort. With our ultimate guide, you have all the information necessary to choose the right sous to vide machine for your kitchen needs.

Whether you’re looking for a budget-friendly option or something that can handle larger meals, affordable sous vide machine will satisfy your culinary desires. So don’t wait any longer – start your journey towards deliciousness today!

No More Fuss in the Morning: 5 Quick and Easy Vegetarian Breakfast Ideas for Kids

Are you tired of the morning rush and chaos in your house? Do your kids refuse to eat breakfast or complain about the same old cereal daily? Well, worry no more!

We have rounded up 5 quick and easy vegetarian breakfast ideas that will save you time and excite and satisfy even the pickiest of eaters. Say goodbye to fuss in the morning and say hello to happy tummies with these delicious recipes.

Introduction

If you’re looking for quick and easy vegetarian breakfast ideas for your kids, you’ve come to the right place. Breakfast is the most important meal of the day, so it’s important to ensure your kids get enough nutrients to start their day off right. These breakfast ideas are not only nutritious, but they’re also kid-friendly and can be easily made ahead of time.

1. Overnight oats: Oats are a great source of fibre and protein and can be easily prepared beforehand. Add milk or yogurt, fruit, nuts or seeds to a jar of oats and let them soak overnight in the fridge. In the morning, you have to give them a good stir, and they’re ready to eat.

2. Breakfast burrito: Wrap up some scrambled eggs, shredded cheese, and diced veggies in a whole wheat tortilla for a hearty breakfast that’s easy to eat on the go. You can even make these ahead of time and reheat them in the microwave for a quick breakfast option.

3. Smoothie: Start your day with a healthy smoothie made with fresh fruits and vegetables, yogurt or milk, and some honey or maple syrup for sweetness. Throw everything into a blender and blend until smooth. Add a handful of nuts or seeds if you need an extra energy boost.

4. Fruit salad: Try a fruit salad if you want something lighter. Chop up your favourite fruits, such as bananas, apples, and berries, and mix them with a bit of honey or yogurt. This is also a great way for your kids to eat more fruit.

5. Toast: Toast is a classic breakfast food easy to make and customized with different toppings. Spread peanut butter or almond butter on whole wheat toast for extra protein or with sliced bananas or berries for sweetness. You can even add a cinnamon sprinkle for extra flavour.

Whatever option you choose, these vegetarian breakfast ideas will make your mornings stress-free and delicious!

Overnight Oats

1. Overnight oats are a healthy, hearty breakfast that can be made ahead of time and easily customized to your child’s liking.

2. To make overnight oats, combine rolled oats, milk, and any desired toppings in a jar or container the night before. In the morning, give the oats a good stir and enjoy!

3. Overnight oats are a great way to incorporate more fruits and vegetables into your child’s breakfast routine. Add some grated carrot or zucchini for extra nutrients, or top with fresh berries or sliced bananas for sweetness.

4. Need help deciding what toppings to use? Get creative and let your child choose their mix-ins! Some other ideas include chopped nuts, seeds, dried fruit, nut butter, yogurt, or honey.

5. Overnight oats are an easy and healthy breakfast that can be made ahead of time and enjoyed the next morning. With endless topping combinations, your child will love this tasty breakfast!

Banana Pancakes with Nut Butter

Ingredients:
-1 cup whole wheat flour
-1 tsp baking powder
-1/2 tsp salt
-2 ripe bananas, mashed
-1 egg, beaten
-1/4 cup milk
-3 tbsp butter, melted
-3 tbsp nut butter (peanut, almond or cashew butter)
-Maple syrup or honey for serving

Instructions:
1. Whisk together the flour, baking powder and salt in a large bowl.
2. In another bowl, mash the bananas and stir in the egg and milk.
3. Pour the wet ingredients into the dry ingredients and mix until well combined.
4. Melt the butter in a large frying pan over medium heat. Scoop 1/4 cup of batter into the pan for each pancake. Cook for 2 minutes per side or until golden brown.
5. Serve with nut butter and maple syrup or honey.

Veggie Scramble and Toast

This is a great option for kids who love veggies. Scramble some eggs and add in any vegetables you have on hand. Serve with toast for a complete meal.

Yogurt Parfaits

Who doesn’t love a parfait? They are healthy, filling, and can be made ahead of time. I like to make a big batch of yogurt parfaits on the weekend, and then we have them ready to go all week long. You’re ready to layer yogurt, fruit, and granola in a jar or cup!

Smoothie Bowls

Smoothie bowls are a delicious and easy way for your kids to eat their veggies in the morning. Blend some fruits and vegetables with water or juice, pour into a bowl, and top with your child’s favourite toppings. We like to top ours with granola, nuts, and seeds for a filling breakfast that will keep our little ones going until lunchtime.

Conclusion

With these five vegetarian breakfast ideas for kids, you can make mornings easier and less stressful. From overnight oats to egg muffins, there are plenty of healthy options that your children will love.

Not only is this an easy way to get them to eat more fruits and veggies in the morning, but also it will leave everyone feeling nourished and energized for the day ahead. So don’t stress about what’s for breakfast – try one of these delicious vegetarian recipes today!

Small But Mighty: How to Make the Most of Your Compact Kitchen

Your kitchen may be small, but it’s mighty! Whether you live in a tiny apartment or have limited space, there are plenty of ways to make the most of your compact kitchen. 

With clever design tips and storage solutions, you can transform even the tiniest cooking space into a functional and stylish haven that meets all your culinary needs. So let’s dive into maximizing every inch of your small kitchen – because size doesn’t matter when creating delicious meals!

Introduction: What is a Compact Kitchen?

A compact kitchen is a small but Mighty kitchen. It is usually found in an apartment or condo. This type of kitchen has limited counter and storage space.

The appliances are also smaller than what you would find in a full-sized kitchen. Despite its small size, a compact kitchen can be Mighty if you know how to make the most of it.

Here are some tips for making the most of your compact kitchen:

1. Use multipurpose Appliances – When choosing appliances for your compact kitchen, look for ones that serve more than one purpose. For example, an oven with a built-in microwave saves counter space and is more efficient than two separate appliances.

2. Get creative with storage – Compact kitchens often need more storage space. Get creative by using wall space for shelving or hanging pot racks from the ceiling. Utilize vertical space as much as possible!

3. Keep it organized – An organized kitchen is more efficient, regardless of size. Be sure to keep countertops clear of clutter and remove any dishes or utensils you’re not using immediately. Creating a place for everything will help you keep your small kitchen tidy.

 4. Choose lighter colours – Light colours make small spaces look bigger, so choose light and neutral colours for your walls and cabinets. This will help to open up the space and make it look larger than it is.

5. Use a rolling cart – A rolling kitchen cart can greatly maximize storage in a tiny kitchen. It can hold all your pots, pans, and other items like spices or dishes without taking up valuable counter space.

By following these tips, you can make the most of your compact kitchen and create an efficient cooking space in your home!

Maximizing Your Space with Vertical Solutions

If you’re working with a small kitchen, you must get creative with your storage solutions. One way to do this is to utilize vertical space. This can be done in several ways, such as:

– installing shelves or racks on the walls

– hanging pots and pans from a pot rack

– using magnetic strips to store knives and other metal utensils

– mounting spice racks inside cabinet doors

You can free up valuable countertop and floor space in your small kitchen by using vertical space. This will help to keep your kitchen organized and functional, despite its limited size.

Creative Uses of Wall Space

In a small kitchen, it’s important to use every inch of space – including the walls! Here are some creative ways to use wall space in your compact kitchen:

-Install shelves: Shelves are a great way to add extra storage space without wasting valuable floor space. You can use shelves to store dishes, cookbooks, or other items that you need quick access to.

-Hang pots and pans: A pot rack is a great way to keep your pots and pans within easy reach. You can install a pot rack on the ceiling or hang one on the wall.

-Use magnetic knife strips: Magnetic knife strips are a great way to store knives within easy reach. Plus, they look very sleek and modern!

-Install hooks: Hooks are an easy way to add extra storage space for things like aprons, towels, or pot holders.

Clever Storage Ideas for Your Compact Kitchen

If you’re working in a small kitchen, you know the struggle of trying to fit all your essentials into a tight space. But just because your kitchen is compact doesn’t mean it can’t be mighty. With a little creativity, you can find clever ways to make the most of your small kitchen.

Here are some storage ideas to help get you started:

1. Use the space above your cabinets. If you have space above your cabinets, use some wire shelving or hanging baskets to use it. This is a great place to store often-used items like spices or coffee cups.

2. Get creative with wall space. Don’t let wall space go to waste – use it! Install floating shelves or pegboards to create additional storage for things like pots and pans, cooking utensils, or cookbooks.

3. Think outside the cabinet. There’s more to kitchen storage than cabinets – get creative and think outside the box! Use an over-the-door organizer for storing things like foil and plastic wrap, or use hooks to hang things like aprons or oven mitts.

4. Make use of nooks and crannies. Every inch counts in a small kitchen! Utilize those awkward nooks and crannies by installing narrow shelves or magnetic strips for knives or can openers.

5. Keep counters clear. One way to make a small kitchen appear bigger is by keeping counters clear. Invest in some slim storage solutions like a slim cart or lazy Susan to keep items off the countertop and out of the way.

By taking advantage of vertical space, wall space, and nooks and crannies, you can make even the tiniest kitchen feel spacious and organized.

Utilizing Small Appliances for Maximum Efficiency

When it comes to small appliances, it’s all about efficiency. The key is to choose the right ones for your needs and then use them to their full potential.

Here are a few tips on how to do just that:

1. Go for quality over quantity. It’s better to have a few high-quality small appliances you regularly use than many cheap ones you never use.

2. Multi-task whenever possible. For example, if you need to cook something in the oven and boil water simultaneously, see if your oven has a built-in steamer function. That way, you can kill two birds with one stone.

3. Get creative with storage solutions. If your kitchen is short on counter space, look for small appliances that can be stored away when not in use – like a hand mixer that can be hung from a hook on the wall.

4. Use your appliances to their full potential. Don’t just use your blender for smoothies – get creative and make soups, sauces, and even ice cream! The same goes for your other appliances – think outside the box and find new ways to use them.

5. Keep things clean and well-maintained. Regular cleaning and upkeep will help keep your small appliances working properly for longer.

Tips for Meal Planning in a Tiny Kitchen

If you live in a small space, you know that the kitchen is often the centre of the home. It’s where we congregate to eat, socialize, and work. But if your kitchen is smaller, figuring out how to make the most of the space can take time and effort. Here are some tips for meal planning in a tiny kitchen:

1. Simplify your recipes. Choose dishes that have fewer ingredients and require less prep work.

2. Utilize your freezer. Freezing food can reduce spoilage and save you time in the kitchen.

3. Get organized. Invest in some storage containers and label them to find what you need when you need them easily.

4. Plan. Take some time each week to plan your meals for the coming days or weeks. This will help you save time and money by reducing trips to the grocery store and wasted food.

5. Be flexible. Be bold and change your plans if something comes up or you don’t feel like cooking what you originally planned.

Conclusion

Small kitchens may seem challenging, but they can be just as functional and efficient as larger ones. You can make the most out of your compact kitchen space with careful planning, the right organizational tools, and creative storage solutions.

Don’t let size stop you from achieving the kitchen of your dreams—with some thoughtful strategies, it’s possible to create an efficient and stylish mini-kitchen that will meet all your needs.