Squeeze More Nutrients out of Your Produce with These Affordable Juicers

Are you tired of spending a fortune on store-bought juices loaded with preservatives and artificial flavours? Look no further! With these affordable juicers, you can enjoy fresh, nutrient-packed juice at home.

Not only will you save money in the long run, but your body will thank you for all the vitamins and minerals it’s getting from your produce. So let’s dive into the world of juicing and learn how to squeeze every last drop of goodness out of our fruits and veggies!

Introduction to Juicing and its Health Benefits

Juicing is a great option if you’re looking for a way to add more nutrients to your diet. Juicing allows you to extract juice from fruits and vegetables packed with vitamins, minerals, and other nutrients. Not only is juicing a great way to get more nutrients into your diet, but it can also help boost your immune system, improve your digestion, and more.

There are a wide variety of juicers on the market, ranging in price from around $50 to $500. Opt for a less expensive model if you’re just getting started with juicing. However, if you plan on juicing regularly, it’s worth investing in a higher-quality juicer that will last longer and provide better results.

When shopping for a juicer, there are several things you’ll want to keep in mind:

  1. Consider what types of fruits and vegetables you’ll be juicing. If you only plan on juicing leafy greens, you won’t need a powerful juicer to handle tough fruits and vegetables.
  2. Think about how much space you have in your kitchen. Some juicers are larger than others and take up more counter space.
  3. Decide how easy you want the juicer to use and clean. Some models have multiple speed settings, while others only have one or two settings.
  4. Consider how much money you’ll spend on a juicer.

Once you’ve chosen the right juicer, it’s time to start juicing. You can make your delicious juices using a variety of fruits and vegetables. Some popular options include apples, oranges, carrots, celery, spinach, kale, beets, and cucumbers. When juicing leafy greens like kale or spinach, mixing them with other fruits or vegetables is best to mask the taste.

Juicing is an excellent way to get more nutrients into your diet and improve overall health. There are so many different combinations of fruits and vegetables that you can experiment with to create unique and delicious juices. Whether it’s for breakfast or a snack throughout the day, give juicing a try and reap its many health benefits!

What to Look for in an Affordable Juicer

When shopping for an affordable juicer, there are several things you should keep in mind. First, consider the type of juicer you need. There are two main types of juicers: centrifugal and masticating.

Centrifugal juicers are less expensive but do not extract as much juice from fruits and vegetables. Masticating juicers are more expensive but extract more juice and preserve more nutrients.

Second, consider the features you need. Some juicers come with additional features such as pulp ejection or automatic shut-off. These features can be helpful, but they are optional.

Third, consider the warranty. A good warranty will cover repair or replacement if your juicer breaks down within a certain period.

Considering these factors, you can find an affordable juicer that meets your needs and budget.

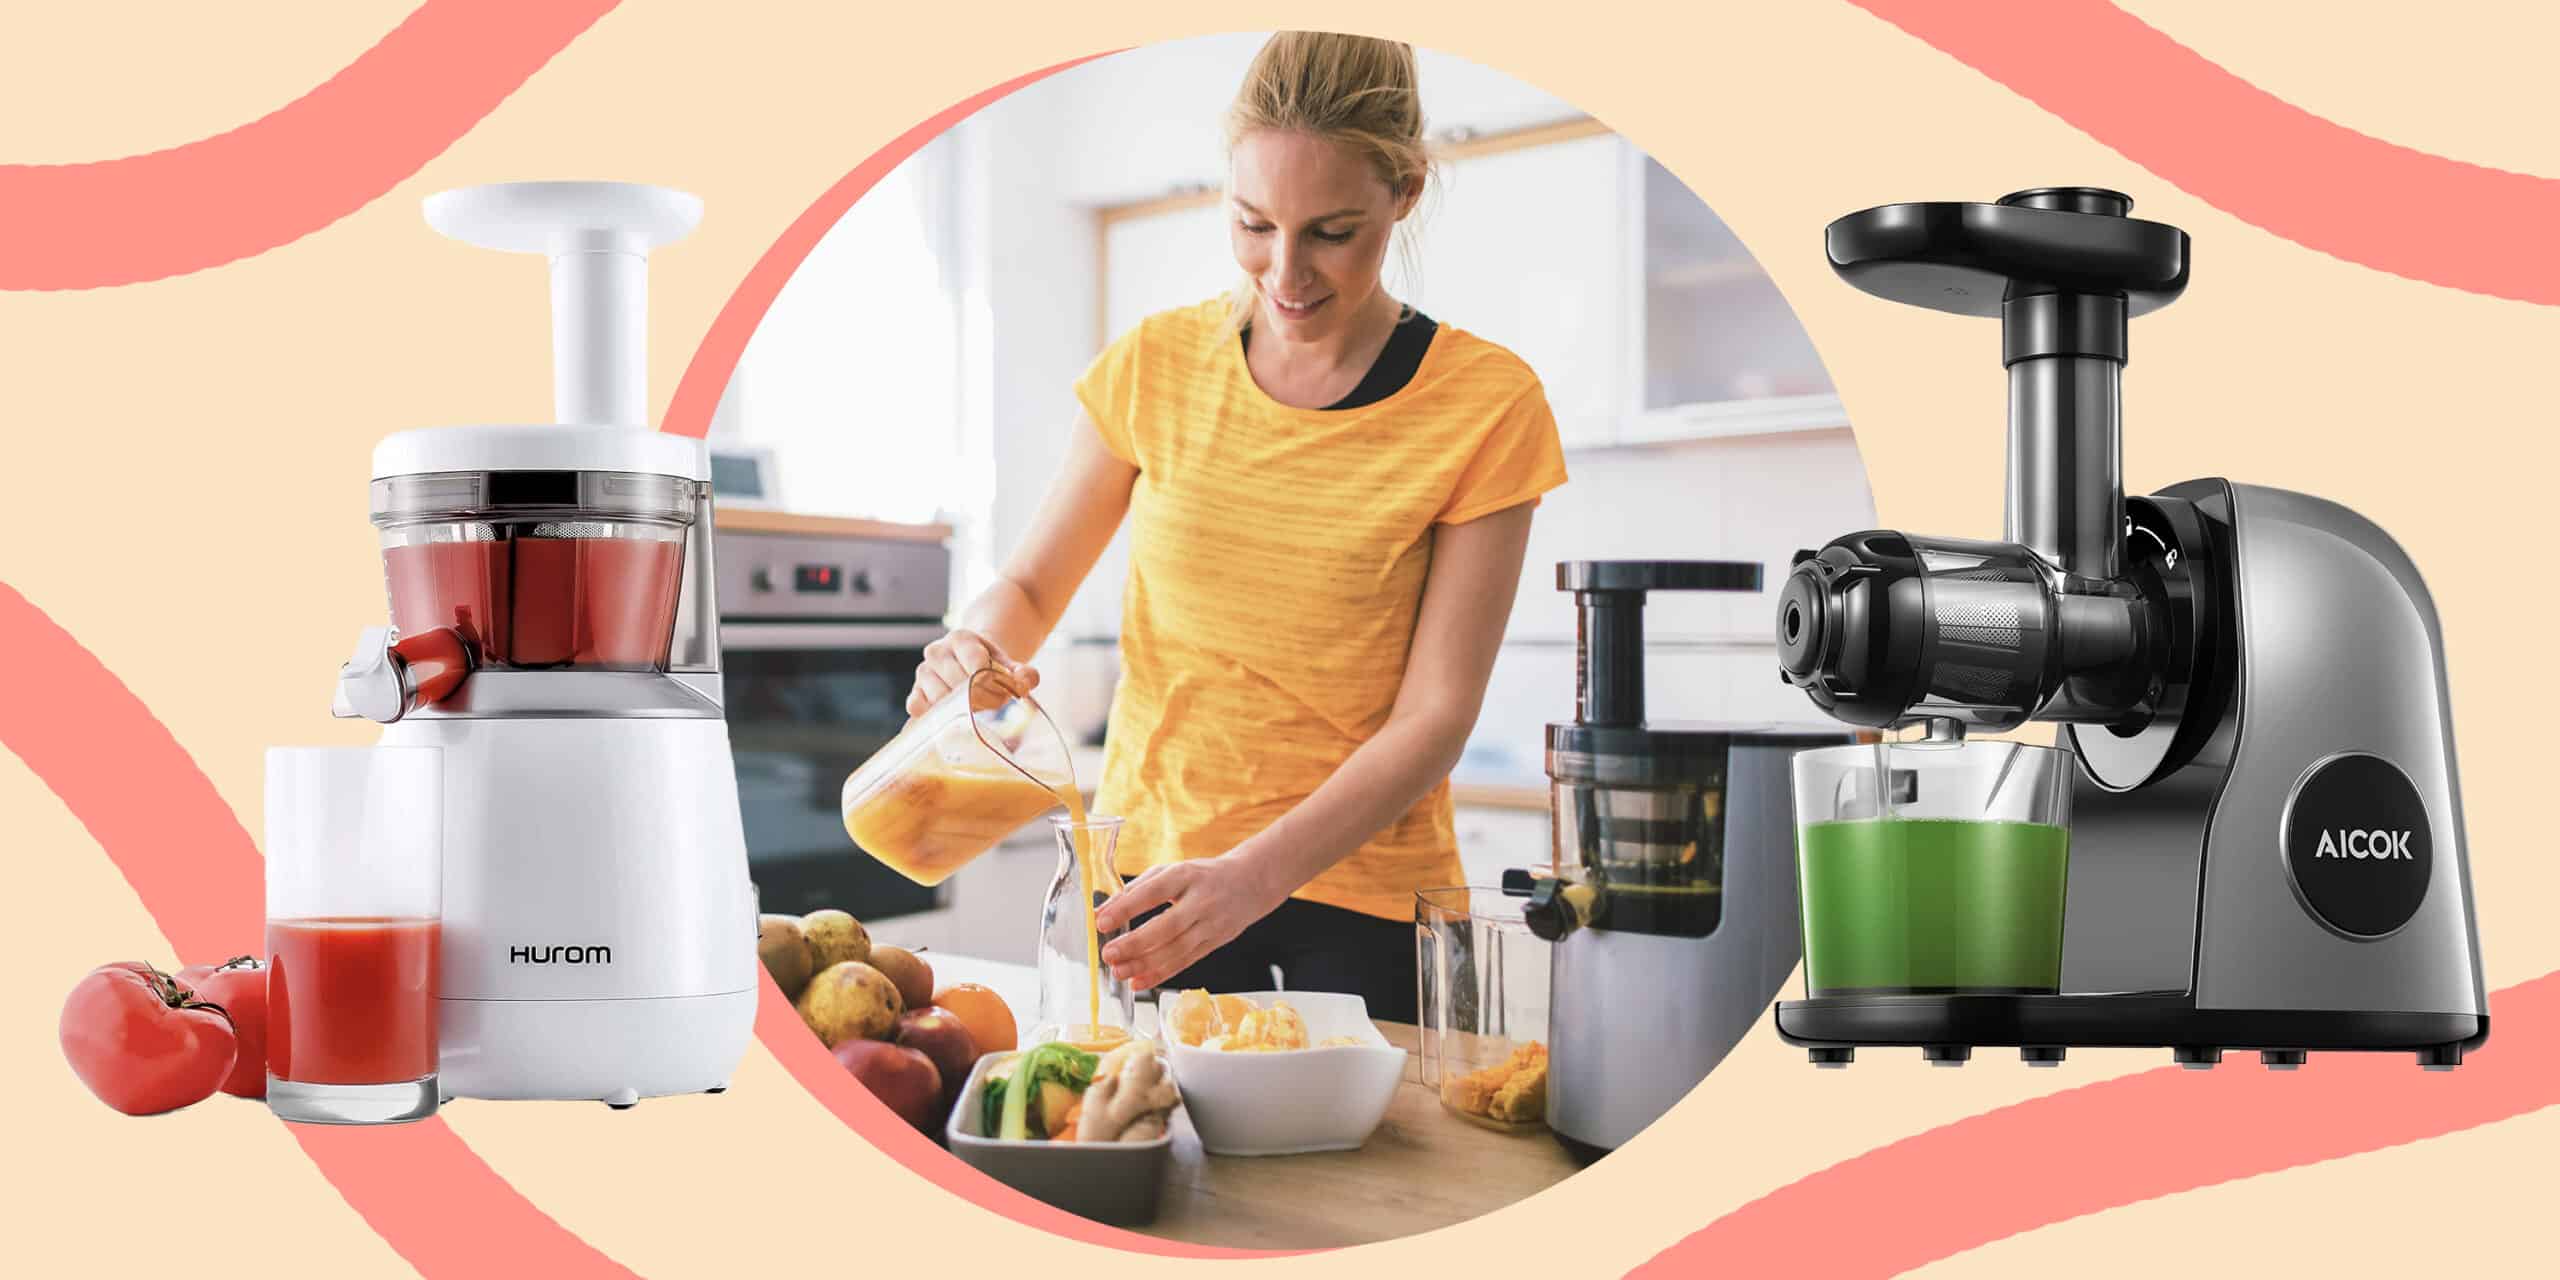
Top 5 Affordable Juicers and Their Features

When it comes to juicers, you can save money to get a good one. Plenty of affordable options will still give you the nutritional benefits you’re looking for. To help you find the best juicer for your needs, we’ve compiled a list of the top 5 affordable juicers and their features.

1. The Breville Juice Fountain Compact is a great option if you’re looking for an affordable juicer that doesn’t sacrifice quality or performance. It has a powerful 700-watt motor that can handle even tough fruits and vegetables and comes with various attachments for easy cleaning.

2. The Hamilton Beach Big Mouth Juicer is another affordable option that pays attention to performance. It has an 800-watt motor that can handle whole fruits and vegetables, and it comes with a pulp collector so you can easily remove any unwanted residue.

3. The Cuisinart CJE-1000 Juice Extractor is perfect for an affordable but durable juicer. It’s made with stainless steel construction for lasting use and has 1000 watts of power to make quick work of your product.

4. The BLACK+DECKER JE2200B 400-Watt Fruit & Vegetable Juicer is ideal if you’re looking for an inexpensive but reliable juicer. It has 400 watts of power, enough to handle most fruits and vegetables, and it comes with a pulp collector for easy cleanup.

5. The Omega Vert VRT350HD Low-Speed Juicer is the perfect choice if you’re looking for an affordable juicer that still gives a great performance. It has a low-speed motor that won’t heat your product, and it comes with several attachments for easy cleaning.

How to Clean and Maintain Your Affordable Juicer

If you want more nutrients from your produce, squeezing it into juice is a great way to do it. But how do you clean and maintain an affordable juicer so that it lasts? Here are some tips:

1. Disassemble your juicer according to the manufacturer’s instructions. This usually involves removing the blade, filter, and pulp collector.

2. Wash all of the parts in warm, soapy water. Be sure to rinse them well.

3. Dry all of the parts thoroughly before reassembling the juicer.

4. If your juicer has a filter, replace it according to the manufacturer’s instructions.

5. Store your juicer in a dry, cool place away from direct sunlight when not in use.

Recipes for Delicious Green Juices

Green juices are a great way to get more nutrients from your produce. Here are some recipes for delicious green juices that you can make at home:

Ingredients:

1 green apple, cored and sliced

1 cucumber, peeled and sliced

1 celery stalk, chopped

1/2 lemon, juiced

1-inch piece of ginger, peeled and grated

Instructions:

1. Add all ingredients into a juicer and process until smooth.

2. Pour into a glass and enjoy!

Ingredients:

2 kale leaves, chopped

2 spinach leaves, chopped

1/2 cucumber, peeled and sliced

1/2 lemon, juiced

Instructions: 

1. Add all ingredients into a juicer and process until smooth. 

2. Pour into a glass and enjoy! 

Ingredients: 

1 kiwi, peeled and sliced 

1/2 cucumber, peeled and sliced 

4-5 mint leaves 

1/4 lime juice 

Instructions: 

1. Add all ingredients into a juicer and process until smooth. 

2. Pour into a glass and enjoy!

Alternatives to Juicing and Final Tips

If you’re looking for an alternative to juicing, consider blending your product. Blending is a great way to get all the nutrients from your fruits and vegetables without eating them all raw. Plus, it’s much easier on your digestive system.

If you’re worried about the cost of a juicer, don’t be! Plenty of affordable options are available that will do the job just as well as a more expensive model. Here are a few tips to help you find the best deal:

– Shop around! Compare prices at different stores before settling on one.

– Check online retailers like Amazon for discounts and deals.

– Don’t be afraid to buy used ones! You can often find juicers for a fraction of the cost of a new one if you’re willing to buy secondhand.

Here are a few tips to help you get the most out of your juicer:

– Use fresh produce whenever possible for the best flavour and nutrient content.

– Experiment with different fruits and vegetables to find combinations you love.

Conclusion

Juicing is a great way to get more of the nutrients you need from your produce. It can also help you save money by allowing you to buy in-season fruits and vegetables that may be cheaper than pre-packaged juices.

With the right juicer, you can easily make nutritious and delicious juices at home without breaking the bank. These affordable juicer recommendations will help you find one that fits your needs so you can start squeezing more nutrition into your diet!

Quick and Easy Meal Prep Lunch Ideas for the On-the-Go Student

As a busy student, finding the time to prepare healthy and delicious meals can be a real challenge. Whether rushing to class, studying for exams or juggling multiple jobs, it’s easy to fall into the trap of grabbing fast food or skipping meals altogether.

But with a little planning and preparation, you can easily create nutritious lunches that are quick and easy to grab. In this post, we’ll share some of our favourite meal prep lunch ideas to help you stay fueled throughout your busy day without breaking the bank or sacrificing taste!

Introduction: Why Meal Prep is Important

Meal prepping your lunches ahead of time is an easy way to save money and eat healthier. When you meal prep, you can control what goes into your food and ensure you get the nutrients you need. Meal prepping also saves time because you can make a big batch of food and have it ready for the week.

There are lots of different ways to meal prep your lunches. You can cook all of your food at once, or you can cook ahead of time and finish your meals when you’re ready to eat them. You can also use leftovers from dinner to make lunch the next day.

No matter how you do it, meal prepping is a great way to save time and money. Try out these quick and easy meal prep lunch ideas next time you’re on the go!

Meal Prepping Basics

When it comes to meal prepping, there are a few basics that you should always keep in mind. First and foremost, you want to ensure you have all of the necessary ingredients. This means stocking your pantry and fridge with fruits, vegetables, proteins, and whole-grain bread or pasta.

Once you have your groceries sorted, it’s time to start thinking about what kinds of meals you want to prep. If you’re stuck for ideas, try looking online for recipes or get creative with whatever you have.

A few simple lunch ideas include a grilled chicken wrap with roasted veggies, a turkey and cheese sandwich on whole grain bread, or a salad with hard-boiled eggs and avocado.

Once you’ve decided what you’ll make, it’s time to get prepping! Try to do all of your chopping and cooking in one go so that all you have to do during the week is assemble your meals. This will save you valuable time during those mornings when you’re rushing out the door for class.

If you follow these basic tips, meal prepping will be a breeze! Soon enough, you can whip up healthy and delicious lunches without a sweat.

Quick and Easy Lunch Ideas for College Students

Quick and easy lunch ideas for college students take a lot of work. With most students’ hectic schedules, finding the time to cook a healthy meal, let alone pack a lunch to take with you on the go, can take time and effort. However, some quick and easy meal prep lunch ideas can help make your life easier.

One of the easiest things you can do is to cook a big batch of rice or quinoa at the beginning of the week. Then, you can add different toppings and mix-ins throughout the week to create various lunches.

For example, on Monday, you could add grilled chicken and steamed vegetables; Tuesday, you could do fried rice with egg and veggies; Wednesday could be a simple stir-fry with whatever protein and vegetables you have on hand, and so on. This way, you’ll always have a delicious and healthy lunch ready to go without spending hours in the kitchen daily.

Another great option for quick and easy lunches is to make Mason jar salads. Layer your favourite salad ingredients in a jar – start with the dressing on the bottom so it doesn’t get everything wet, then add protein (chicken, shrimp, tofu), followed by hardier vegetables (carrots, celery, broccoli) and finally, your greens (spinach, lettuce). These salads will stay fresh all week and can easily be taken on the go. Just add a lid, and you’re good to go!

Finally, you can always opt for a cold sandwich if you want something simpler. Pick up some pre-made deli meat and cheese slices at the grocery store, grab some sliced bread and your favourite condiments (mustard, mayonnaise, etc.) and assemble your unique sandwich. This is a great way to get creative with your lunch while getting all the nutrients you need throughout the day.

Tips for Making Meal Prepping Easier

If you’re looking for ways to make meal prepping easier, here are a few tips to get you started:

1. Start with a game plan. Decide what you want to make ahead of time and make a list of the ingredients you’ll need. This will help you stay organized and on track when in the kitchen prepping your meals.

2. Batch cook whenever possible. Cooking larger batches of food at once can save you time in the long run. And it’s easy to portion out individual servings for quick and easy grab-and-go meals throughout the week.

3. Use freezer-friendly containers. Invest in some good quality containers that can be used for storing food in the freezer. This way, you can always have quick and easy meals that must be reheated before eating.

4. Utilize leftovers. If you have leftovers from dinner, don’t be afraid to repurpose them into your lunch meal prep. It’s a great way to save time and money!

5. Get creative with your ingredients. Feel free to get creative with your ingredients and try new things! Meal prepping doesn’t have to be boring – mix things up and experiment with different flavour combinations to keep things interesting.

Recipes for Three Different Lunches

1. Spicy Southwest Chicken Wrap: Start with a whole wheat tortilla, and add cooked chicken, black beans, corn, shredded cheese, and southwest sauce. Roll it up and enjoy!

2. Turkey and Avocado Sandwich: Layer sliced turkey breast, avocado, tomato, and lettuce on whole wheat bread. Add mayo or mustard to taste.

3. Veggie Stir-Fry: Sauté your favourite veggies (we like broccoli, carrots, and peppers) in olive oil. Serve over brown rice or quinoa for a complete meal.

4. Caprese Pasta Salad: Cook up your favourite pasta and let it cool. Toss with diced tomatoes, fresh mozzarella, basil, olive oil, and balsamic vinegar for a delicious Mediterranean-style salad.

5. Greek Yogurt Parfait: Layer Greek yogurt with granola and berries in a clear cup for an easy, healthy snack or lunch!

Conclusion

Meal prepping can be a great way for busy students to ensure they always have access to nutritious and delicious food. Our quick and easy meal prep lunch ideas have inspired you to prepare your meals beforehand.

Remember, there are endless possibilities when it comes to meal prepping, so don’t be afraid to get creative with what you make! Happy cooking!

Top 7 Best Countertop Microwaves for Small Kitchens Under $100

Do you want to eat cold leftovers or spend hours cooking meals? A countertop microwave can be a game-changer for small kitchens. But, with so many options out there, it can be overwhelming to choose the right one.

That’s why we’ve researched for you and compiled a list of the top 7 best countertop microwaves under $100 that will fit perfectly in your small kitchen. From compact designs to powerful features, these microwaves will make your life easier and more delicious!

Introduction to Countertop Microwaves

1. Countertop microwaves are one of the most popular kitchen appliances today.

2. They come in various sizes and styles to suit any kitchen and can be used for various tasks beyond just reheating food.

3. While they are generally more expensive than their freestanding counterparts, countertop microwaves offer many advantages that make them worth the investment.

4. Here are some things to consider when shopping for a countertop microwave:

-Size: Countertop microwaves come in various sizes, from compact models that fit under your cabinets to larger units that accommodate multiple dishes. Consider how much space you have in your kitchen and what size microwave will best suit your needs.

-Features: Most countertop microwaves come with standard features like defrost and reheat settings, but some models also offer more advanced features like sensor cooking and inverter technology. Decide which features are most important to you and look for a model that offers them.

-Price: Countertop microwaves vary widely, from budget-friendly models to high-end units costing hundreds of dollars. Set a budget before you start shopping so you know how much you will spend on your new appliance.

Benefits of a Small Kitchen Countertop Microwave

A small kitchen countertop microwave can offer many benefits for those with limited space. For one, finding a place for a smaller appliance like this can be easier than finding a larger one.

Additionally, a small countertop microwave can still provide plenty of power and features, making it a good option for those who want to save space without sacrificing performance. Many small countertop microwaves are affordable, making them a great option for budget-minded shoppers.

The Top 7 Best Countertop Microwaves for Small Kitchens Under $100

You may not be able to get a good countertop microwave if you have a small kitchen. However, plenty of great options are out there, and we’ve compiled the top seven best ones under $100.

1. Daewoo Retro Microwave Oven

This Daewoo retro microwave oven is a great option for small kitchens. It has a sleek design that will look great on any countertop and is very affordable. The oven has 900 watts of power and features six pre-programmed settings. It also has a child safety lock to keep little hands safe.

2. Magic Chef Countertop Microwave

The Magic Chef countertop microwave is another great option for small kitchens. It’s very affordable and has 700 watts of power. The microwave has ten pre-programmed settings and features a child safety lock. It also has a defrost setting so that you can thaw out frozen food quickly and easily.

3. Toshiba EM925A5A-SS Microwave Oven

This Toshiba microwave oven is a great choice for small kitchens. It’s very stylish and has 950 watts of power. The oven has eleven pre-programmed settings and features an LED display. It also has a child safety lock to protect little ones from harm.

4. Panasonic NN-SN651W Microwave Oven

This Panasonic microwave oven is another excellent choice for small kitchens. It’s affordable and has 1,000 watts of power. The microwave has twelve pre-programmed settings and features a touch control panel. It also has a child safety lock to keep little hands away from the hot oven.

5. Oster OGZB1101 Countertop Microwave

This Oster countertop microwave is perfect for small kitchens. It’s very affordable and has 900 watts of power. The microwave has ten pre-programmed settings and features a digital display. It also has a child safety lock to keep curious little hands away from the hot oven interior.

6. Hamilton Beach EM031M2B Countertop Microwave

This Hamilton Beach countertop microwave is great for small kitchens on a budget. It’s very affordable and has 800 watts of power. The microwave has six pre-programmed settings and features an LED display with a clock timer. It also has a child safety lock to ensure that curious little hands stay safe from harm.

7. Galanz GLCMKA19E-033 Countertop Microwave

The Galanz countertop microwave is another excellent choice for small kitchens on a budget. It’s very affordable and has 700 watts of power. The microwave has six pre-programmed settings and a digital LED display with a clock timer. It also has a child safety lock to ensure that little hands stay away from the hot oven interior.

Product Reviews

If you’re looking for the best countertop microwaves for small kitchens under $, you’ve come to the right place. In this article, we’ll look at some of the top options on the market and their key features.

When choosing a microwave for your kitchen, size is an important consideration. If you have a small kitchen, choose a model that only takes up a little space.

Another important factor to consider is power. If you plan on using your microwave for cooking large meals, you’ll need one with plenty of power. Otherwise, a lower-powered model should suffice.

Here are some of the best countertop microwaves for small kitchens under $:

1. Panasonic NN-SN651B: This compact microwave is perfect for small kitchens. It has 1200 watts and 10 different power levels to cook anything from frozen pizza to chicken breasts. The interior is spacious enough to accommodate a large plate and has a built-in child lock for safety.

2. Toshiba EM925A5A-BS: This Toshiba model is another great option for small kitchens. It has 900 watts of power and 10 different power settings. The interior is large enough to fit a standard dinner plate and comes with a child lock feature.3

3..Danby DMW077 BLDB: This model from Danby is a great choice for smaller kitchens. It has 700 watts of power and 10 different power settings. The interior is large enough to fit a standard dinner plate and has a child lock feature.

No matter your choice, these microwaves will make a great addition to any small kitchen. They are all well-made, energy efficient, and powerful enough to meet your cooking needs.

Price Comparison Chart

When it comes to countertop microwaves, there are a lot of options to choose from. However, not all of them are created equal. To help you make the best decision for your needs, we have compiled a price comparison chart of the best countertop microwaves for small kitchens under $.

The first thing you need to consider is the size of your kitchen. You should opt for a smaller microwave if you have a small kitchen. However, if you have a larger kitchen, you can get away with a bigger model.

The next thing you need to look at is the power output. The higher the wattage, the more powerful the microwave will be. If you only plan on using it for simple tasks like reheating or defrosting frozen food, then a lower wattage should suffice. However, if you plan on using it for more intensive tasks like cooking meals, you will want to opt for a higher wattage.

You need to consider the features that each microwave offers. Some models come with additional features like sensors that automatically adjust the cooking time based on the food being cooked or an interior light that makes it easier to see inside. Other models may offer basic features like reheat and defrost buttons. Consider what features are most important to you and then compare prices accordingly.

Frequently Asked Questions

If you’re looking for the best countertop microwaves for small kitchens, you’ve come to the right place. In this article, we’ll answer some of the most frequently asked questions about these types of microwaves so that you can decide which one is right for your kitchen.

What are the benefits of a countertop microwave?

One of the main benefits of a countertop microwave is that it only takes up a little space in your kitchen. This is ideal if you have a small kitchen or limited counter space. Additionally, countertop microwaves are usually less expensive than built-in models.

What are the drawbacks of a countertop microwave?

One potential drawback of a countertop microwave is that it may have fewer features than a built-in model. Additionally, some people find that countertop microwaves are less attractive than built-in models. However, this is largely a matter of personal preference.

Conclusion

Countertop microwaves are an excellent choice for small kitchens and a tight budget. With our list of the top 7 best countertop microwaves, you can be sure to find one that fits your needs and won’t break the bank.

Whether you’re looking for something simple or more advanced, a microwave on our list will fit the bill. All these models offer great features at amazing prices, so don’t hesitate – to pick one up today!

The Ultimate Guide to Easy and Affordable Vegan Meal Prep

Are you looking to incorporate more plant-based meals into your diet but feel overwhelmed by the thought of meal-prepping? Look no further! Our ultimate guide to easy and affordable vegan meal prep has got you covered.

Whether you’re a seasoned pro or new to meat-free eating, we’ve compiled tips, tricks, and recipes to make meal planning a breeze. Say goodbye to boring salads and bland tofu dishes and hello to delicious, nutritious meals that will leave you feeling satisfied all week long. So grab your cutting board, and let’s get cooking!

What is Vegan Meal Prep?

Vegan meal prep is the process of preparing vegan-friendly meals in advance. This can be done by cooking large batches of food at once or prepping individual ingredients to make meal assembly quicker and easier.

There are many benefits to vegan meal prep, including saving time and money, reducing food waste, and making it easier to stick to a vegan diet. Meal prepping can also help you eat healthier overall, as you can control what goes into your meals and better portion them out.

If you’re new to vegan meal prep or just looking for some easy and affordable recipes to get started with, check out our ultimate guide below. We’ve got everything from quick and easy one-pot meals to make-ahead breakfasts and lunches, plus tips on batch cooking like a pro.

Benefits of Vegan Meal Prep

If you’re looking for an easy and affordable way to meal prep vegan meals, look no further than vegan meal prep! Vegan meal prep is a great way to save time and money on your weekly grocery bill, and it’s also a healthy and delicious way to eat. Here are some of the top benefits of vegan meal prep:

1. Save time and money: Meal prepping vegan meals can save you a lot of time and money in the kitchen. Instead of spending hours cooking each day, you can batch-cook several meals and store them in the fridge or freezer for quick and easy later. This means less time spent cooking and more time saved overall.

2. Eat healthily: Vegan meal prep is a great way to ensure you eat whole foods daily. Prepping your meals lets you control what goes into them and ensure they’re packed with nutrients.

3. Reduce food waste: Another benefit of vegan meal prep is that it can help reduce food waste. When you cook in bulk, you can portion out your meals beforehand to only make what you need. This helps reduce leftovers and wasted food, which is good for your wallet and the environment.

4. Customize your meals: One of the best things about vegan meal prep is that you can customize your meals to fit your taste buds and dietary needs. Want to avoid a certain ingredient? Swap it out for something you do like! Meal prepping also allows you to experiment with different flavours and recipes to find the perfect vegan meal.

Tips for Making Vegan Meal Prep Affordable and Accessible

Here are a few key things to remember when making vegan meal prep affordable and accessible:

  1. Try to cook in bulk whenever possible. This will help reduce the overall cost of your meals.
  2. Utilize leftovers as much as possible.
  3. Take advantage of seasonal produce. Seasonal produce is typically cheaper than out-of-season produce.
  4. Buy from local farmers’ markets or Community Supported Agriculture (CSA) programs whenever possible.
  5. Try to stick to whole foods as much as possible.

Refined and processed foods tend to be more expensive than whole foods. By following these tips, you can save money on your vegan meal prep without sacrificing taste or nutrition.

Cooking and Meal Planning Strategies

Whether you’re new to veganism or have been plant-based for years, meal prep is a great way to save time and money while ensuring you always have healthy, delicious food.

There are endless ways to approach vegan meal prep, but we’ve added some tips and tricks to make it easier. From simple batch cooking to make-ahead freezer meals, there’s a method that will work for everyone.

One of the most important things to remember when meal prepping is to keep your meals varied. Just because you’re eating the same thing for lunch every day doesn’t mean it has to be boring! Mixing up your ingredients and trying new recipes will make you stay excited about your meals and less likely to fall off the vegan wagon.

Here are some of our favourite vegan cooking and meal-planning strategies:

Batch cooking: This is the simplest form of meal prep and involves cooking a large batch of one or two recipes at the beginning of the week. You can then portion your food into single servings and either eat them throughout the week or freeze them later. This works well for soups, stews, casseroles, grains, and beans.

Meal planning: If batch cooking sounds like too much work, take some time each week to plan out your meals for the following days. This doesn’t have to be complicated – choose a few recipes you want to make and write out a shopping list.

Prep ahead: You can also save time by prepping ingredients. This can include chopping vegetables, cooking grains, and soaking beans. Store them in containers in the fridge or freezer, so they’re ready to go when you need them.

Make-ahead freezer meals: There are tons of delicious recipes that freeze well, like veggie burgers, burritos, lasagna, and enchiladas. Just make a double batch and freeze the extras for another time.

Regardless of your chosen strategy, meal prep is a great way to stay on track with your vegan diet and save time and stress during the week!

Recipes for Tasty and Affordable Meals

Assuming you have some basic kitchen supplies and appliances, here are recipes for tasty and affordable vegan meals. Many of these recipes can be made in advance and frozen for later.

Black Bean Quinoa Burrito Bowls: In a bowl, combine cooked quinoa, black beans, corn, diced tomatoes, avocado, and cilantro. Mix lime juice, olive oil, chilli powder, and garlic powder for the dressing. Season to taste with salt and pepper.

Chickpea Curry: In a pan over medium heat, sauté onion and garlic in oil until softened. Add chickpeas, diced tomatoes, tomato paste, curry powder, turmeric, cumin, and salt. Cook for about 10 minutes or until heated through. Serve over rice or quinoa.

Roasted Cauliflower Soup: Preheat oven to 375 degrees Fahrenheit. Cut cauliflower into florets and toss with olive oil and seasonings of your choice (garlic powder, onion powder, curry powder). Roast in the oven for 25-30 minutes or until tender. Cool slightly, then blend with vegetable broth in a blender or food processor until smooth. Season to taste with salt and pepper. Serve garnished with chopped green onions or cilantro.

Veggie Kebabs:

  1. Cut vegetables of choice into cubes (bell peppers, mushrooms, onions, zucchini, etc.) and toss with olive oil and seasonings of your choice.
  2. Thread onto skewers and grill or bake until tender.
  3. Serve with a side of quinoa or couscous.

Tofu Stir-Fry: In a pan over medium heat, add tofu cubes and sauté in oil until golden brown. Add garlic, ginger, bell peppers, and broccoli florets to the pan. Cook until vegetables are softened, then season with soy sauce, sesame oil, rice vinegar, and chilli sauce. Serve over cooked jasmine rice or noodles.

Alternatives to Traditional Grocery Shopping

If you’re looking for alternatives to traditional grocery shopping, plenty of options are available. You can buy vegan food online, at vegan-friendly stores, or even at some regular supermarkets.

Several meal delivery services cater to vegans, so you can have all your meals delivered right to your door. And if you need more time, some vegan meal prep services will do all the work for you!

Conclusion

Vegan meal prep can be an amazing way to save time and money while eating healthy, delicious meals. With some planning, you can create easy and affordable vegan meals that are sure to please.

We hope this guide has given you some ideas on how to get started with vegan meal prep and tips for creating tasty dishes that your whole family will enjoy. So what are you waiting for? Get cooking!

Simple and Scrumptious: Egg-Free Baking for Beginners

Are you tired of scouring the internet for egg-free baking recipes that taste good? Are you a beginner baker who wants to create delicious treats without the hassle of working with eggs? Look no further!

This blog post will share some simple and delicious egg-free baking recipes perfect for beginners. From cookies to cakes, you’ll be amazed at how easy it is to whip up these delectable desserts without using eggs. So wear your apron and impress your friends and family with your newfound baking skills!

Introduction to Egg-Free Baking

If you have an egg allergy or are looking for a vegan baking option, you’re in luck! Egg-free baking is simple and delicious. Here’s a beginner’s guide to getting you started.

Ingredients

There are many substitutes for eggs in baking. One of the most popular is a mixture of baking soda and vinegar. Combine 1 teaspoon of baking soda with 1 tablespoon of vinegar and add to your batter like an egg.

Another option is to use fruit purees, such as mashed bananas or applesauce. For each egg called for in a recipe, substitute 1/4 cup of fruit puree.

Or, if you’re looking for a store-bought option, there are now many egg replacers on the market. Follow the package directions for substituting in your recipes.

Baking Tips

To ensure success when baking without eggs, follow these tips:

– Be careful not to overmix the batter or dough. Overmixing can result in tough baked goods.

– When using leaveners like baking soda or powder, add them just before baking. Adding them too early can cause them to lose their potency.

– Eggless baked goods often require a little extra rising time than their traditional counterparts. Allow ample time for your cakes, cookies, and quick bread to fully bake before removing them from the oven.

– Because they lack the binding quality of eggs, egg-free baked goods are more delicate than those made with eggs. Handle them with care to avoid breaking them.

You’ll be an egg-free baking pro with a little practice and experimentation!

Benefits of Egg-Free Baking

Baking without eggs may seem daunting, but it’s quite simple! And it has some great benefits too. Here are a few reasons why you should give egg-free baking a try:

1. It’s cheaper! Eggs can be expensive, so eliminating them from your baking can save you some money.

2. It’s vegan! If you’re looking for a vegan-friendly baking option, egg-free.

3. It’s allergy-friendly! Many people are allergic to eggs, so egg-free baking is the perfect solution.

4. It’s quick and easy! You don’t need to spend hours in the kitchen when you bake without eggs.

5. It’s healthier! Egg-free baking generally contains fewer calories and saturated fat than traditional recipes that call for eggs.

Substitutes for Eggs in Baking

There are many substitutes for eggs in baking, and the best one to use depends on the desired outcome. For example, if you want a light and airy cake, aquafaba (the liquid from a can of chickpeas) is a good option.

Applesauce or mashed bananas are both great choices if you’re looking for something that will add moisture to your baked goods. If you need something to bind your ingredients, using ground flaxseed or chia seeds mixed with water is an effective egg replacement.

Tips and Tricks for Egg-Free Baking

When it comes to egg-free baking, there are a few things to keep in mind to ensure success. First, use a quality non-stick baking pan or silicone baking mat – this will help prevent sticking and make cleanup a breeze.

Secondly, when measuring your ingredients, be precise – this is especially important when leavening agents like baking soda and baking powder.

Third, give yourself some extra time when baking egg-free; since there is no egg to bind the ingredients, your batter may take longer. Have fun with it! Experiment with different flavours and ingredients to find what you like best.

Recipes for Eggless Cookies, Cakes, and Breads

If you’re avoiding eggs for dietary reasons or because you’re out of eggs and can’t get to the store, know that you can still enjoy all your favourite baked goods!

There are plenty of recipes for eggless cookies, cakes, and bread. And while some may require a few more ingredients than your average recipe, they’re still simple and delicious.

To start, check out these recipes for eggless chocolate chip cookies, banana bread, and vanilla cake. You can whip up any of your favourite desserts with just a few adjustments without using a single egg. So go ahead and bake to your heart’s content – without worry!

Alternatives to Eggless Baked Goods

If you’re new to egg-free baking, you might wonder about the alternatives to using eggs in your recipes. Here are some common substitutes for eggs in baked goods:

-Applesauce: This is a great option for sweetened quick bread and cakes. You can substitute 1/4 cup of applesauce for each egg called for in the recipe.

-Banana: Another good option for sweetened quick bread and cakes, bananas can be substituted at a 1:1 ratio for eggs.

-Flaxseed meal: For each egg you need, combine 1 tablespoon of flaxseed meal with 3 tablespoons water and sit for 5 minutes before adding it to your batter or dough. This works best in denser recipes like muffins or brownies.

-Chia seeds: Similar to a flaxseed meal, chia seeds can be used as an egg replacement by combining 1 tablespoon of chia seeds with 3 tablespoons of water and letting it sit for 5 minutes before adding it to the rest of your ingredients. Again, this works best in denser recipes.

Conclusion

Baking without eggs can be a fun, creative challenge. With these tips and recipes, you have everything you need to create delicious egg-free desserts for everyone in your family.

Experiment with different ingredients and methods to find what works best for you – the sky’s the limit! Whether it’s a light brunch or an impressive dinner party dessert, now you know that egg-free baking is simple and delicious.

Meal Prep Made Easy: The Top 7 Best Food Storage Containers

Do you want to spend all your free time cooking and cleaning up after meals? Meal prep is a great solution to save time during the week, but finding the right food storage containers can be overwhelming.

That’s why we’ve researched for you and compiled a list of the top 7 food storage containers for meal prep. From glass to plastic, leak-proof to microwave-safe, these containers will make meal prep easy and stress-free. Say goodbye to last-minute takeout orders and hello to delicious homemade meals all week long!

What are the best food storage containers for meal prep?

Countless food storage containers are on the market, and deciding which is best for your needs can take time. This article will outline the top five best food storage containers for meal prep.

1. Glass Storage Container: A glass storage container is a great option to keep your food fresh and easy to see. They are also easy to clean.

2. Food Storage Containers with Lids: If you plan on Meal prepping often, it is important to get containers with lids to prevent contamination and keep your food fresh.

3. Stackable Storage Containers: If space is an issue, consider stacking your storage containers to take up less room. This will also make them easier to transport.

4. Flexible Plastic Storage Containers: F flexible plastic storage containers are another great option if you have limited space. These are lightweight and easily stacked, making them ideal for busy households or apartments.

5. Ceramic Storage Containers: Ceramic storage containers are worth considering if money is no object due to their durability and low-maintenance features.

Our Top 7 Picks

Check out these top food storage containers if you’re looking for easy meal prep!

1. Sterilite Bento Boxes: Perfect for packing healthy lunches and snacks, these boxes have multiple compartments to organize food.

2. OXO Good Grips Food Storage Containers: These containers are perfect for portioning food and ensuring it remains fresh. They also have a locking lid to keep your food safe while you’re on the go.

3. MealPrep-O-Matic Container System: This system comes with six different microwave-safe and dishwasher-safe containers, making it easy to pack your own meals without worrying about cleaning up afterward.

4. Contigo Travel Mug: Keep your coffee or tea hot while on the go with this mug, which can also be used as a water bottle when needed.

5. Rubbermaid FreshWorks 12-Pack Easy Select Food Storage Containers: This set of containers is perfect for those who want variety in their meal planning – each container has its unique shape and size so you can easily find what you’re looking for when cooking or packing a lunch.

6. Best Choice Products 17 Quart Round Classic Accessory Storage Container: If you’re looking for something larger than the other containers on this list, this option is perfect – it can fit almost anything from leftovers to whole meals!

7. Rubbermaid Commercial-Grade Food Storage Containers: If you’re looking for something that will last years and is built to withstand the rigors of commercial kitchens, these containers are perfect – they come with a 1-year warranty and are made from heavyweight plastic for durability.

Why They’re Ideal for Meal Prep

1. They’re easy to clean and store.

Food storage containers are a great way to keep your food organized and accessible and clean, and safe. They’re also easy to clean, a huge bonus in today’s busy world.

2. They’re portable.

If you’re looking for a food storage option that’s easy to take with you wherever you go, containers made from plastic are a great choice. They’re lightweight and easy to carry around, which makes them perfect for meal prepping.

3. They’re versatile.

Food storage containers can be used for various foods, making them ideal for fresh and prepped meals. You can store leftovers, snacks, meal components, or even as a container for baking ingredients or breakfast items.

4. They’re affordable.

Food storage containers are affordable and easy to find, making them an affordable option for many. Additionally, they tend to last longer than other types of food storage containers, which is another advantage in terms of cost.

5. They’re eco-friendly.

Food storage containers made from plastic are environmentally friendly, which is a major benefit. Not only are they cheaper to purchase and use than other food storage options, but they also tend to be less harmful to the environment when disposed of properly.

What to Avoid When Using These Containers

If you’re looking for an easy way to meal prep and store your food, check out these top best food storage containers. Some of them are decorative and functional, so you can be sure your food will stay fresh and tasty.

However, before stocking up on these containers, knowing what not to do with them is important. Here are four tips for using the best food storage containers:

1. Don’t Overfill Them: Make sure each container is full to the top before closing it off. This will help keep your food from going bad and attracting pests.

2. Don’t Put Anything Wet Inside: Not only will this ruin the seals on the containers, but it also increases the chances that your food will spoil. Stick to dry foods when storing them in these containers.

3. Keep Them Clean: Take care of the cleanliness of these containers by washing them regularly with warm water and mild soap. This will ensure that your food remains fresh and free from spoilage.”

Conclusion

If you want to simplify your life and make Meal prepping easier, you need to invest in some good food storage containers. Today we will outline the top 7 best food storage containers to make preparing healthy meals a breeze.

We have everything you need to get started, from glass jars and plastic containers to airtight sealers and customizable baskets! So if you’re ready to take on the challenge of healthy eating, start with these essential food storage containers.

Healthy on the Go: Fast and Easy Work Lunch Ideas for a Productive Day

Are you tired of spending your lunch break waiting for fast food? Do you want to fuel your body with nutritious meals that will energize you throughout the day?

Well, look no further! In this blog post, we’ve got some amazing work lunch ideas that are healthy, quick, and easy to prepare.

Whether you’re a busy professional or just looking for inspiration, these dishes will help you stay productive and focused all day. So grab your lunch box and start our journey toward better health!

Healthy Lunch Ideas for on the Go

Look no further if you’re looking for healthy, fast, and easy work lunch ideas! These dishes can be whipped up in minutes, leaving you with a nutritious and tasty meal.

1. Quinoa and Vegetable Bowl: This dish is packed with fiber, protein, and whole grains, making it a perfect option if you’re looking for something hearty and filling. Ingredients:

½ cup uncooked quinoa, rinsed and drained

1 cup vegetable broth

1 large carrot, peeled and diced

1 red bell pepper, diced

1 cup frozen corn

2 tablespoons chopped fresh cilantro

Salt and pepper to taste

Directions:

  1. Bring the vegetable broth to a simmer in a small saucepan over medium heat.
  2. Add the quinoa and cook until tender according to package directions.
  3. Remove from heat and let cool slightly.
  4. In a medium bowl, combine the quinoa mixture with the carrot, bell pepper, corn, and cilantro—season with salt and pepper to taste.
  5. Serve hot or cold. 

2. Lentil Sloppy Joes: Lentils are high in fiber, making them an ideal energy source for busy days. These sloppy joes also pack an impressive nutritional punch thanks to their vitamin C content. Ingredients:

2 tablespoons olive oil or avocado oil

1 onion, chopped

3 cloves garlic, minced

One 15-ounce can of lentils, drained and rinsed (or 3 cups of cooked lentils)

One 28-ounce can of crushed tomatoes

1 teaspoon smoked paprika

1 teaspoon cumin

Salt and pepper to taste

8 whole wheat buns, toasted

2 tablespoons chopped fresh cilantro

Directions:

  1. Heat the oil or avocado oil in a large skillet over medium heat.
  2. Add the onion and garlic and cook until softened about 5 minutes.
  3. Add the lentils, crushed tomatoes, smoked paprika, cumin, and salt and pepper to taste.
  4. Bring the mixture to a simmer and cook until heated through about 10 minutes.
  5. Spoon the mixture into the buns and top with the cilantro.
  6. Serve immediately.

Tips for packing a healthy lunch

If you’re looking for a quick and easy work lunch that will keep you healthy and energized, check out these ideas!

1. Bring a healthy salad or fruit tray to work. Mix some greens, sliced fruit, and nuts for a wholesome and satisfying meal.

2. Make a protein-rich snack such as grilled chicken or fish with veggies, rice, or quinoa. Include fresh fruits and vegetables for added nutrition.

3. Pack an energy bar or piece of fruit to munch on during your break. Grabbing something quickly will help you stay groggy-free until your next meeting.

4. Bring a container of unsalted cashews or almonds for snacking throughout the day. These nuts are high in protein and fiber, keeping you full longer.

Make Ahead Lunch Ideas

Packing a lunch daily is unnecessary if you keep these short and easy work lunch ideas in mind!

1. Roast chicken or turkey breast wrapped in multi-grain tortilla shells with salsa and shredded cheese.

2. Quinoa, black beans, corn salad with diced tomatoes, sour cream, and avocado.

3. Spicy tuna wraps with cucumber, red onion, and tempura flakes.

4. Mediterranean-inspired grilled chicken salad on whole grain pita bread with tzatziki sauce and crumbled feta cheese.

5. Peanut butter and jelly sandwiches on whole wheat bread with chopped banana and honeydew melon stripes for added sweetness.

Small Apartment, Big Solutions: Clever Storage Ideas for Your Kitchen

Welcome to the world of small apartments, where every inch counts! If you’re an apartment dweller or a tiny house lover, storage can be a challenge, especially in your kitchen – the heart of your home. But fear not!

We’ve scoured the internet and gathered some smart and creative ideas to maximize your kitchen space while keeping it stylish and functional.

From vertical shelves to hidden cabinets, these clever solutions will make you wonder why you ever thought having a big kitchen was necessary.

So buckle up because we’re about to show you how small spaces can have big styles with our top picks for clever storage ideas for your kitchen!

Tips for Storing Food in a Small Apartment

When living in a small apartment, making the most of your space is important. One way to do that is by using clever storage ideas for your kitchen. Here are some tips:

1. Use baskets and racks: A great way to store food is to use baskets and racks. You can put everything from fruits and vegetables to condiments and spices on these shelves. This way, you’ll have plenty of room to work in the kitchen without searching for things in a pile on the floor.

2. Store perishables in the fridge: If you have items that need to be stored at temperatures below 40 degrees Fahrenheit, like perishables, put them in the fridge. This will keep them fresh and free from bacteria growth.

3. Keep your counters clear: When you don’t have much counter space, try to use it for storage instead. Place pots and pans on top of one another or stack baking sheets on top so that they’re standing up straight. This will give you more room to work in the kitchen without having clutter taking up valuable counter space.

4. Utilize wall-mounted hooks: If you don’t have any cabinet or rack space available, try using wall-mounted hooks instead. They’re perfect for holding smaller appliances like mixers or blenders and take up minimal counter space too!

Ideas for Storing Food in a Kitchen Cabinet

There are many clever ways to store food in a kitchen cabinet, depending on the size and configuration of your cabinet. A pantry can be a great place to store perishables like milk and cheese, while a drawer near the stove can be used for cooking ingredients or utensils. Here are some ideas to get you started:

– Use baskets or containers to organize spices and condiments: A small basket on the countertop can hold salt and pepper, while a larger container in the cabinet can hold herbs, oils, vinegar, and other essentials.

– Store canned goods alphabetically: This one’s easy if your cabinet has several shelves. Put all cans of similar shapes and sizes in one spot, then label them with the type of food (e.g., vegetables, beans) and the corresponding aisle in the grocery store.

– Keep baking supplies together: Baking powder, sugar, flour, etc. can all go in one place, making it easy to find when needed. If your kitchen is small enough, consider organizing by ingredient (e.g., flour sacks for wheat products; baking cups for cupcakes).

– Create custom storage areas for specific appliances: If your oven takes up more than one shelf in your cabinet, designate an area on one side of the cabinet only. If there’s not enough room on that side, consider installing vertical shelving instead – this lets you use smaller cabinets without sacrificing storage space

Ideas for Storing Food in the Fridge

1. Make use of stacking containers. Many small spaces in the fridge can be filled with stacking containers that can be easily accessed and organized.

2. Keep your produce chilled with a vegetable crisper. A vegetable crisper is an excellent way to store fresh produce and keep it chilled, which will help extend its shelf life.

3. Store perishables in the freezer. Not only is this a great way to maximize space in the fridge, but it also helps preserve food by freezing it rapidly. This means it will last longer and is less likely to go bad.

4. Store leftovers in the fridge. Leftovers can be stored in the fridge for a few days or frozen longer. This way, you can prepare a quick and easy meal whenever possible.

Ideas for Storing Food in the Cupboard

When it comes to kitchen storage, a few clever ideas can work well in even the smallest of apartments.

One great way to store food is in cupboards. This can be done by organizing your food into separate sections, like cups, plates, and bowls. This will allow you to easily find what you’re looking for and save on storage space.

Another great idea is to buy small containers that fit inside each other. This will help you organize your food by categories, such as fruits and vegetables, condiments, and bread. Not only will this make shopping for groceries easier, but it will also keep your food fresh and free from clutter.

Last but not least, remember the fridge! One way to store food in the fridge is to buy small containers that fit inside it. For example, buy jars or cans of soups or stews and store them in the fridge section for quick and easy access. Alternatively, buy smaller packages of meat or cheese so they only take up a little space on the shelf.

Conclusion

There’s no need to live in a cramped kitchen! With some clever storage ideas and a bit of imagination, you can find plenty of space for your cooking needs without sacrificing any countertop or cabinet space. Check out our roundup of small apartment kitchen storage solutions to get started.

Healthy and Affordable Dinner Ideas for Novice Cooks

Do you want to order takeout or eat frozen meals every night? Do you want to start cooking healthy and delicious dinners but need help knowing where to begin? Well, look no further because we’ve got you covered!

This blog post will share some easy and affordable dinner ideas perfect for novice cooks. You don’t have to be a culinary expert to whip up these tasty meals that satisfy your hunger and nourish your body. So please put on your apron, grab a pan, and let’s get cooking!

Featured Recipe: Garlic Butter Shrimp with Roasted Asparagus

Garlic butter shrimp with roasted asparagus is a healthy and affordable dinner that will surely please. The shrimp are coated in a garlic butter sauce, and the asparagus is perfectly roasted. This dish can be made in about 30 minutes, so it’s perfect for a quick and easy meal.

Healthy Dinners for Beginner Cooks

If you’re starting in the kitchen, there are plenty of healthy and affordable dinner ideas you can try. Whether you’re looking for something easy or a little more challenging, these recipes have you covered.

One of the simplest and most affordable dinners is roasted chicken. You can roast a whole bird or use a rotisserie chicken to make this dish even easier. Season the bird with salt, pepper, and some herbs, then bake it in a preheated oven until cooked. Try seasoning your bird with curry powder or cumin before baking for a more flavorful option.

Another simple and budget-friendly option is grilled cheese. You can make your bread or use store-bought slices; either way, you can enjoy a delicious sandwich without breaking the bank. Add some sliced tomatoes or avocado for extra flavor and nutrients.

Try making salmon cakes for something more complicated but still affordable. These cakes are made from ground salmon mixed with chopped-up vegetables such as onion and celery, then shaped into small patties before being battered and fried. They’re perfect for an appetizer or main course and come together quickly, so you can enjoy them immediately.

If you’re feeling frisky (or want to stretch your culinary skills a bit), consider trying out some new recipes that require some advanced preparation techniques but don’t…

Recipes for a Healthy Weeknight Dinner

If you’re looking for healthy and affordable dinner ideas that can be prepared quickly, look no further! Here are seven recipes that will help you easily get through your weeknight meal planning.

Chicken Teriyaki Ramen: This recipe is quick, easy, and perfect for a busy night. You’ll only need six ingredients to make this dish, and it will only cost you around $10 to prepare.

Grilled Cheese Sandwiches with Veggies: This simple dish is perfect for those days when you don’t have time to cook anything else. All you need is some grilled cheese sandwiches filled with your favorite veggies, and you’re good to go.

Roasted Brussels Sprouts with Bacon: Brussels sprouts are a great vitamin C, fiber, and potassium source. Not to mention, they taste amazing, roasted with crispy bacon on top. This recipe takes just 15 minutes to prepare and costs around $5.

Butternut Squash Soup with Quinoa: Butternut squash is one of the most nutritious vegetables, making it the perfect ingredient for a delicious soup like this one. Quinoa is also a great source of protein and fiber, so you’ll be satisfied after eating this soup. The preparation time is around 20 minutes, and this recipe costs around $7.50.

Mexican Rice Burrito Bowls: These are perfect if you’re looking for something hearty and filling. They’ll fill you up and are relatively quick and easy to make. You only need some ground beef, cooked rice, fresh toppings, and simple ingredients. The cost of this dish is around $10.

Creamy Garlic Spinach and Artichoke Pasta: This pasta dish is not only delicious but it’s also packed with nutrients and antioxidants. It’s perfect if you’re looking for something healthy to eat on a busy night. The recipe takes just 30 minutes to prepare, and this meal costs around $10.

Baked Fish with Orange Honey Glaze: This recipe is perfect for something light but still delicious. Baked fish is a great way to get your omega-3s and other essential vitamins and minerals without adding fat. The glaze gives this dish a delicious citrus flavor that will please your taste buds. The preparation time for this meal is around 25 minutes, and the total cost of this dish is around $12.50.

Budget-Friendly Dinners for Beginner Cooks

As a beginning cook, you might look for healthy, affordable dinners that won’t break the bank. Here are seven budget-friendly dinner ideas for novice cooks.

Cheesy Bacon and Broccoli Macaroni: This dish is simple and can be made with just a few ingredients. You’ll need macaroni noodles, broccoli florets, bacon, cheese, and olive oil. Cook the macaroni noodles according to the package directions. While the noodles cook, sauté the broccoli in olive oil until it’s slightly softened. Once the noodles are cooked through, drain them and add them to a serving bowl. Top with crumbled bacon and shredded cheese. This dish is perfect for a quick and easy meal.

Five-Ingredient Burrito Bowls: This recipe is easy to follow and requires just five ingredients – ground beef, black beans, corn tortillas, salsa, and sour cream sauce – to make a delicious burrito bowl! Preheat your oven to 350 degrees Fahrenheit before assembling your bowls.

Mix 1/2 cup of cooked ground beef with 2 tablespoons of salsa to make the ground beef. Warm up one tortilla in the microwave for about 20 seconds before folding it in half to resemble a taco shell shape.

Add ground beef mixtures inside each tortilla shell before placing them on an ungreased baking sheet. Bake in preheated oven for 10 minutes until warmed up. Combine 1/4 cup of sour cream with 1 tablespoon of salsa to make the sour cream sauce. If desired, serve the burrito bowls topped with shredded cheese and diced tomatoes.

Spinach and Artichoke Dip: This dip is simple and requires just a few ingredients. You’ll need artichokes, spinach leaves, Parmesan cheese, lemon juice, and garlic. Start by boiling the artichokes until soft, then chop them into small pieces. In a food processor, blend the artichokes until they’re smooth. Add the spinach leaves to the food processor and pulse until they’re finely chopped. Stir in the Parmesan cheese and lemon juice before serving. This dip is perfect for a party or as an appetizer.

Black Bean Burrito Bowls: Similar to the Spinach and Artichoke Dip recipe, this only requires a few ingredients. You’ll need black beans, corn tortillas, salsa, and sour cream sauce. Preheat your oven to 350 degrees Fahrenheit before assembling your bowls.

Mix 1/2 cup of cooked black beans with 2 tablespoons of salsa to make the black beans. Warm up one tortilla in the microwave for about 20 seconds before folding it in half to resemble a taco shell shape.

Add black bean mixtures inside each tortilla shell before placing them on an ungreased baking sheet. Bake in preheated oven for 10 minutes until warmed up. Combine 1/4 cup of sour cream with 1 tablespoon of salsa to make the sour cream sauce. If desired, serve the burrito bowls topped with shredded cheese and diced tomatoes.

Spicy Black Bean Burrito Bowls: This recipe is spicier than the other two options and requires more preparation time. You’ll need black beans, corn tortillas, salsa, and sour cream sauce. Preheat your oven to 350 degrees Fahrenheit before assembling your bowls.

Mix 1/2 cup of cooked black beans with 2 tablespoons of salsa to make the black beans. Over medium heat, cook the black beans in a skillet until they’re slightly softened. Once they’re cooked, add them to a serving bowl and top them with shredded cheese and diced tomatoes, if desired.

Mix 1/2 cup of salsa with 1 tablespoon of cumin powder and 1 teaspoon of chili powder to make the salsa. If desired, serve the spicy burrito bowls topped with shredded cheese and diced tomatoes.

Greek Quinoa Bowls with Tofu: This recipe is a healthy and filling option that requires just a few ingredients. You’ll need quinoa, fresh spinach leaves, feta cheese, cucumber, tomatoes, and Greek seasoning.

Cook the quinoa per package instructions before adding it to a serving bowl. Top the quinoa with diced cucumber, tomatoes, and crumbled feta cheese.

Season the tofu with salt and pepper before cooking it in a skillet over medium heat until it’s slightly softened. Once the tofu is cooked through, spoon it over the quinoa bowl and serve.

Conclusion

Trying to cook your own food can be daunting, but with a little guidance, you can make healthy and affordable dinners that everyone in the family will love. In this article, we provide you with seven dinner ideas that are perfect for novice cooks.

From easy weeknight meals to hearty main courses, these recipes will have you cooking like a pro in no time. So what are you waiting for? Get started today and enjoy some delicious home-cooked meals!

How to Keep Your Kitchen Clean and Organized with These Simple Hacks

Are you tired of constantly battling a messy and disorganized kitchen? Do you feel like no matter how much time you spend cleaning, it never stays tidy? Well, fear not!

We’ve scoured the internet to bring you some of the best and simplest hacks for keeping your kitchen clean and organized. From clever storage solutions to quick cleaning tips, these tricks transform your messy kitchen into a calm, clutter-free oasis. So put on your apron and prepare to turn over a new leaf in your culinary space with these game-changing hacks!

How to Clean a Countertop

Cleaning a kitchen countertop is one of the most common household tasks, and it can be easy to overlook if it needs to be done regularly. Here are three tips for cleaning your kitchen countertop:

1. Use a damp cloth to clean any spills or messes immediately. Wiping down the surface with a wet cloth will help remove any messes and stains faster and prevent them from spreading.

2. If dirty residue remains after wiping down the surface, use a mild soap or detergent in warm water to clean the countertop. Be sure to rinse off the soap completely before moving on to step

3. Apply a wax or sealant protectant layer to the countertops every six months or whenever they appear dull or damaged. This will help keep the surface shiny and new, preventing food and drink from leaving stains behind.

4. If you need help cleaning your kitchen countertops or spot any stains or dirt that need to be addressed, feel free to contact a professional. A professional can guide you through cleaning your countertops effectively and safely, saving you time and hassle in the long run.

Remember to keep your kitchen countertops clean and free of stains and dirt, so you can easily prepare meals and snacks for your family.

How to Clean a Kitchen Cabinet

Cleaning a kitchen cabinet can initially seem overwhelming, but these simple hacks make it easy to keep your kitchen looking great! Start by spritzing the cabinet with water and then using a household cleaner of your choice.

Be sure to avoid using abrasive cleaners, which can damage the finish. Once the cleaner has been applied, dry the cabinet off with a towel.

If you have hard-to-reach areas, use a cloth dampened in warm water to clean them. Finally, polish the cabinet using a soft cloth and furniture polish if necessary.

How to Clean a Sink

Cleaning a sink can seem daunting, but it can be a breeze with a few simple hacks. Here are four tips for cleaning your sink:

1. Use an All-Purpose cleaner: A general-purpose cleaner is perfect for cleaning all surfaces. Fill a bucket or spray bottle with the desired cleaner and scrub the surface with a brush.

2. Use vinegar as a degreaser: Vinegar is a natural degreaser that will remove grease and oil residues from surfaces. To clean a stainless steel sink, fill a bowl or cup with white vinegar and place it under the faucet. Pour water over the mixture until it simmers; then, use a sponge to clean the surface.

3. Use baking soda to lift stains: Baking soda is great for lifting stains off grout and countertops. Sprinkle baking soda on the stain, let it sit for 10 minutes, then scrub it with a toothbrush. Repeat if necessary.

4. Get tough on built-up food stains: If food gets stained on the surface of your sink, don’t try to remove it using soap and water – that won’t work! Instead, try using hydrogen peroxide mixed with dishwashing detergent; pour half of the hydrogen peroxide into the sink and half into another container; add enough dishwashing detergent to make a frothy mixture…

How to Clean a Dishwasher

Cleaning a dishwasher can be a pain, but it’s not impossible with a few simple tricks. Here are five tips to help make your dishwasher run smoother:

1. Run the dishwasher with hot water first. This will help loosen any built-up food and dirt on the dishes.

2. Use a kitchen scrubber to clean hard-to-reach areas in the dishwasher.

3. Add vinegar or lemon juice to your detergent for extra cleaning power.

4. Preheat your oven before loading your plates or glasses into the dishwasher to prevent them from sticking together and becoming difficult to clean later.

5. Empty and dry all of the dishes before loading the dishwasher so they’re ready when it comes time to wash them.

How to Clean a Stovetop

If your kitchen is cluttered and dirty, it’s time to clean it up! Here are some tips on how to clean your stovetop:

1. Clear the countertop: Before you start cleaning the stovetop, ensure there isn’t anything you need on the counter. If there is, put it away before starting. This includes dishes, cups, utensils, and food.

2. Wipe down the surface: Use a damp cloth or sponge to wipe down the surface of the stovetop. Make sure to get into all of the nooks and crannies.

3. Scrub with a brush: If built-up residues are on the surface, use a brush to scrub them off. Be careful not to scratch the surface!

4. Rinse off: Once you’ve cleaned the surface and scrubbed any residue, rinse it with water.

How to Clean a Glasses Frame

Cleaning a glasses frame can be a pain, but keeping your kitchen looking clean and organized is worth it. Here are four tips to help you clean your glasses frame:

1. Use a microfiber cloth or a lint-free tissue to wipe down the frame.
2. use a diluted dishwashing soap and water solution to clean the lens surface.
3. Rinse off the frame with cool water and pat dry with a towel.
4. If necessary, use a glass cleaner to polish the frame

How to Clean a Floor

Cleaning a kitchen floor is one of the most important parts of keeping it clean and organized. Here are four ways to help you clean your floor easily:

1. Sweep or mop regularly: Sweeping or mopping will help remove dirt, dust, and debris. Make sure to sweep in a direction that goes towards the room’s exit.

2. Use a vacuum cleaner with a HEPA filter: A vacuum cleaner with a HEPA filter will capture small particles and allergens better than standard vacuums. Use a pet-specific vacuum cleaner with a HEPA filter if you have pets.

3. Use vinegar: Vinegar is an effective cleaning agent for floors. Add 1 cup of white vinegar to 2 gallons of water and spray the solution onto the floor to clean it. Be careful not to get vinegar on any surfaces that you do not want it on, such as cabinets or countertops. Allow the solution to sit for 10 minutes before wiping it off with a damp cloth.

4. Swab with hydrogen peroxide: If all else fails, swab the floor with hydrogen peroxide gel instead of using vinegar or water. Hydrogen peroxide can be harmful if ingested, so use gloves when applying it!

Conclusion

Keeping your kitchen clean and organized can be daunting, but with a few simple hacks, it is achievable. You can focus on cooking instead of cleaning by organizing your cabinets, storing away utensils and appliances in the right places, and keeping surfaces clean. Check out our tips for keeping your kitchen clean and organized below!