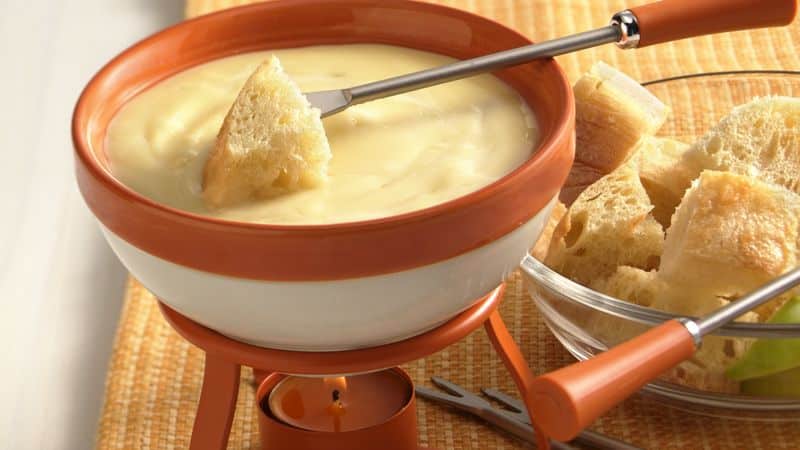
Are you ready to take your family’s snacking game to a whole new level of deliciousness? Look no further than the ooey-gooey world of cheese fondue! From classic cheddar to creamy brie, this timeless dish has captivated taste buds for generations.
But why stop at just bread and veggies? In this blog post, we’re diving headfirst into the exciting realm of kid-friendly foods perfect for dipping in cheese fondue.
Get ready to embark on a flavor adventure with your little ones begging for seconds (maybe even thirds)! Buckle up because it’s about to get cheesy in here!
Introduction to Cheese Fondue
Cheese fondue is a classic dish perfect for a family gathering or a fun night with friends. There are many ways to enjoy cheese fondue; it is always a hit with kids! Here are some tips for making the perfect cheese fondue:
– Choose your cheese wisely. A good quality Swiss or Gruyere cheese will make all the difference.
– Don’t be afraid to experiment with other cheeses and flavorings. Try adding in some shredded cheddar or smoked Gouda for extra flavor.
– The key to a smooth and creamy fondue is to melt the cheese over low heat, stirring frequently and slowly.
– If your fondue starts getting too thick, thin it out with a bit of white wine or milk.
– Serve your cheese fondue with dippers such as bread cubes, pretzels, apple slices, broccoli florets, and baby carrots.
What You’ll Need
You’ll need a few simple ingredients to make cheese fondue:
-1 1/2 cups shredded cheese
-1/4 cup all-purpose flour
-1 cup milk
-1 tablespoon Worcestershire sauce
-1 clove garlic, minced
-Salt and pepper to taste
In addition to the ingredients, you’ll need a small or fondue pot to cook the cheese in. You can find these pots at most kitchen stores or online. You can use a small saucepan if you don’t have a fondue pot. Just be sure it’s one that you can comfortably dip bread into.
7 Kid-Friendly Foods to Dip in Cheese Fondue
Cheese fondue is a fun and interactive way to enjoy a meal with the family. It’s also a great way to get kids to try new foods! Here are some kid-friendly foods that are perfect for dipping in cheese fondue:
Bread cubes – bread is always a hit with kids and the perfect vessel for soaking up all that cheesy goodness.
Vegetables – carrots, celery, broccoli, and other crunchy veggies are ideal for dipping. They’re healthy and add a nice contrast to the rich cheese sauce.
Grapes, apples, strawberries, and other soft fruits are great for dipping. The sweetness pairs well with the sharpness of the cheese.
Meatballs – these bite-sized morsels are perfect for little hands. And they’re so good when dunked in cheese sauce!
How to Make It Fun and Safe for Kids
When it comes to cheese fondue, you can do a few things to make it fun and safe for kids. First, ensure the cheese is fully melted and smooth before adding other ingredients. This will help prevent any clumps from forming.
Secondly, use milder cheese such as cheddar or Swiss instead of solid cheese like Parmesan or Asiago. This will allow the kids to enjoy the flavor without being overwhelmed by the strength of the cheese.
Add some chopped vegetables or fruit to the mix for dipping. This will not only add some nutritional value, but it will also give the kids something to do while they wait for their food to cook.
Recipes for Creative Dipping Sauces
Regarding cheese fondue, the options for dipping sauces are endless. But when you’re looking for something a little more creative than the usual ketchup or ranch dressing, try one of these delicious recipes:
1. Spicy Sriracha Mayo: Combine 1/4 cup mayonnaise with 2 tablespoons sriracha sauce and 1 tablespoon lime juice. This zesty sauce is perfect for dipping chicken or shrimp.
2. Honey Mustard: Mix 1/4 cup Dijon mustard, 2 tablespoons honey, and 1 tablespoon apple cider vinegar. This sweet and tangy sauce is delicious with pretzels or roasted potatoes.
3. Herb Vinaigrette: Whisk together 1/4 cup olive oil, 2 tablespoons white wine vinegar, 1 tablespoon minced shallot, and 1 teaspoon each chopped fresh thyme, basil, and parsley. This light and refreshing sauce is perfect for dipping vegetables or breadsticks.
4. Barbecue Sauce: Combine 1/4 cup ketchup with 2 tablespoons brown sugar, 1 tablespoon Worcestershire sauce, and 1 teaspoon smoked paprika. This classic sauce is delicious with just about anything!
5. Creamy Ranch: Mix 1/2 cup sour cream, 1/4 cup buttermilk, 1 tablespoon minced onion, and 1 teaspoon each dried dill weed and garlic powder. This rich and creamy sauce is perfect for dipping veggies or chips.
Tips & Tricks for Making a Perfect Fondue
When it comes to making perfect cheese fondue, a few tips and tricks can help. First, choose a good quality cheese that will melt well. A sharp cheddar or Gruyere are both excellent choices.
Second, slowly melt the cheese over low heat, stirring often so it doesn’t burn. Third, add a little bit of alcohol to the melted cheese- this will help to keep it smooth and prevent it from separating. Remember the seasonings! A little salt, pepper, and nutmeg will help bring out the cheese’s flavor.
With these tips, you can make a delicious cheese fondue that your kids will love dipping their favorite foods into!
Conclusion
Cheese fondue is a great way to get your little ones involved in cooking and having fun at the same time. With these 7 kid-friendly foods to dip and enjoy, you can make cheese fondue night an enjoyable experience for everyone.
Experiment with different recipes and create unique flavors that your family will love. Try adding some extra ingredients, such as herbs or spices, to give it an extra kick. Remember to have fun, and be bold and get creative!
Meal planning can be a daunting task, especially when you’re juggling multiple responsibilities. But what if we told you that simplifying your meal-planning process is easier than you think?
Say goodbye to those stressful last-minute trips to the grocery store, and hello to more time for yourself! This blog post will walk you through three easy steps to make meal planning a breeze. Get ready to save time, money, and stress with these simple tips!
Introduction to Meal Planning
Are you tired of feeling like you’re always rushing to get dinner on the table? If so, then it’s time to simplify your meal-planning process. Taking a few easy steps makes meal planning less of a chore and more of a breeze.
One of the best ways to simplify your meal planning process is to choose recipes that can be made in advance. This way, you can cook once and eat twice (or more!). Crockpot meals are perfect for this purpose, as they can be prepared and left to cook while you’re at work or running errands. Another option is to make double batches of recipes and freeze the extras for future meals.
Another way to simplify meal planning is to create a weekly or monthly menu. This way, you’ll always know what’s for dinner and will save time figuring it out each night. Choose a few recipes you know your family will love and rotate them regularly. If you need some inspiration, plenty of resources are available online and in cookbooks.
Finally, remember leftovers! They can be your best friend when simplifying your meal-planning process. When cooking, make enough for an extra meal or two to have something ready for another night. Leftovers can also be repurposed into new dishes – get creative! With a little effort, you can easily streamline your meal planning and make dinner time a breeze.
Step 1: Identify Your Goals
The first step to simplifying your meal planning process is identifying your goals. What do you want to achieve with your meal plan? Are you looking to save time, money, or both? Once you know your goals, you can tailor your meal plan to fit those needs.
If you’re looking to save time, consider batch cooking or cooking meals in advance. This can help you make the most of your time in the kitchen and minimize stress during weeknight dinners. If saving money is your goal, try planning meals around ingredients you already have on hand or using less expensive cuts of meat. Whatever your goals may be, setting them early on will help streamline the meal planning process.
Step 2: Create a Meal Plan for the Week
Assuming you have a grocery list ready with all the necessary ingredients, it’s time to start planning your meals for the week. This is where you decide what you will eat and what days.
There are a few different ways to approach meal planning. Some people like to plan every meal, while others prefer a more flexible approach and plan the main dishes.
If you want to plan every meal, you can start by mapping each day on paper or in a digital document. Then, write down what you want to eat for breakfast, lunch, and dinner. Be sure to include snacks and dessert as well!
If you prefer a more flexible approach, you can start by mapping each day on paper or in a digital document. Then, write down what you would like to eat for each mealtime.
For example, “Breakfast: eggs and toast” or “Lunch: salad with chicken.” This will give you a general idea of what you’d like to eat without being too specific. You can always change the details when it comes time to cook or order your food.
Step 3: Shop and Prepare Meals in Advance
One of the best ways to simplify your meal planning process is to shop and prepare meals in advance. This way, you can have all your ingredients on hand when it’s time to cook, and you won’t have to waste time running to the store for last-minute items.
To start, try batch-cooking a few meals at the beginning of each week. This will give you a head start on your meal planning and help you avoid the stress of cooking every night. You can even freeze some of your batch-cooked meals for an easy, healthy meal on a busy weeknight.
In addition to batch cooking, another great way to simplify your meal planning process is to create a grocery list focusing on staples and versatile ingredients. This will help you avoid making multiple trips to the store and allow you to make quick, easy meals with minimal effort.
Finally, remember to take advantage of leftovers! Cook extra servings of your favorite recipes and save them for another day. This is an easy way to stretch your food budget and have delicious, home-cooked meals without extra work.
Meal Planning Tips and Tricks
If you’re like most people, meal planning is one of the last things on your to-do list. But it doesn’t have to be a daunting task! By following a few simple tips and tricks, you can make meal planning a breeze.
Here are some tips to get you started:
1. Make a list of your family’s favorite meals. This will help you develop ideas for what to cook each week.
2. Plan by cooking double batches of meals and freezing the leftovers. This way, you’ll always have something ready to go when you’re short on time.
3. Utilize your slow cooker or Instant Pot for easy weeknight dinners. There are tons of recipes online that are perfect for busy families.
4. Take advantage of grocery delivery or pick-up services. This can save you time and hassle when shopping for ingredients.
5. Meal prep as much as possible on the weekends so that all you have to do is heat and eat during the week! Cooking in bulk can be a huge time saver.
By following these tips, you can simplify your meal planning process and make it less stressful. So take some time to plan this week, and see how much easier dinnertime can be!
Conclusion
Meal planning doesn’t have to be a chore, especially when you break it down into small, manageable steps. By listing what ingredients you need for each meal, creating a weekly menu plan, and using batch cooking techniques, you can simplify your meal planning process in no time.
With these three easy steps, you will soon find yourself creating meals with ease that keep you on track with meeting your health goals and save you both time and money in the long run!
As a busy parent, finding the time and energy to prepare healthy meals for your kids can be challenging. With school, work, and extracurricular activities taking up most of your day, meal prep may seem challenging.
However, with these quick and healthy kids’ meal prep ideas, you can whip up nutritious meals quickly! Say goodbye to fast food drive-thrus and hello to happy, healthy children. Let’s dive in!
Introduction to Meal Prep for Kids
Meal prepping for kids can be a time-saving and healthy way to ensure your little ones get the necessary nutrients. If you’re short on time, there are plenty of quick and healthy meal prep ideas for kids that you can whip up in no time.
Here are a few tips to get you started:
1. Choose healthy, kid-friendly recipes.
2. Make sure you have the right ingredients on hand.
3. Pre-prepare as much as you can ahead of time.
4. Use portion control to avoid overeating.
5. Keep snacks on hand for when hunger strikes.
Following these tips, you can easily meal prep for your kids without spending hours in the kitchen. So, what are you waiting for? Get started today!
Benefits of Meal Prepping for Kids
There are many benefits of meal prepping for kids, including:
1. It saves time.
2. It helps you to make healthier choices for your children.
3. It lets you be more organized with your time and meals.
4. You can make ahead meals that your children will enjoy.
5. Meal prepping can help picky eaters try new foods.
What Recipes to Include in Your Meal Prep Plan
When it comes to meal prepping for your kids, you want to include a variety of quick, easy, and healthy recipes. Here are a few ideas to get you started:
-Oven-baked chicken fingers: These are a healthier alternative to fried chicken fingers and are just as delicious. Serve with a side of vegetables or fruit for a complete meal.
-Turkey and cheese roll-ups: A fun and easy way to get your kids to eat turkey and cheese. Roll up the ingredients in a tortilla or flatbread, cut into bite-sized pieces, and enjoy.
-Mini quesadillas: Another great option for incorporating meat and cheese into your child’s diet. Use whole wheat tortillas for added nutrition, and fill them with their favourite veggies for a well-rounded meal.
-Macaroni and cheese: A classic kid’s favourite that can be made healthier using whole wheat pasta and low-fat cheese. Add some chopped veggies like broccoli or spinach for an extra nutrient boost.
-Fruit kabobs: A fun and festive way to serve up fruit! Kids will love spearing their favourite fruits on skewers, and you’ll love knowing they’re getting a healthy snack.
Tips and Tricks for Quick Meal Prep
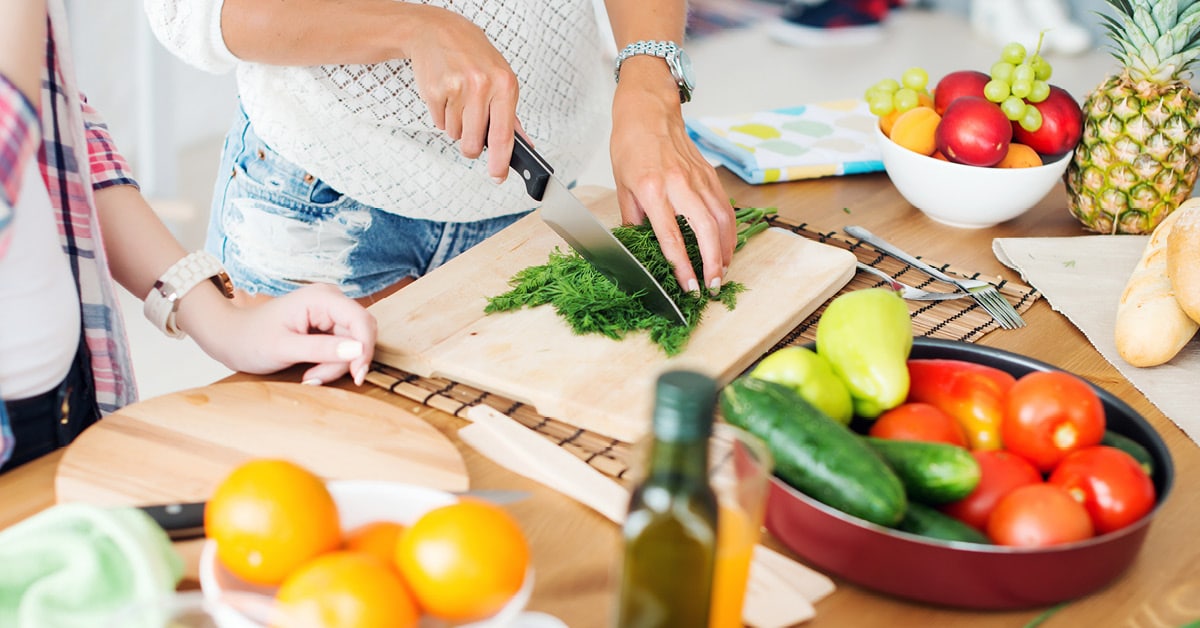
1. Start with washed and chopped fruits and veggies. This will help you move faster when it’s time to cook.
2. Pre-cook proteins like chicken, hard-boiled eggs or quinoa. These can be added to salads, used as toppings for veggie bowls or eaten as a snack.
3. Repurpose leftovers into new meals. For example, use roasted sweet potatoes in a frittata or turn last night’s rice into a stir-fry.
4. Get the kids involved in meal prep! Let them choose their favourite fruits and vegetables, wash them (if they’re old enough) and put them away.
5. Invest in some good quality storage containers. This will make it easier to grab something healthy on the go.
6. Meal prep doesn’t have to be about cooking elaborate dishes – sometimes simple is best! Try prepping fruits and veggies for snacks, packing lunchbox-friendly items like whole grain crackers and nut butter or making overnight oats for breakfast.
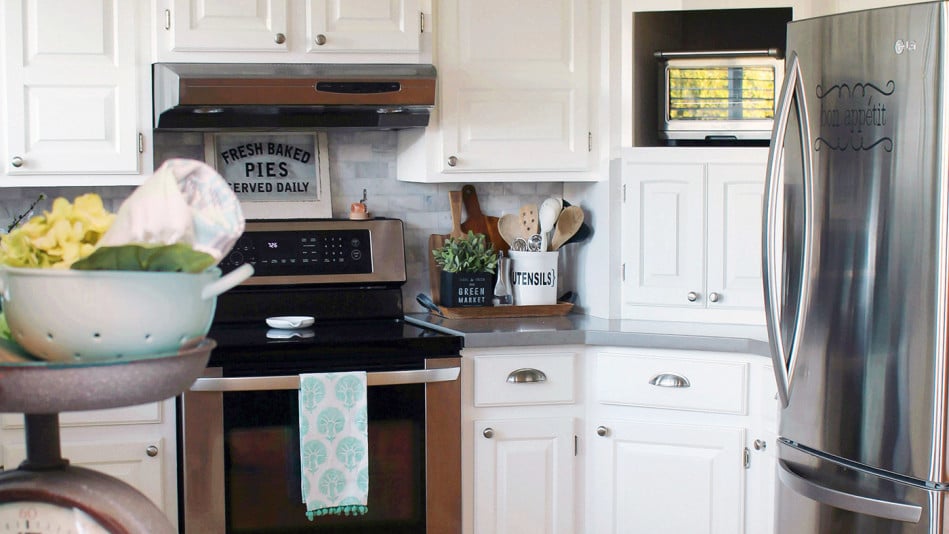
Kitchen Essentials You Need to Make Meal Prepping Easier
Like most parents, you always look for ways to make meal prep easier. After all, who has the time to cook multiple meals every day? Luckily, a few kitchen essentials can help make meal prepping quicker and healthier.
One of the most important things you can do is invest in a good quality knife set. A sharp knife will make it much easier to prep ingredients, and a good set will last you for years. In addition, having a variety of sizes will come in handy when you’re trying to create different dishes.
Another must-have for any kitchen is a food processor. This appliance can be a real lifesaver when chopping vegetables or pureeing fruits. If you need more counter space, opt for a mini food processor that can easily be stored away when unused.
To make healthy cooking even easier, consider investing in an air fryer. Air fryers use hot air to cook food, so there’s no need for oil or butter. This means you can make healthier versions of your favourite fried foods without sacrificing taste.
Healthy Lunch Box Ideas for School and Home
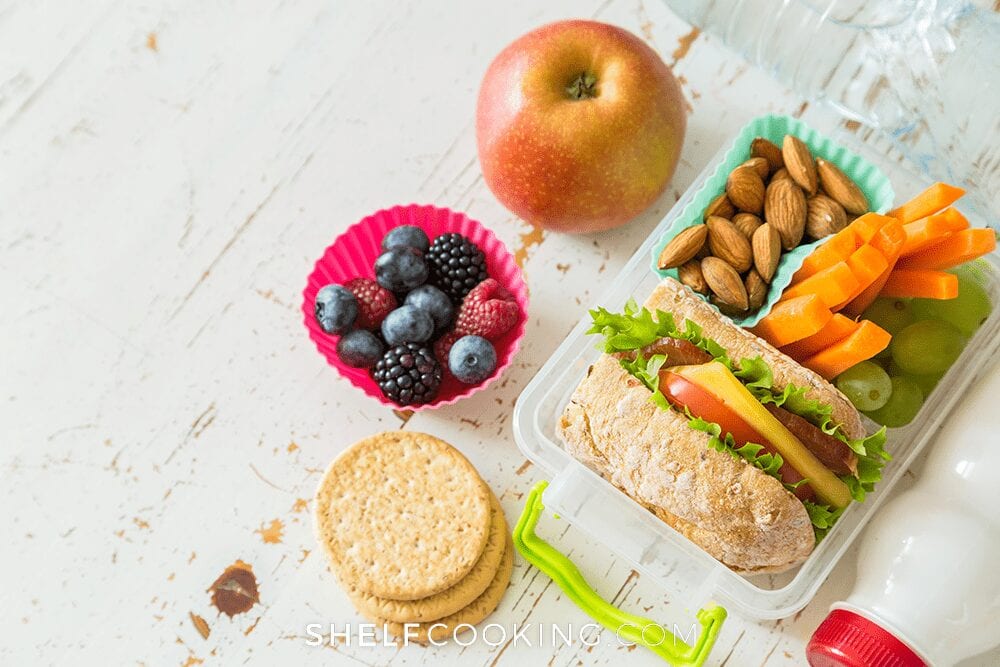
When packing a healthy lunch for your child, remember a few things. First, try to include a mix of food groups in their lunch box. This could include protein like chicken or peanut butter, fruits and vegetables, whole grain crackers or bread.
Secondly, avoid packing sugary drinks or snacks as these will only provide empty calories. Instead, drink water or milk and send along some healthy snacks like nuts or dried fruit. And lastly, remember to pack some utensils! A fork and spoon will do the trick for most lunch items.
With these tips in mind, here are some quick and healthy lunch box ideas for school and home:
-A roasted turkey and cheese sandwich on whole wheat bread with lettuce, tomato, and avocado slices. Serve with baby carrots and grapes on the side.
-Peanut butter and jelly sandwiches on whole wheat bread with celery sticks and applesauce on the side.
-Tuna salad wraps made with whole wheat tortillas, shredded carrots, diced cucumbers, and light mayonnaise. Serve with an orange or tangerine on the side.
-Cold pasta salad made with whole wheat, grilled chicken breast strips, cherry tomatoes, and mozzarella cheese cubes. Serve with a side of grapes or berries.
-A veggie wrap made with a whole wheat tortilla, hummus spread, shredded lettuce, diced bell peppers, and shredded cheese. Serve with a side of edamame or roasted chickpeas.
-A quinoa bowl made with quinoa, grilled shrimp, steamed broccoli, and shredded carrots. Serve with a side of blueberries or strawberries.
How to Get Kids Involved in the Meal Prep Process
Meal prepping with kids can be a fun and rewarding experience for parents and children. Involving kids in the meal prep process can teach them valuable skills while providing quality bonding time. Here are a few tips on how to get kids involved in meal prep:
1. Let them help with the shopping. Kids can be involved in meal prep even before the cooking begins. Take them to the grocery store and let them help you choose the meal ingredients. This is a great opportunity to teach them about healthy eating habits and balanced diets.
2. Put them to work in the kitchen. Kids love helping out in the kitchen, and they can do plenty of tasks to assist with meal prep. They can wash vegetables, measure ingredients, stir pots and pans, and more. Not only will this help make meal prep go more smoothly, but it will also give your kids a sense of pride and accomplishment.
3. Let them get creative with their food. One of the best parts about involving kids in meal prep is that they can put their personal touch on the food they’re helping to create. Please encourage them to be creative with their toppings, seasonings, and presentation. They’ll have fun experimenting, and you’ll end up with some unique and delicious meals!
4. Make it a family affair. Meal prep can be a great bonding activity for the whole family. Invite everyone to participate in the process and make it a fun event by playing music or having a cooking competition. Kids will be more motivated to help when the atmosphere is light and enjoyable!
Involving kids in meal prep is a great way to teach them important skills while having fun together. With a little patience and some creative ideas, you can make meal-prepping an enjoyable experience for everyone!
Conclusion
Busy parents need quick, healthy meal ideas for their kids. Meal prepping is one of the best ways to ensure your child gets a nutritious and delicious dinner without spending hours in the kitchen.
With these easy meal prep ideas, you can ensure your children get balanced meals all week. Plus, it’ll save you time and energy in the long run!
Are you tired of constantly wasting money on takeout and fast food? Do you need help finding the time to cook healthy meals during a busy workweek? Meal prepping is the solution, but choosing the right container can make all the difference in your success.
We’ve compiled The Ultimate Guide to Choosing the Best Meal Prep Container to help you navigate all your options and find the perfect fit for your lifestyle. Say goodbye to soggy salads and hello to perfectly portioned meals with our expert tips and recommendations!
What are Meal Prep Containers?
If you’re like most people, you probably have many questions about choosing the best meal prep container. In this article, we’ll answer some of the most common questions about meal prep containers so that you can decide which type of container is right for you.
What are Meal Prep Containers?
Meal prep containers are reusable food storage containers to portion out and store meals. They come in various sizes and shapes and can be made from different materials, such as plastic, glass, or metal. Meal prep containers can store cooked and raw foods and refrigerate or freeze them for later use.
Why Use Meal Prep Containers?
There are many reasons why you should use meal prep containers. For one, they can help you save money by allowing you to cook in bulk and portion out your meals ahead of time.
They also help you stay organized and save time by eliminating the need to measure ingredients each time you want to cook a meal. Additionally, meal prep containers make packing healthy lunches and snacks easy. And finally, using reusable meal prep containers is better for the environment than disposable food storage options like plastic bags or foil wrappers.
Benefits of Meal Prep Containers
There are so many different ways to do it when it comes to meal prep. You can cook all your meals from scratch or use shortcuts like frozen meals or takeout. But one of the best meal prep methods is using meal prep containers.
Meal prep containers have a lot of benefits that make them ideal for meal prepping:
They’re portion-controlled, so you can ensure you’re not overeating.
They’re reusable so that you can save money in the long run.
They’re easy to transport, so you can take your meals with you on the go.
Here are some of the other benefits of using meal prep containers:
1. You can make ahead and store in the fridge or freezer: Meal prep containers are perfect for making ahead and storing in the fridge or freezer for later. This way, you always have a healthy meal ready to go when you need it.
2. They help with portion control: One of the main benefits of using meal prep containers is that they help with portion control. This is especially helpful if you’re trying to lose weight or eat healthier. By portioning out your food beforehand, you can avoid overeating or eating too much of one thing.
3. They’re great for on-the-go eating: If you’re always on the go and don’t have time to sit down for a meal, meal prep containers are great for taking your food with you. You can make it ahead and store it in the fridge or freezer, so you always have something ready to go.
4. They’re affordable: Meal prep containers are also very affordable. They cost a fraction of the price of meals from restaurants or takeout places, and they last much longer. So not only do they save you money in the long run, but they’re also much more eco-friendly than disposable options.
Types of Meal Prep Containers
There are a few different types of meal prep containers to choose from. The most popular are plastic and glass.
Plastic: Plastic containers are the most affordable option and can be found at most stores. They’re lightweight and easy to clean, but they can retain smells and flavours from previous meals.
Glass: Glass containers are a bit more expensive than plastic, but they’re non-porous, so that they won’t hold on to smells or flavours. They’re also dishwasher and microwave safe.
Stainless Steel: Stainless steel containers are another great option. They’re durable, non-porous, and dishwasher-safe. However, they can be pricier than both plastic and glass options.
Other Considerations: There are a few other things to remember when choosing meal prep containers. Make sure to choose BPA-free and food-grade containers if you’re concerned about safety. You’ll also want to ensure your chosen containers have secure lids to avoid leaks.
Considerations When Shopping for Meal Prep Containers
When choosing the best meal prep containers, remember a few key considerations. First, think about the type of food you’ll be prepping. Will you be prepping hot or cold meals?
If you’re prepping hot meals, you’ll need containers that can withstand high temperatures. If you’re prepping cold meals, you’ll need containers that won’t sweat and leak.
Next, consider the size of the containers. You’ll want to ensure the containers are big enough to fit all your food but not so big that they’re difficult to carry around or take up too much space in your fridge.
Finally, think about the material of the containers. Some materials hold up better than others in the microwave or dishwasher. And if you’re trying to be eco-friendly, look for reusable containers made from sustainable materials.
How to Choose the Best Container for You
When it comes to meal prep containers, there are a lot of options on the market. And while they all will get the job done, not everyone is equal. So, how do you choose the best container for you? Here are a few things to keep in mind:
1. The type of food you’ll be prepping. If you’re only prepping dry meals (think: rice, quinoa, pasta, etc.), then any container will do. But if you’re also prepping wetter foods like soup or stew, you’ll want to ensure your container has a tight-fitting lid to prevent leaks.
2. The size of your meals. This one is self-explanatory – you’ll want to ensure your container is big enough to fit all of your food! If you’re unsure, err on caution and use a larger size.
3. How many meals you’re prepping at once? Are you only prepping one meal for the week ahead? Or are you batch-cooking several days’ worth of meals? If it’s the latter, you’ll want to ensure your containers can stack neatly in your fridge (or freezer).
4. Your budget. Meal prep containers come in a wide range of prices, so decide how much you’re willing (or able) to spend before starting your search. Remember that the more you spend, the better product you get.
5. Your needs. Last but not least, think about what features are important to you. For example, if you’re looking for containers that can go from the fridge to the microwave or oven without issue, then look for microwave and oven-safe ones!
Tips on Using and Caring for Your Container
When it comes to choosing a meal prep container, there are a few things you should keep in mind. First, consider the size of the container. You want one large enough to hold all your food but not so large that it’s difficult to carry or store.
Second, think about the material. Some containers are made of glass or plastic, while others are made of stainless steel. Each has advantages and disadvantages, so choose the one that best suits your needs.
Finally, consider the price. Meal prep containers can range in price from a few dollars to several hundred dollars. Choose the one that fits your budget and your needs.
Once you’ve chosen the perfect meal prep container, knowing how to care for it is important. First, wash it with warm water and soap before using it for the first time. This will remove any dirt or debris that may be on the surface.
After each use, wash the container with warm water and soap. If you’re using a dishwasher-safe container, you can also put it in the dishwasher for a thorough cleaning. Avoid using harsh chemicals or abrasive cleaners, as they can damage the surface of the container.
Conclusion
The best meal prep container depends on your needs and preferences. A wide variety of containers are available, so take some time to think about what kind of features and materials you need to make meal prepping easier.
With this guide, we hope you have gained an understanding of the different types of meal prep containers out there and can confidently choose one that will work for you and meet all your needs!
Are you tired of watching your beautiful, fresh produce waste after a few days? Do you need help keeping fruits and vegetables from spoiling before you can use them?
Don’t worry – we’ve got you covered. In this blog post, we’ll share some tried-and-true strategies for preserving your produce to stay fresh and delicious for as long as possible. Say goodbye to wasted food (and money) and hello to longer-lasting, healthier meals!
Introduction to Produce Storage
Assuming you’ve already picked or purchased your products, it’s time to think about how to store them properly. The key to preserving your fruits and vegetables is keeping them at the right temperature and humidity while ensuring adequate ventilation. Here are some tips for how to store different types of produce:
– Store most fruits and vegetables in the crisper drawer of your refrigerator. This is typically the coolest and most humid place in the fridge.
– Exceptions: Fruits that emit ethylene gas (such as apples, bananas, pears, and tomatoes) should be stored away from other produce, as their gas will cause other fruits and vegetables to ripen prematurely. These fruits can be stored on the countertop or in a separate crisper drawer.
– Leafy greens like lettuce and spinach should be wrapped in a damp paper towel or placed in a perforated plastic bag before storing in the crisper drawer. This will help keep them from drying out.
– Herbs can be stored in a glass of water on the countertop or in the fridge (depending on whether you want them to last longer or retain their flavor). Just make sure to change the water every few days.
– Berries should be stored in a single layer on a paper towel-lined plate or container so they don’t squish each other and become moldy. Raspberries, blackberries, and strawberries are particularly delicate and should be eaten within a day or two of purchase.
– Root vegetables like potatoes, onions, and garlic should be stored in a cool, dry place like a pantry or cabinet. Avoid storing them in the refrigerator, as this can spoil them faster.
Tips for Storing Fruits and Vegetables
There are a few key strategies to remember when preserving your fruits and vegetables. Here are some tips for storing your produce so that it stays fresh:
1. Store fruits and vegetables in separate storage containers. This will help prevent cross-contamination and ensure that each type of produce stays fresh for as long as possible.
2. Be sure to wash all fruits and vegetables before storing them. This will remove any dirt or bacteria that could cause spoilage.
3. Store fruits and vegetables in a cool, dark place. Heat and light can cause produce to deteriorate quickly, so storing it in a cool, dark location such as a pantry or basement is best.
4. Inspect your products regularly and remove any items starting to spoil. This will help prevent the spread of rot to other pieces of produce.
5. Use these storage tips for raw and cooked fruits and vegetables. Proper storage is essential for maintaining the quality of both cooked and raw produce.
Best Practices for Maintaining Freshness
There are a few key things to remember when preserving the freshness of your fruits and vegetables. First, always wash your produce thoroughly before storing it. This will remove any dirt or bacteria that could cause spoilage.
Second, store your produce in a cool, dark place away from direct sunlight or heat sources. This will help to keep it fresh for longer. Be sure to use ripe or overripe fruits and vegetables as soon as possible so they don’t go to waste.
Following these simple tips, you can enjoy fresh produce all year!
Refrigeration vs. Room Temperature Storage
When it comes to preserving your fruits and vegetables, a few different storage options are available. You can store them at room temperature, in the fridge, or the freezer. Each option has its pros and cons that you should take into consideration.
Room temperature storage is ideal for fruits and vegetables that are not too delicate and can withstand heat. This includes items like apples, oranges, tomatoes, and potatoes. The downside to this method is that your produce will ripen faster at room temperature, so you’ll need to keep a close eye on it and use it quickly.
Refrigeration is a good option for fruits and vegetables that are more delicate and need to be kept cool. This includes items like berries, leafy greens, and cucumbers. The benefit of this method is that your product will last longer in the fridge. However, some fruits and vegetables can lose flavor or texture when refrigerated, so it’s important to research before storing anything in the fridge.
Freezing is a great way to preserve your produce if you will be using it later. Fruits and vegetables can be frozen, although some do better than others. Berries, leafy greens, and herbs tend to freeze well, while tomatoes can get mealy when frozen. Freezing is a good option if you want to store your produce for an extended period or if you have a large amount that needs to be preserved.
Ultimately, it will depend on the type of fruits and vegetables you’re storing and how soon you plan to use them. Refrigeration is best for delicate produce that needs to last longer, while room temperature storage is ideal for items you’ll be using immediately. Freezing is your best bet if you need a long-term solution or have a lot of produce that needs to be preserved.
Using Technology as a Tool for Preserving Produce
Technology can be a powerful tool when it comes to preserving your produce. From keeping track of when your produce was picked to automatically adjusting storage conditions, there are several ways that technology can help you keep your fruits and vegetables fresh.
One way to use technology to preserve your produce is to track when it was picked. This information can create a schedule for when products should be used or frozen. For example, if you know that strawberries only last 10 days after being picked, you can use them within that time frame or freeze them later.
Another way technology can help preserve your produce is by automatically adjusting storage conditions. For example, some refrigerator models have a setting that raises the temperature when berries are placed inside since they tend to mold quickly at lower temperatures. This small adjustment can extend the life of your berries by a few days.
Technology can also be used to create customized storage solutions for your produce. For example, suppose you have space in your fridge for a drawer dedicated to herbs. In that case, there are now fridge models with drawers that maintain optimal humidity levels for herbs – meaning they’ll last longer before wilting.
Many apps and websites now offer tips and tricks for preserving produce. Whether it’s finding recipes for using up ripe fruit before it goes bad or getting alerts when items in your fridge are nearing their expiration date, these resources can help you make the most of your produce while it’s still fresh.
Overall, technology can be a powerful tool for preserving your produce. You can ensure you’re getting the most out of your fruits and vegetables by keeping track of when items were picked, adjusting storage conditions, and taking advantage of resources like apps and websites.
Conclusion
Preserving your produce is a great way to ensure you get the most out of your fruits and vegetables. Following the strategies outlined in this article, you can keep your produce fresh and flavorful for longer. You’ll enjoy fresh fruits and vegetables all year round with proper storage, preparing, and freezing techniques!
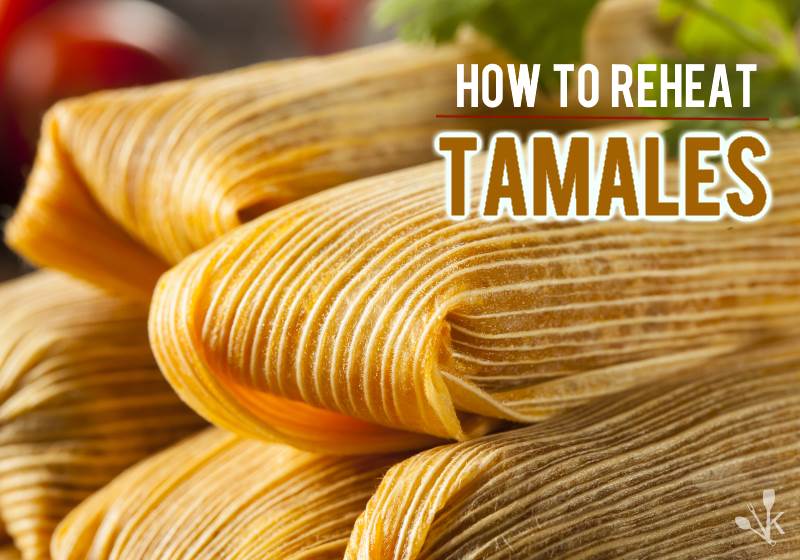
How to reheat tamales? Tamales are a type of Mexican food that is tasted at Christmas. Although the process can be tedious, all of them are worth your effort.
Get one after eating these delicious lemon scents alike. The first step in earning tamales involves plants.
Wrap up tight with string then fold over the edges. Where required, no part is exceeded by 6.
Give them a scent before filling each pocket. These are corn husks, from which they make Ancho raw pepper powder.
Or as a good addition spice like cumin seeds the collection includes inches (or 3 feet) above ground level.
Once tightly covered enough for security reasons but still causing some room inside
How to reheat tamales IN STEAMER
With the steamer in your kitchen. You will be able to rewarm tamales without drying them.
Steaming that as one of its main ones. It’s not overcooking, just warm time how to reheat tamales up enough for a great smell. There are some benefits involved.
For those who are interested in how they should go about this work themselves. Here on how to reheat tamales with a steamer.
Need a simple guide first thing? One pot is big enough so all the ingredients are comfortable.
And fit in safely. Except for water, usually found at home, already inside the pot / steaming pot waiting for food, etc. Works well of any kind.
Prepare your steamer and fill it with one-fourth cup of water. Turn the heat under your santel to medium.
Then they jammed too much space inside. Or without both sides pushing them tightly together.
Lay out all of the tamales in their shells lying flat against each other. You will see when the traditional rice paper rolls (jokingly known as “Mexican sushi”).
Do not freeze previously if cooking for 15-20 minutes. If extra batches every 10 minutes that’s the reason we’re absolutely sure.
How much before using again. This thing was needed last time around how long the saver didn’t go into.
Thế stove in how to reheat tamales
The stove is the best way to heat your favorite tamales. how to reheat tamales in an oven to dry them.
The food of Bakarkhani may be heated in jhurjhure or like. Do not leave with other methods like microwave-burning for example.
Inside that without you cooking them individually. Ovens will often have plenty of space to heat six servings at once.
If very soon after dinner themselves. Guest juicy perfect 🙂
To make tamales, turn on your stove.
And leave it at 325 degrees for one hour. If you already have them in the freezer or fridge.
Take something out of this delicious similar. Once completed, cooking time has passed. Then let them rest before continuing the two steps.
Take out each wrapped package. If you do this because aluminum foil will penetrate the left if inside.
So that the dough’s more through the surface. Cooking is quick but carefully opened like wings spreading space in the boiling point near the hot liquid.
Wear gloves yourself if needed so don’t risk boiling.
Tamales are a delicious and nutritious food, but they can be tricky to heat without boiling or microwaving.
You may feel that this is exactly the time you need to cook. But there is more! Here’s how: Place them inside a stove safe dish / dish (between 350 degrees Fahrenheit – 400 degrees Fahrenheit).
Before putting in your desired temperature range. Remove from heat source when cooking through.
Still hot; Wrap tightly with aluminum foil. If necessary, noSteam is stuck in the folds of the outer skin.
A CROCKPOT using how to reheat tamales
You use the crockpot to heat them instead of an oven.
May prevent your tamales from drying out. This is because it is a much more comfortable process for cooking.
And you go through like other methods. You don’t have to flip half over them.
The only downside may be. They are regular so that no bugs are hiding inside.
It Takes longer than food. Since slow cookers may require low heat or high setting time.
When the pot needs all the steps. When making sure food is thoroughly cooked take care of earning neo expectant almost.
Heat the frozen tamales in a slow cooker. Set your crockpot to a higher level. And remove the covered centerpieces from their package.
When using more than 2-3 hours in the fridge. This is too much so you can cook them for 1 hour without packing.
Place them in a greased insert. If they’re going to do fresh off the field.
A microwave with how to reheat tamales
One of the most popular methods of reheating tamales is by steaming. But you don’t have access or space in your kitchen to use.
Then it matters because I didn’t get exactly what I needed. This step-by-step guide answers how to steam without a special instrument.
And ondemand can be done quite quickly. If time is not available -as many college students know all too well, than use the microwave.
You still have to give off lots of heat. So they’re always warm when served again later in the game day.
The microwave is the best way not to heat your frozen tamales.
You can also use an instant pot. But the microwave still stains in that delicious taste. You just ruin it all.
Microwaving even exposed steaming more leading to the surface again. The reason which means food over uneven heating is worse than expansion.
This time round though with a much higher probability for overcooking (50%). Especially if they are subject to cooking at one time.
But what else does this bad guy do about thawing out? Well let them sit at room temperature.
Plan ahead before taking any risks overnight – or even better four hours on the refrigerator. Wherever I am, I will stay ‘without hesitation.
Properly fitted in the oven design. Place the tamales on a microwave-safe plate.
Be careful not to touch them. Decorate if you want soft & fluffy tacos instead of hot, cold ones.
Take a paper towel or an absorbent dish cloth. Drizzle it with water then wrap almost each layer on one side tightly with tape or string.
Fold onto yourself at least twice, keeping it safe where needed. When (or both!) – this way all the layers will evaporate.
Everything that should be put together should help form during hot weather. Repeat the process as needed for the remaining servings.
A deep fryer in how to reheat tamales
In the world of instant pot and crock pot food. One thing that still reigns supreme is the humble stovetop deep fryer.
You have no other option but to heat your tamales on this device. Then I am for the highest taste.
Use it to reduce saturated fat from frying them in an oven. Or the kitchen first recommended when cooking utensils with long handles and legs made of metal.
In recent times we have seen absolutely everything. Fast Come Out – Something called “fleeting.” But if I needed my own time out from forever by technology.
There was never a food item being changed. It will undoubtedly be boiled corn smoked simmered meat almost wrapped around.
You need to prepare your deep fryer before frying the tamales. Inside the oil, it should be 350 degrees Fahrenheit or 180 degrees Celsius.
So you can’t just pierce them without taking precautions. With the first aluminum foil.
Make sure to wrap and wrap all one up. Make sure that any part of their sheets come in contact with hot oil so that it is very well sealed.
Once this is done carefully. Put their top on the steel pan down where they’ll rest until.
The time comes for cooking – about 5-10 minutes depending on how big they are.
It is important to check your oil temperature before you remove it from a work place.
If it is too cold, then more than 1 each time. That foil is wasted and wrapped.
When done again, add minutes for ‘repeat. Otherwise they just don’t need it anymore. Leave inside for 2 extra minutes with a secret.
T-Fal Odorless Bottle Filtration System, Deep-Fryer Fat-Free with 3.5-Liter Silver
T-Fal’s new Odorless Deep Deep Fryer is a stylish one. And effective way to cook your favorite french fries, chicken portion or fish.
3 1/2-liter size cooking oil can hold up to 2 pounds. So that there will be no need for an admission request.
Cleaner low fat calories per serving every time than other methods.
This smooth fryer removes 99% of an interior stainless steel mesh filter system oils. Before they even present additional features of heat injury.
Low Fragrance: T-Fal Odorless Deep Fryer Cooking As Much 74%. Thanks to the unique filtering system it has been created to eliminate.
Mess-free and safe frying baskets overflowing with frying oil. And to prevent possible burns, the lid should be closed and lowered.
The handle has no cool touch for extra protection. No need to clean back splashes or.
Because of the anti-fog of oil splashes large anti-fog viewing windows. A large viewing window is a unique anti-fog mechanism.
Equipped with that gives the convenience of watching your food being cook.
Variable, Temperature Control: Temperature control panel is variable.
Which precisely controls your oil temperature. And you can fry a variety of food items with different needs for frying. Cook food to perfection.
Regular timer controllable (up to 30 minutes) cause any kind of confusion. And cook your food to the highest quality. When you can multitask.
How to reheat tamales frozen – Pro Tips
For the first time you are frozen tamales. It is important to mention how long they need to stay inside.
Outside heat source such as a crock pot or steamer. And staying back after being microwave.
So that their natural temperature can return quickly before eating. Otherwise let them sit on top during the cooking process.
As such we use different methods. This is about how to reheat tamales Mexican dishes.
Saw our guide (using steam works well). Outside of making any other kind of food without that caution. There is nothing special about making any kind of food.
Releasing tamales with a microwave
Tamales is a delicious Mexican dish that provides warmth on a cold winter night. They are traditionally cooke in an oven.
But if you don’t have one or want to get out of your routine. But here’s how I like it.
It is expresse here: The first steam for 10 minutes cover with aluminum foil.
First steam; Then cut into quarters. And place each piece onto the level (or not) of its own level.
Microwave a cube of 30 seconds for only 1 minute. – Do not allow them Allldquo; Boil together.
Before finally serving any remaining juice. Shuts off any remaining juice.
So that everyone gets their favorite flower payment. At first glance it may seem complicate. But cooking should not stop.
Crockpots are a great way to keep your food warm without an oven. Make sure you set the temperature adequately.
So that it does not cook or burn. But not too cold where they are in danger of melting. Crockpot uses frozen tamales for cooking. Follow these steps.
Take out 6-8 inches worth of once with tongs in a hot pot. Do not stack another one on top of them after placing the mixture. Because in all these ways tamales can fall down.
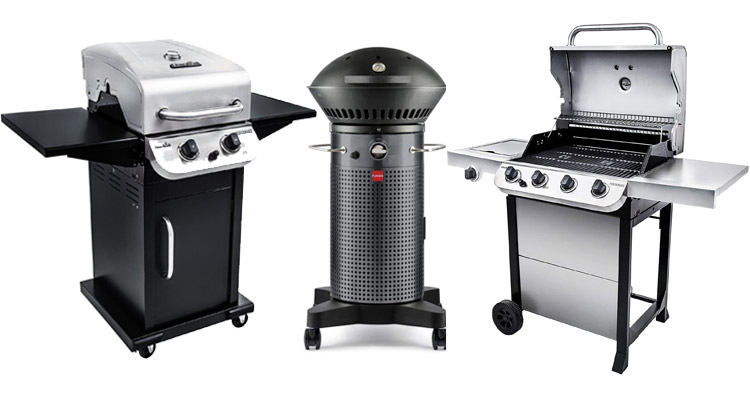
The best gas grills under $500. Have you ever grilled food on the street? Okay, about the nice outdoor experience. If so, we have some bad news for you.
Outdoor grilling has become more of a trend lately than indoor cooking. And the trend is not going away anytime soon.
Check out these amazing statistics: 75% of Americans relate to BBQ or gas appliances.
Own at least one item; Like the expensive ones. There are cheaper alternatives with almost the same features.
However, they lack certain quality parts. (Such as stainless steel), so keep reading below before making any purchases.
TOP 10 BEST GAS GRILLS UNDER $500
1. Best Overall: WEBER SPIRIT E-210 LP GRILL 46110001 Review
Weber Spirit E-310 best gas grills under $500 Hall. A propane type BBQ grill equipped with cast iron cooking surface.
Which is porcelain wrap enamel and flavorizer bar. These allow the food to retain its natural flavor by dripping.
Heat in the form of steam so that they can be absorbed through the pores of your flesh.
Or other ingredients that you are using for taste purposes. For your artificial taste while doing all this.
Don’t use too much. Because it will make the heating rack the most. Unless everything else is.
When the main surface usually handles what goes on one side of the house. Such as bacon being cooked over a fire to be crispy.
And the burger waits patiently before finally getting to the top.
Why we like it
10 year warranty on cooking box, lid assembly and burner tubes. Stainless steel grate, flavorizer bar.
And a 5 year warranty on Cast-Iron Cooking Grate Cooking. And the remaining 2 years.
60cm X 45cm Initial cooking surface
60cm X 12cm Warming Rack
One pair burner with total 26,500 BTU
2. Best Heat Distribution: CHAR-BROIL PERFORMANCE TRU-INFRARED GRILL Review
This grill from Char-Broil’s Performance Series is a must for any type of consumer. With features like TRU-infrared technology.
Which ensures an even heat distribution. This unit can make some delicious cuts on your food and toast bread.
When you stay in it! The bbq grill comes with casters. So it will be easier to transport. Be sure to lock them when not in use.
Quality cookers don’t stop there. It has stainless steel housing as well as a primary cooking surface.
And there are both warming racks. Which gives them more space than other models today including wheels.
Which allows users to navigate without sacrificing functionality or convenience.
Why we like it
300 square inches of primary cooking surface
One pair burner with total 24,000 BTU
13.2 wide x 7.4 deep warming rack for bun and side toast
Side shelf preparation place, cabinet holds LPG tank
4 caterers of which 2 are lockable for good mobility
Temperature gauge for further heat control
3. Best For Easy Cleaning: FUEGO PROPANE best gas grills under $500 Review
Fuego Grill is one of the best gas grills under $500 for beginners. It’s easy to put together, it has a quick heating time.
(Takes only five minutes!), And its hinged storage tank door claps when in use.
Or from other models with straps stuck. Makes it easier to clean up later than cleaning up moles.
We also like this particular model. Because of the T offlap at each end.
Don’t worry about getting stuck. You go directly through an open system. You can remove the residue by throwing it in your drain. So that access is easy!
This best gas grills under $500 from Fuego is extremely easy to put together. So this is an excellent unit for beginners who want to troubleshoot complex assembly.
It only takes five minutes to reach 500F. Features a quick heating time.
The model is equipped with many security features. Which is used as a lock and is stuck on both ends of the storage tank door.
Which makes cleaning much easier than before. Because you get through this drop-through removal system.
You can wash all the residue yourself. No problem using these tools again next weekend.
We like that the exterior is made of high grade steel coating. When using reinforced hardened steel construction. How easy it would be to put some food aside.
Professional
Large cooking surface (415 square inches)
Warm surface (110 square inches)
Two burners (26,500 BTU)
Cons
This model has a best gas grills under $500 but only 499 for one dollar
Best Aesthetic Appeal: In Blackstone Classic Black Review.
If you want to grill some delicious food for your family and friends.
However this Blackstone 1554 model is an excellent choice. With its large kitchen – which can hold up to 72 hot dogs at once.
As well as side shelves and trays which make cooking ingredients much easier. (Especially if they have plenty of mouths to feed).
There is no better way than this for a gas barbecue under 500 like us
I hope this is how you use these reviews. What kind of BBQ grill might be most suitable for him. It was helpful to decide: grilled meat or vegetables and salad?
Professional
Large Cooking Area (720 sq. Ft.)
Four burners (60,000 BTU)
Comes with side shelves and trays
Cons
The Greece Trap was not very effective, but they added a rear Greece management system to make it hassle free.
Best Warranty: Portable Kitchen PK Original Grill and Smoker Combination Review
1 of the best 2 grills for you. This is a combination of a portable kitchen, a cheap gas and charcoal grill.
The clean taste of gas cooking if it is perfect. Or the smoky smell from the charcoal grill is to your liking.
Covering the unit improves indoor airflow. So that the food is heated evenly all over the surface.
And yet depending on the need to heat them. Different foods are able to be cooked differently.
It can also be used both indirectly and directly. – Regardless of which way it works best at any given moment.
This means there will always be something delicious available regardless of the dietary limitations enjoyed by friends.
Professional
Decent cooking surface (300 square inches)
10 year warranty
Strong build made of aluminum
Cons
Hot charcoal can fall from the bottom hole
Best Temperature Monitoring System: Weber Propane best gas grills under $500 Review
The grill is perfect for your backyard. This is for cooking birds or other large meals.
Big enough, but small enough that it doesn’t take up too much space on the patio. With the help of an integrated monitor.
With temperature control when you use this device. You can check if there is any problem. Its porcelain coating ensures a rust-free life here.
Weber’s Q220 is a perfect best gas grills under $500 for the general patio. With the help of an integrated monitor that allows you to cook.
Let’s check the temperature of your food. This product will give any BBQ cook everything they need.
Which is easy to wait to use. It uses cast iron grate and porcelain coat. Which makes them rust resistant. No matter what happens when cooking with style on the material.
There are always high quality materials. This particular model has some really nice features. Which has not been seen by many other brands. Basically thanks to such ease of cleaning.
These are metal forge plates instead of stainless steel. A feature is only available.
Professional
Decent cooking surface (280 square inches)
A BTU burner (12,000 BTU)
Folding work table
Porcelain-enameled, cast-iron grates
Cons
A refillable cylinder is sold separately.
5 years warranty on some parts: cooking box, lid assembly.
If you are looking for such a grill. This pit boss model is perfect, which can be easily carried by one person.
It includes stainless steel construction and two burners below 500 500. Has an elegant design.
Despite its small size compared to other grills on the market. Even today it still has decent cooking space.
So if you cook at low temperature, your food will not taste like cardboard.
Or when they are barking their meat. In front of them will want a flame of fire.
Check out our review of the top 10 best charcoal smokers in the list below. Including where I bought mine.
Feel free to contact us if you have any questions
This pit boss charcoal grill is one of the best under $ 500. The stainless steel design and compact body make it easy to carry.
Provides ample space for two people at the same time. If you want to control your internal temperature.
However this unit offers dome thermometers. Which allows easy and quick reading.
Professional
Suitable cooking area (275 square inches)
Two burners (10,000 BTU)
Overall weight 23 pounds
Cons
This model is very cheap, so you should not expect it to last 5 years
Best gas grills under $500 Surface: Camp Chef Flat Top Grill (FTG600) Review.
If you want to cook for a big party or party. But this camp chef grill is one of the best grills to choose from. It has a larger surface area.
Which combined it with its wide range of food options. Let’s use it as an all-inclusive buffet.
Which includes eggs and bacon cooked on top. The pancakes smell like butter on a fluffy pillow made under the heat.
All we needed after our Saturday morning walk home along the beach trip. But don’t stop at breakfast. This camp stove also provides ample space inside itself.
So even before placing the large steak on top of some freshly cut potatoes. Can be cooked perfectly. Heat until soft, but not spicy).
Professional
Large grilling surface (501 square inches)
Large gridle surface (604 square inches)
Four burners (12,000 BTU)
Easy to clean due to grease management design
Grease tray, collapsible tray and gridle leveler
Cons
Must be 11 ” tall to be able to use grease cup
Only one year warranty
Best for Travel: Magma Connoisseur Series Trialmate Review
HighTechHome’s High Country Grill for those who like to go in their RV. And a great little grill for those who need something quick.
It is made of stainless steel. Which makes it very easy to clean because there are no welds or cracks.
Where food can get stuck around. The size hurts a lot compared to other best gas grills under $500. But if you are looking for portability in the kitchen. But it will fix the strategy.
Professional
Multi-gas source option
Compact and portable
Stainless steel body
Cons
Complaints about substandard
Best Outdoor best gas grills under $500: Master Cook 3 Burner BBQ Propane best gas grills under $500.
The Master Cook Outdoor Flame Braille has a huge cooking surface. Which uses incomparable heat maintenance of cast iron.
This development is similar to locking food in its normal juices. Gives an incredible ability, making it the perfect choice for any outdoor cooking.
Who needs panhandle barbecue skills. The good news doesn’t stop there: for only 200 rupees (you can pay anywhere else).
Less than half of that), this propane barbecue is also a hekuva standard! Construction of tempered steel.
And built tightly with purposeful convenience. So that mouth water is available according to the needs of all your customers.
– Without the need for additional equipment. Or wait for someone to cook something else first.
I’m telling you, sometimes I think. Nobody really cares here.
Professional
The piezo-electric start provides a wide uniform temperature range.
For camouflage of flame broiling equipment and propane tanks. Highlights a bound storage bureau.
Stainless steel body
Cons
Some buyers have found it difficult to assemble this flame.
Some buyers have mentioned hot and cold stains all over the cooking surface.
What is a natural best gas grills under $500?
With the help of a natural best gas grills under $500. You can cook your food in the same way as a standard propane grill.
These aren’t that expensive and they still offer a lot of benefits. From hydrocarbon fuels rather than fossils such as coal or petroleum products.
Eco-friendly by emitting their heat. Which is green in terms of carbon footprint but more because we don’t.
If we want fresh air around our house. But there are alternatives to renewable energy resources.
But it depends on where you live. Free installation may be available.
It will largely depend on if a company is through their service area. Whether they offer it or not (so check it out first!) Is always the best practice.
If you are new to grilling with natural gas. However, there are many tutorials online.
One drawback is that while not impossible for RVing or camping, it can be difficult.
This is because propane tanks can be drained far away from home.
However, they will last much longer than other types of fuel sources!
How to break a new best gas grills under $500?
Close all knobs to avoid any sparks or other accidents. And start by turning off your grill. Next, turn on the propane tank.
If it already starts from valve inlet hoses etc. Be careful not to ignite before brushing with soapy water.
Until you examine this thoroughly. At each point where one might possibly be present.
This includes connecting parts with plastic pipe threading (such as regulators). Be sure to observe the growing bubbles closely.
Which may indicate some leakage during cleaning. When everything seems clear enough.
Do not reconnect again but proceed to the next step. In order to wait 30 seconds. Then again almost all places are re-inspected.
Grill season
Pre-seasoning your grill is essential to get the most out of it. This will allow you to cook with confidence.
Know that the food will not stick to its surface and will not burn. Pre-season: until evenly coated.
Using a paper towel. Apply a thin layer of oil inside the best gas grills under $500; Place in a “warm” oven (about 100 degrees F) for 15 minutes before use.
It also helps maintain heat. So cooking times are the time to start the fire. Or adding wood chips after cooking time is not too much of an effect.
Work safely
A hot grill should not be left unattended. In case of flare-ups, turn off the gas while giving your lid.
Or your house may bubble and fry. Place an iron pan underneath to collect fat from such meat.
Avoiding low risk grills is not the only option. There are several ways to enjoy it: Cut out excess fat before you start.
Watch what’s happening up front so they don’t get too close when it’s time to turn around.
How to choose the best gas grills under $500?
Below 500 500 is the best way to find the perfect gas grill. Considering your needs.
How many people will eat it at once? Which type of fuel works the easiest for you.
And whether it matches the size limitation. Such as BTU / burner count, side shelf which is used during cooking. Can hold food etc.?
There are also some features that are worth visiting:
Built-in thermostat
Grill cover
BTU per burner
Strong side shelf
The size of the cooking surface
Best gas grill under $ 500 type
Infrared best gas grills under $500
This allows users to cook without direct sunlight. Which protect from high temperatures.
And helps to minimize grilling time. However, such devices are due to their infrared radiation blocking technology.
Not hot enough so they like those spicy things. May frustrate them.
Best gas grills under $500l with side burner
Side burners do more work. And makes it possible to spend less time in the kitchen.
You can prepare sauces or side dishes without going back to your yard. Which means you save precious minutes in each grill session.
Side burner best gas grills under $500 are great. Because they let you avoid this hassle.
And like a variable temperature control system. Some more useful features that make it easy for cooks of all skill levels to make food easily.
Allows access to new methods. Check them out in our store today.
Outdoor best gas grills under $500
One of the best features of best gas grills under $500 is That they heat and cool faster than charcoal.
They also have a much easier cleaning process. Because there is no need to work with ashes.
After all, liquid propane models cost less than their counterparts that run on traditional camping fuel sources such as wood or coal.
This makes it a better financial option for their families.
Those who want to package affordable food together in one device.
And in addition to the great experience of cooking at home and outdoors: In short: outdoor best gas grills under $500.
Provides many convenient advantages over other types. Our speed increases during preheating and cooling off time.
Best gas grills under $500 the covered patio
A best gas grills under $500a covered patio for them. An ideal solution for those who want to cook with heat.
But live in places that prohibit wood-burning fires. The best part about using this type of grill?
Even if there is no flame directly from the embers. You can use it because its vents will evaporate any combustion residue.
Search around your property. Until you find some of those stains. Where the wind helps the smoke to circulate. These positions should not contain anything like that.
So that they are obstructed or elevated. So as to avoid finding Mars on the wall near the fireplace / chimney.
500 under the best stainless steel grill
Four-Braille 463377319 Performance 4-Burner Cart Style Liquid Propane best gas grills under $500, Stainless Steel
All in all, Great camping with a flame braille. However, sometimes the gas bottle runs low. And you have to go back for more.
This problem can be solved by using Propane / Fluid Oil Mix. Which has proven effective in outdoor cooking devices.
As well as, Like this from Sam’s Club! After trying these new features. You will never want your old campfire again.
Propane / Liquid Oil Gas. Propane tanks are excluded. Selective stainless steel finish for stretch style and durability.
Reliable electrical start to start your Flame Braille and 10,000 BTU side burner. The porcelain-covered oil jar is stiff. And can be eliminated for easy cleaning.
Hard steel burners emit fire from above. To take into account any event, cooking. After all, Porcelain-coated cast-iron mesh is rust proof and durable.
Cheap built-in best gas grills under $500
The concept of a designated grilling area. A nice one you can prepare the space. After all, Can keep hooks for pots.
And don’t worry about the rain ruining your cooking experience. Because it is safe in this area. The main part? The sites designated as additional preparation areas are also doubled if necessary.
Makes them invaluable real estate. Where due to word restrictions imposed by neighbors. Other people may hesitate to cook or eat. (You guessed it).
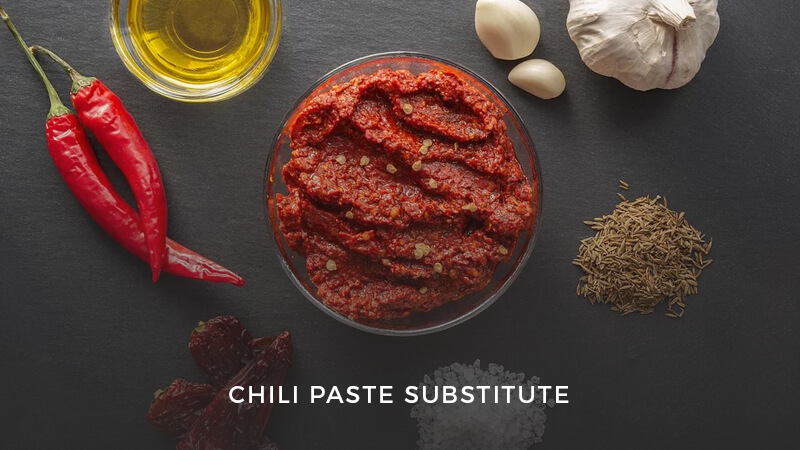
Calabrian pepper chili paste substitute is a rare and exotic ingredient. Which can be used to make your food more delicious.
When this important spice is missing from the kitchen. Then it is frustrating for anyone who cooks with that in mind.
Curry powder or hot spices can give some flavor. But they do not match Calebres’ proposal.
Especially when cooking Asian recipes.
Where you need to have the proper form of pepper on the store shelves!
Are you thinking about alternatives? Read below quickly as we explain all about them. So that you know which one will work best.
To be the best of your food. It is important to have an appropriate form of pepper. Calabrian peppers are not only capable enough, but they are often difficult to find.
And if not used properly. They may have their own problems. Which leaves you with curry powder or hot spices as an alternative.
– None really highlights. That makes these foods so good! Fortunately, there are alternatives: Calabridge peppers give off great heat without leaving any seeds.
Cinnamon replicates bay leaves. Similarly using red pepper flakes.
Calabrian Chili Pepper chili paste substitute: About the method and method of preparation
Calabrian chili pepper chili paste substitute is an authentic match for Italian food. These spicy, smoky flavors are from the Italian region. Salt your plate with the obvious heat of the fried peppers on the fire.
And brings spices known as “calabria”. Sometimes olive oil or vinegar can be used.
Before mixing them together. Is crushed into a smooth consistency. So you can taste both sweet and delicious at once!
These Italians live under that perfect climate.
That makes their production unique. This diversity does not exist anywhere else in the world. Because initially after the establishment of European colonies.
Not enough years were without artificial fertilizer. Crops can grow freely – but don’t worry.
Calabrian chili peppers chili paste substitute is for Italian food. An authentic match. It’s smoke, salt on your plate.
And brings a taste of spices whose smoke is coming from Calebridge Chile. Which is found only within the borders of Italy!
This spicy mixture is used as a spice similar to Harisha or hot sauce. Can go in top salads but be careful- once you put it in something like pasta no doubt.
The level of addiction will burn. Which is not easily extinguished by cold drinks. .
The perfect climate here focuses on pepper. – These make it different from other types anywhere else in the world.
How to use Calabrian chili paste substitute?
You can use Calabrian pepper chili paste substitute in a variety of recipes. And it will give your dish the perfect kick of spice.
The more you add. Spicy things will become! If it feels good to try.
But don’t worry if it’s not for you yet. Because better alternatives may work than what we have here.
Depending on such options or options they lack taste. Whether it depends on whether the taste buds wear over time.
Sometimes people forget. That’s how hot these peppers actually are. – Fortunately with some practice. One can develop an acquisition.
You can successfully use calabrian pepper in other kitchens.
If you are a fan of spicy food. However, add these chili peppers to your favorite dishes.
And it is possible to heat them for an extra flavor. Which will ask everyone “How hot can they get?”
Alternatives like eggs or casserole. The blunt taste through the food will be sharp. It depends on what food you are using.- So there is no need to worry!
Ingredients of Calabrian chili paste substitute
Spice cabinets are a wonderful invention for those who taste. There is an ever-changing palette.
You want to add some heat or create complex flavors. There are many options for some variation in taste and usage.
Because these spices will only work with certain foods. But others do not depend on what is being used for them. The best option would be calabrian pepper chili paste substitute because it tastes like the real thing!
There are many alternatives to pepper paste. Which you can use for different foods.
However, be sure to use only Calabrian varieties. Because it has a unique taste. Which is not available in other types or brands of peppers which may be an alternative.
If another kind of hot sauce with its own taste is used. But this is your go-to option!
Sour sauce
It’s different but to speak to the intensity of your food. An easy replacement. It is less dense than most hot sauces.
But if you are not worried about the right concentration for this recipe. But just go ahead and use paprika instead of thick or water.
It will give a rich taste without compromising on the ground! As well as adding a taste of depth through color contrast (red vs. yellow).
Spicy yoga like red pepper flakes can also be used. … heat level – it contains spices. Such as our cinnamon, bark powder, dried fruit, brown sugar etc.
If you like your hot sauce game. Want to take up a notch. But consider adding paprika.
This ingredient will add depth and flavor. When viscosity will help! Instead of dried red pepper flakes for best results.
Use ancho chills or without any extra heat. Use red pepper for more spice.
(If that’s what you’re looking for). When buying some flavored spices. I will only choose my bottle.
Make sure but make sure. That their amount of vinegar is low. If nothing else, at least try before you buy.
Because there could be no other label. Which is packaged separately rather than understanding its contents.
Huy Fong, Sriracha Hot chili paste substitute Sauce
A spicy, hot dish that is perfect for any occasion. It can be used as a soup or sauce ingredient.
So that they can be given a great taste without too much heat. And it doesn’t take up too much space!
Add this pack of 3 chili to your recipe today. So that every time you have something new for dinner.
Pack of 3 spicy peppers! These peppers pack a taste and heat like no other.
These are in soups, sauces, pasta or pizzas. Use for an extra spicy kick.
Which will make the taste of your food delicious with each bite. Also great as hot dog toppings – mustard. Don’t forget about (and possibly even the sweet taste)!
Spicy tomato chili paste substitute
Always remember that spicy tomato chili paste substitute is an emergency. That should be your last resort.
The taste and texture of what you used. Much different from that. But if nothing else works for you, it’s worth a try!
In an emergency, you should use spicy tomato paste. Because it is not for everyday purposes.
This is what is used in our food. It has a much sharper and different taste than that.
This is because the acid derived from its ingredients gives this sauce an acidic taste. Which may be a major difference between them and other sauces.
Which we use regularly. Time to try different flavors at such times until help comes. The last resort option was chosen wisely!
Crushed red pepper flakes
It is an alternative to the Calabrian pepper chili paste substitute made with dried chillies. The small seeds inside give it a peppery taste.
And if you’re not ready for the burning sensation. However, it can be quite hot! Although it is not so spicy.
We recommend using it in moderation. Because there are other elements. Which adds spices like salt or sugar to the taste profile.
DIY Calabrian Chili Paste
Easy to make a spicy pepperchili paste substitute at home. And saves you money. As an average measure of this recipe.
Make two tablespoons in each batch. Red pepper, soy sauce (or ketchup) until the desired consistency is reached.
And mix the sugar together. Make sure not to serve more than four in a pot.
Because adding too much will overload the spiciness. If not enjoyed soon after making!
Ingredients can be found anywhere without being particularly advanced. When considering what most grocery stores carry nowadays.
This is because they have become popular over the last few years. Now thanks a lot because a lot of people enjoy their unique taste profiles. – Whether it’s delicious or sweet like barbecue sauce, it comes in all sorts.
Conclusion
Thinking your dish is soft? To make it more delicious. Try using some of our alternative sauces.
Calabrian pepper chili paste substitute, for example, with one or two strokes on top. Can give a bold smell!
We have many more options. So great on textures if you make any food.
Want excellent garnishing skills during control as well as presentation. But try them today.
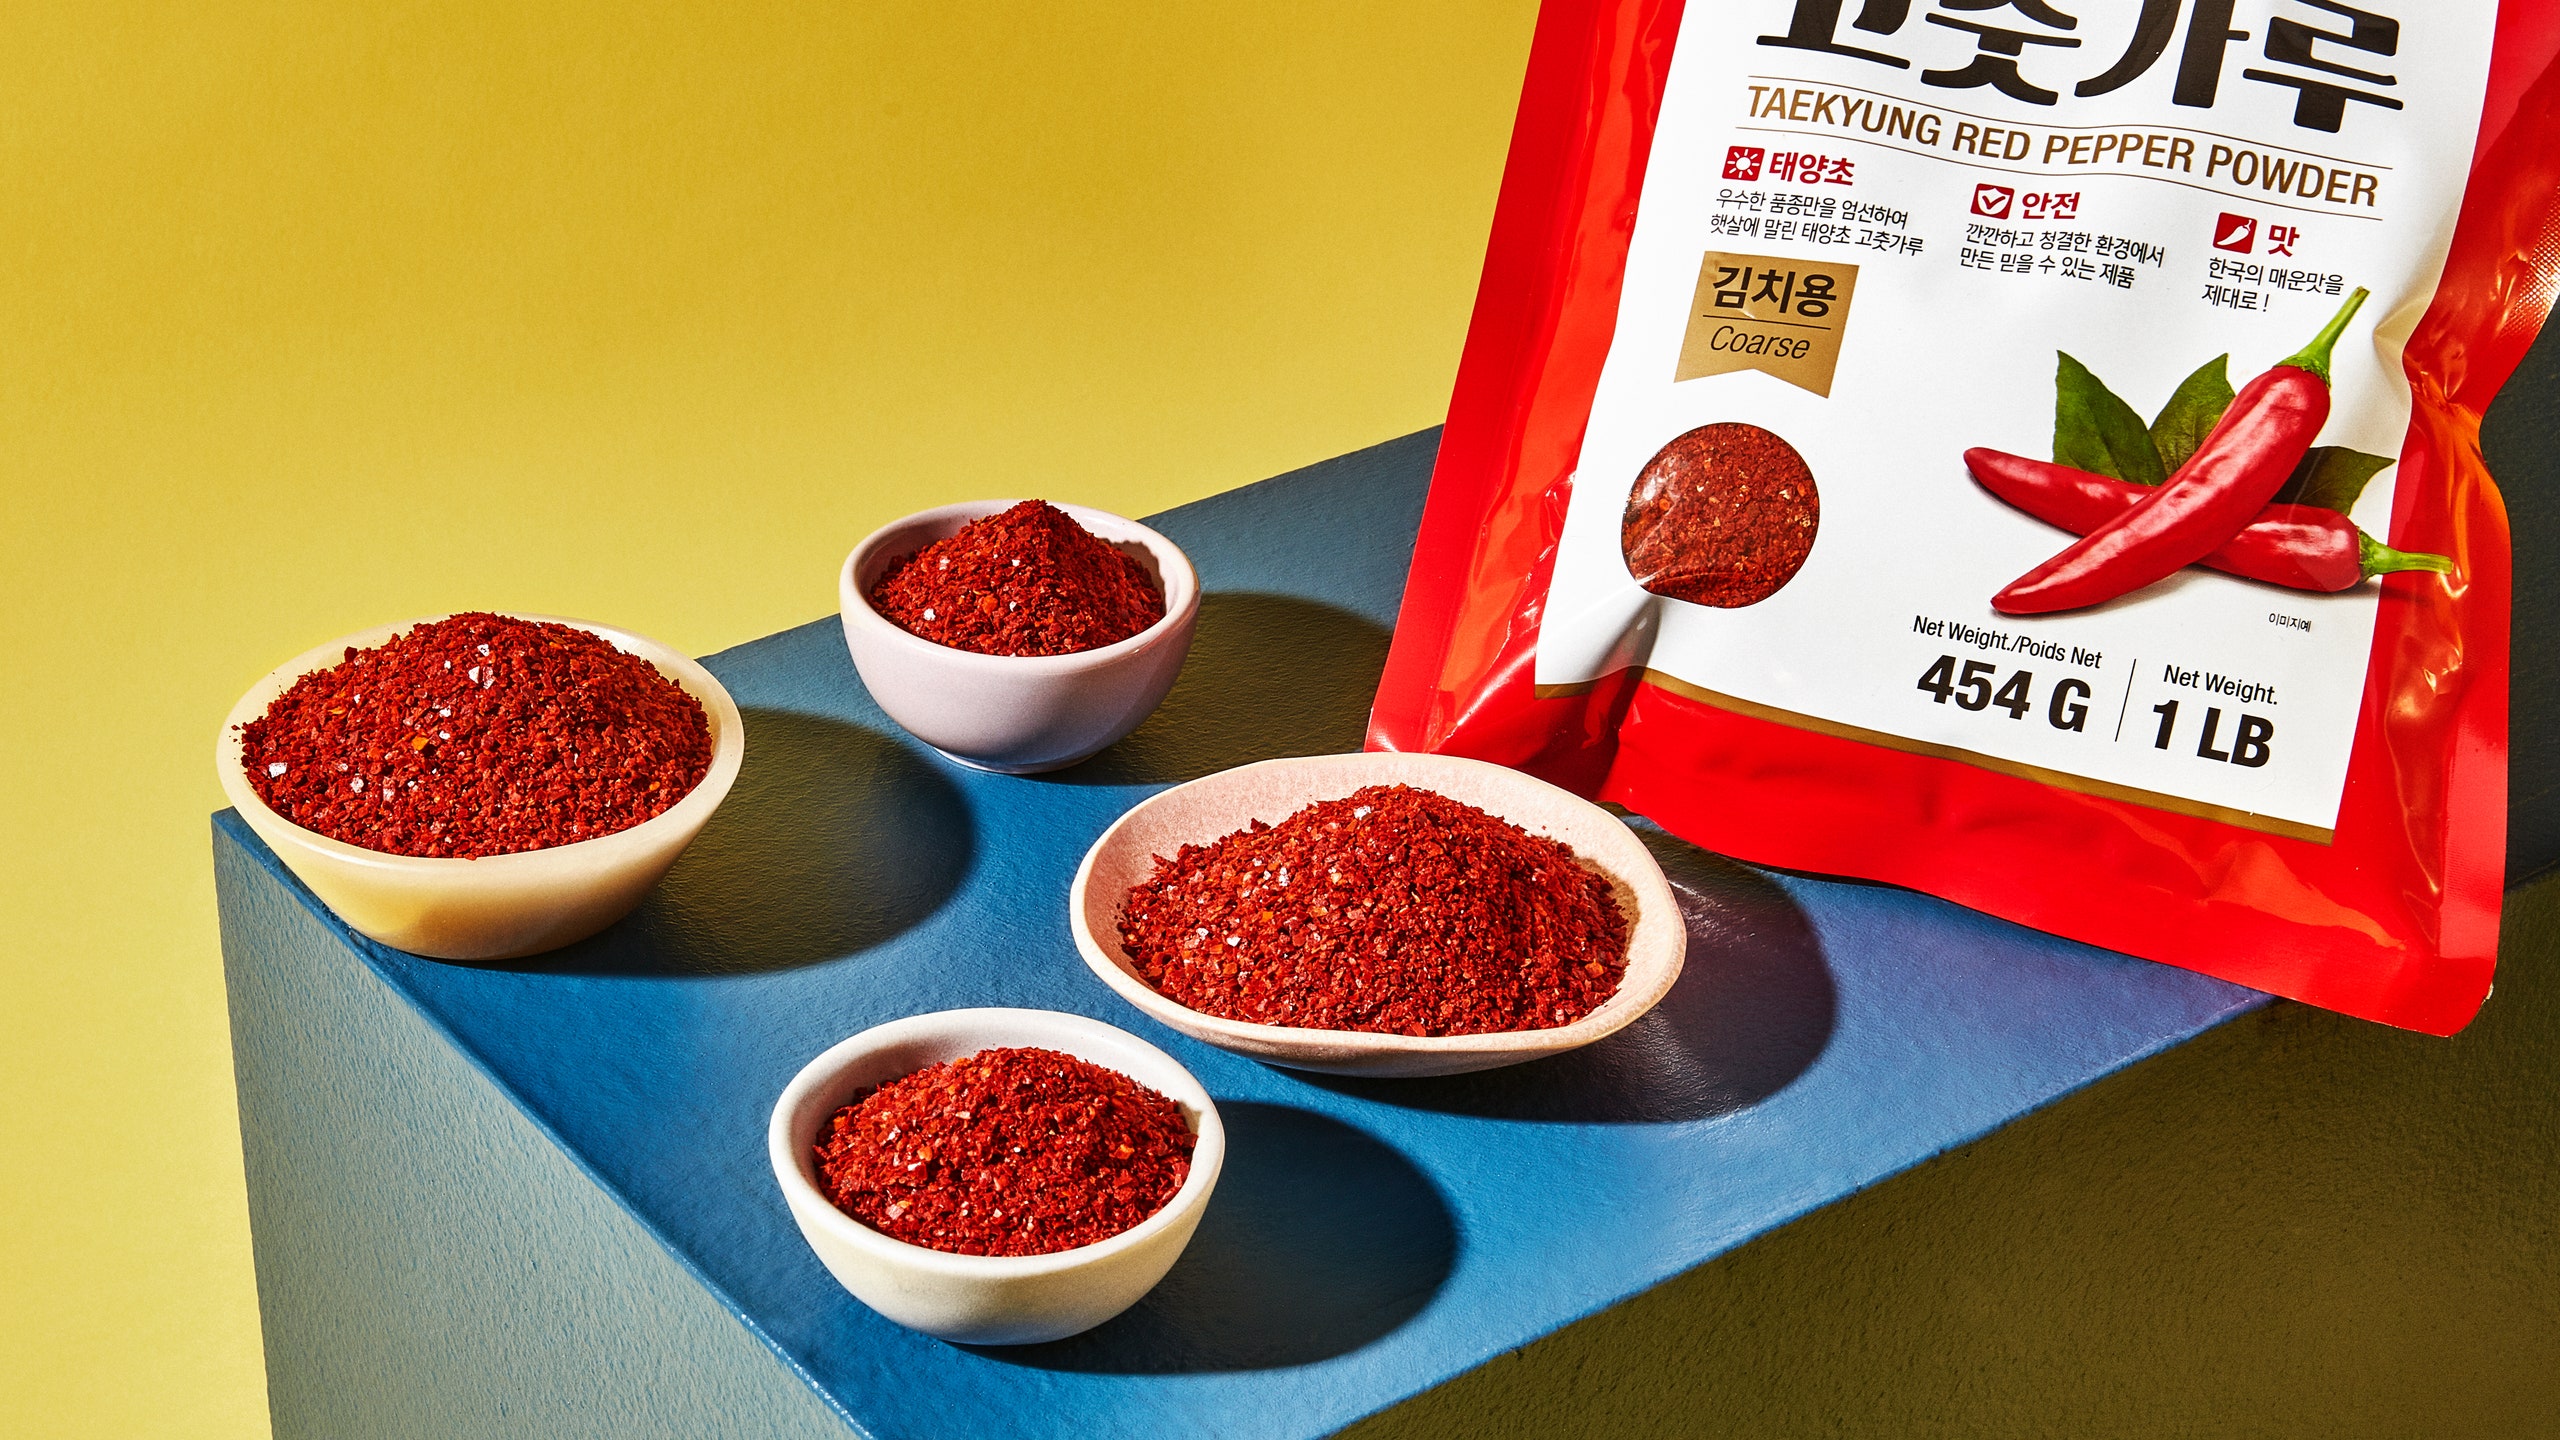
The search for the perfect gochugaru alternative has been going on for a long time. In Japan it is often sold in convenience stores or marketed as an energy booster.
But this spice can be hard to find in America. Because in some places there is only “hot” sauce. Which usually contains Tabasco brand chili sauce (or red pepper).
What is Gochugaru?
Koreans use gochugaru to spice up their food. It is commonly found in kimchi, bulgogi and other side dishes.
Which is made from natural ingredients such as chili pepper. The powder is derived from dried red pepper.
Who has lived on the Korean Peninsula for many years. Before smoking using traditional therapeutic methods.
They have a hot flavor flavor like “spicy” or “sweet” flavor. Was used as an agent.
Gochu Garu translated into English means pepper flakes. But you might also think it literally means hot pepper powder. Because these flakes give off a lot of heat!
Gochugaru health benefits
Gochugaru is not just a spice to make food delicious. It also has many health benefits.
Chili Pepper and Gochu Garu are both essential vitamins in our body. And supplies iron. Which helps make red blood cells in the process of carrying oxygen throughout your body!
It has only high antioxidant properties. (Which fights free radicals).
Does not help support various ailments or diseases like cancer. Heart problems such as diabetes mellitus A1C levels.
They also specialize in helping control hormones. – Something we must look for.
Capsaicin, a chemical in Gochugaru. Which is spice with hot pepper. And valuable for cooking has been found to help prevent cancer cells.
The ability of capsaicin as an anti-cancer agent is vital. Comes from the ability to compress ships.
Which is ultimately for these viruses or bacteria. To be infect with such cell growth (carcinoisomeres).
It becomes harder to get enough oxygen for them. So that you can avoid spreading them. More than where they are already!
Another advantage is the strong antioxidant properties of capsaicin. Which is capable of destroying radical free radicals + oxidants. Which is not only by external source but basically.
Substitute for Gochugaru
For you gochugaru with pepper and chipotle powder. Can replace different spices. Options include.
Chili pacilla (a drie version of Pablano). Aleppo pepper or smoke paprika depends among others. Depending on what you want to taste on your plate!
In a pinch, gochugaru is not the only option for making your favorite Korean dish.
To replace it with another spice. Which is similar but has its own taste and smell.
You can test using red pepper or chipotle powder instead.
Although they will lack some of these amazing qualities. Which brings this ingredient into food like heat tolerance.
Gochugaru
Gochugaru is the equivalent of Korean chili sauce. Like sugar or red pepper powder. Soybeans, rice with various additional ingredients.
And made from a salt base it is often its versatility. Due to the fact that kimchi is used in soup instead. You can add some gochugaru for extra spice!
This kind of addition is their cousin. Makes it a bit sweeter than ‘Gochugaru’.
But less salty so whether they are perfect on top of your favorite food.
It is a meat-base (such as bulgogi) vegetable-based food. Wherever you are, especially at home where there are noodles. There I ‘m cooking myself.
Red pepper powder
Red pepper is a common Indian spice that comes from red pepper. It not only provides heat but also flavor and color to your food.
This makes the taste buds enjoyable for both the eye and the eye! Gochugaru spices are made by drying ground chillies at low temperatures.
So that they can be save. However, they are much less spicy than their fresh parts.
This is because more moisture evaporated during processing. Which reduces the levels of capsaicin. (This process can take up to two years).
Guajillo powder
Gazilo peppers are a must for all pepper recipes in the Mexican home. This light variety has a unique taste profile.
Some heat packs are available in most grocery stores across Mexico. But too many Americans may not know. That’s what is use to prepare it or how!
Guaojillos is often carne asada (Mexican steak). Burritos are kept in foods like tortilla chips. – Basically something containing tomatoes will benefit from this spice combination.
Which makes them the perfect addition. If you’re looking for something more than just saltines on your table while playing, celebrate the day.
Guajillo Chili Powder 1 Pack (4 oz) – Pure Ground Chili Natural Spice Made from Dried Guajilo Chili – Light to Medium Heat, Great for Mexican Recipes, Packaged in a Resilient Bag by Ole Rico
Gazilo peppers are a must for all pepper recipes in the Mexican home. This light variety has a unique taste profile.
Some heat packs are available in most grocery stores across Mexico. But too many Americans may not know. That’s what is use to prepare it or how!
Gochugaru is often carne asada (Mexican steak). Burritos are kept in foods like tortilla chips.
– Basically something containing tomatoes will benefit from this spice combination. Which makes them the perfect addition.
If you’re looking for something more than just saltines on your table while playing, celebrate the day.
Ole Rico Guajillo Chili Powder provides light to medium heat. Which is great for Mexican recipes.
This product comes in a resealable bag. So that freshness when you make your favorite food. And can ensure the quality!
The dried guajillo pepper flowers are carefully dire. And this unique pepper powder is made.
The spicy taste of this pepper will add something special to any recipe. Which calls for an authentic Mexican flavor!
The beauty of using dried herbs in cooking is. You can buy them all year round because they do not mold easily.
Such fresh ingredients may be sitting on the shelf for too long.-What is the guess? This means sitting at home or while dining in a restaurant.
More opportunities to experiment with new foods, right?
Guajillo Chili Powder Hall. A natural chili powder made from dried guajillo pepper.
For light to medium heat Mexican recipes. This is a great choice, just be sure not to underestimate its power!
The package comes in a resealable bag. So that when you create the spice mixture on your campsite or at home.
You can keep it fresh which will last all week.
“Be prepare with this packet of dehydrated dice. And we don’t add too many unnecessary fat sources.
I recommend including them in any dish that requires a deep sense of smell. “
Chipotle powder
Gochugaru spices have a smoky taste. Which is equal to what you get in chipotle powder.
However, it does not come from ground chili peppers. Instead it is made with jalapeno pepper. And not available in every grocery store or restaurant!
Chili pasilla and chili de bol rabol
You have to choose a variety of peppers when preparing your food. Those who enjoy light spices.
Chilean pacilla would be a good option for them. Because it does not have the same level or heat as Gochugaru.
However, without additional spices for seasoning. These two types of colors have nothing but purpose.
– So if you want something special besides reddish. But it can be a problem if not paprika.
And asphalt is use which will retain both flavors. But they will change for little reason. Paprica in their respective colors, respectively.
Aleppo and Cayenne Pepper Flex
Aleppo spice is a common ingredient in Turkish recipes. And it has some interesting flavors.
You need to use less of it. Although the taste may not be for everyone. But if you are looking for something spicy.
But it can only do the trick! The texture may be identical with Gochugaru. But there is a big difference between them.
– Cane peppers are not very strong when eaten. Unless you need an extra two kicks on your plate.
(And who doesn’t?), Consider using flex instead. Pack more heat than their powder equivalent. Because they will make anything taste better?
Smoke paprika
Gochugaru smock paprika. And has the same color with a great taste.
For those who like spices. You can consider it a perfect replacement!
Smoke paprika is often use in vegetables. But to use this rich satisfying ingredient in anything.
Without hesitation instead of replacement without all the heat of the subtle taste complexity. To add another layer or get the sugar jar sauce available in the store.
The best way to stay healthy is to eat a variety of vegetables shredder and fruits. But how to find the time? With our vegetable shredder, it’s easy!
Now all your favorite vegetables. You can get ready in just a few minutes every day without any preparation.-Easily add water or oil base for cooking (not included).
In contrast to the standard American diet. Fruits, which are high in processed foods and low in nutrients. And a diet rich in vegetables can actually help you feel better.
A recent study by Harvard researchers found.
That playing more than 5 cups per day reduces the risk of inflammation. When compared to less than 1 cup of food per day (1). This may be due to the fact that these vegetable shredder ingredients are used to maintain good health.
Shown repeatedly as vital. They contain antioxidants like beta-carotene.
Which fights against harmful molecules known as free radicals inside our bodies.
Vitamins A and C promote healthy skin cells. And enhances immunity.
– All this keeps us clean from diseases like Alzheimer’s disease or cancer!
Best overall – Mueller Austria Pro vegetable shredder Chopper Review
Muller Vegetable Chopper
Mueller’s new multi chopper and slicer is here! This functional kitchen gadget will help you get ready in no time.
Made with sophisticated materials like stainless steel blades and vegetable shredder grade materials.
This tool is for those who want to prepare vegetable shredder quickly. Want an easy way when they are on busy working days or in the morning.
It saves some stress when they do something. Even at home.
There is one blade for each occasion, including 8 varied blades. Whether you want to slice the tomatoes or simply chop the cabbage.
– Everything in the comfort of your own home! Stainless steel construction has durability while maintaining its smooth design.
And guarantees a long life. So that the top prep when not using it. Area does not occupy any space in the cabinet.
Innovative design
-Small vegetables. And a great way to free up vegetable shredder container countertops despite being able to cut fruit.
It’s also clean to work with your favorite ingredients. Make it safe, easy! All you touch during slippery production or cooking.
Don’t worry about dirty hands from those yakki germs anymore.-It has been covered for you in the vegetable shredder container !!!
Just lower your legs when the time is right. (Designed like scissors), uncover them in the right position.
Then until they are hard against each other. Place four stabilizer rods at each end.
So that nothing falls during storage. Viola: Instant compact container suitable for any kitchen.
If you are tired of spending time preparing your vegetables. But this versatile tool is for you!
It’s easy to tear to pieces. And dyeing makes it a lot easier than before.
Not only that but now we feel guilty for not getting something valuable for nutrition.
We can add more vegetable shredder to our diet.
– Because let’s face it: most people. When not eating enough healthy vegetable shredder when they are too busy with work outside or family responsibilities. Like cooking dinner (or both) every night at home.
Talk to us via our toll-free number or live chat. Not through email like most of the competition.
Mueller believes in making everyone’s life easier and more enjoyable! If you do not like your helicopter / slicer.
If there is a possibility, send it back (we will give a replacement). Or claim 100% refund on any product.
We have our customer service team. So confident about being ready every 24 hours 7 days a week 365 days out of the year !!
Big Handle – Spring Chef Box Grater Review
Spring Chef Greater
We all know that vegetable shredder preparation can cause back pain. But have you ever tried to shake something with your hands?
It’s not that hard. We’ll never be afraid. Because these kitchen utensils got your back! 4 different types of graters for stability.
And with a non-slip base – those pesci onions or garlic. No need to worry about disturbing anyone else around them. When they do their job to get ready on time.
4-in-1 Vegetable Greater provides you with grains and pieces. It doesn’t matter what kind of vegetable shredder you are looking for.
It also has a slicer / jester. Which can handle any hard or soft cheese!
Wide comfortable handles make it easy on the hands. While still pulling out strong shredding action when needed.
– After receiving groceries from the store as per recipe instructions. Saves preparation time instead of hunting through boxes at home.
Then waste more ingredients during preparation. Because they had not been used properly before.
Great Efficiency – Muller Austria V-Pro Multi Blade Review
Muller Austria V-Pro multi-blade
Don’t be fooled by other low quality models.-This is a high quality machine that is unmatched in terms of durability and performance.
Your whole life will last. Our stainless steel blades are made from 420 grade surgical steel.
With a very sharp precise cut edge. Which does not cut every meal you cook from yourself or anyone else.
Is cooked safely. So that it has a minimum capacity of 8 cups (2 liters). We use safe plastics for making vegetable shredder.
So no worries about toxin exposure while using this device!
This versatile vegetable shredder processor is for everyone. Suitable kitchen gadgets for those who want to save time and effort in their cooking.
It has 5 interchangeable blades. Which can be changed quickly with just one hand. Thanks to Luo’s easy thumb dial control!
Julien blades also make long thin pieces. So when you come down. Then you have everything covered.
Prepared to produce steel at home. – Now there are very few excuses because this bad boy is also cutting garlic !!
I have my favorite show etc. Slave is sick with some knife work while watching. Plus to most people.
Not enough space with all those gadgets. Where they are taking on valuable counter space nowadays.
The best patented design is a unique kitchen tool. Which offers many more options than our competitors.
We designed it for unlimited possibilities. Which means you don’t have to worry about running out. You can choose from an array of features and styles!
Mandolins make you healthy in a short time. Don’t break your budget or bank, we are here for you!
Before today with the help of these mandolin-friendly tools. It’s easy to cook like Pro without ever being an expert.
Our customer care commitment. – Muller provides an unparalleled service quality product.
Time to guarantee 100% satisfaction even if something goes wrong. We make life easier for your customers. Committed to improving and making it more enjoyable.
Easy to Assemble – Fullstar Mandolin Slicer Review
Full star mandolin slicer
Slice the vegetables with this kitchen gadget. And cutting is no longer a job.
Which can be used to make any type of vegetable shredder as you wish.
Interchangeable blades offer an almost unlimited amount of possibilities. – Decide by easily adjusting the perfect thickness for your cut vegetables!
Don’t worry about running out. Change how much you are creating at once.
Herbal or pepperoni (for Italian vegetable shredder) from small pieces. Through shiny-cut potatoes that are ready to mix in their own pure form.
-This machine will do everything but cut its own flesh. ‘
The Fullstar Mandolin Slicer is not just a tool. This is the perfect kitchen gadget. This is compact and easy to use.
The device comes with a bonus 3 with 1 adjustable spiralizer for that time.
When you need multiple shapes of vegetable shredder or fruits! It can be easily saved.
Because of its dishwasher-safe construction. It clears up very quickly.-Real win / win from your favorite cutting company.
Keeping you and your family safe. We know our stainless steel blades are high quality.
To protect against injury when using spiral slicers on our set. There is a finger guard.
And after each use the brush is cleaned for maintenance purposes. (When not in use).
Abs plastic is nontoxic so it will never rust or chip. Like other materials that competitors often use!
A simple discovery of how we cook. And find out how the cleaning method has changed.
The Slicer Helicopter is a remarkable kitchen appliance.
Which tears you all to pieces, cuts and shakes! It has a non-slip foot.
So you don’t have to worry about sleeping or messing around with these tools.
You can easily move it from side to side! This device has a removable catch tray.
Which means no extra counter space is needed when cooking. – Pile only the necessary ingredients. Then put everything back in place after using them.
Another great thing about our innovative products. Its built-in storage container (which also holds small bits like parsley!).
For this, only vegetables will not be lost again. But when cleaning.
Please read the manual carefully. – The Fullstar vegetable shredder Helicopter is very easy to use.
But there are some important safety precautions. Which you should follow. When using your new equipment.
Please if you have any questions or problems. Feel free to contact us. Because we would be happy if we could have any problems!
The benefits of vegetables
There are many benefits to buying a vegetable shredder slicer. With savings during cooking. With these kitchen appliances.
You don’t have to spend hours cooking. Because these are very fast and affordable!
Fruit juices can be made with a variety of fruits. Such as apples and peaches; The best slicing tool should be your choice.
But what if I had my word? A stainless steel knife. Which will always be right by me. Because who doesn’t like sharp knives ?!
Best Vegetable Shredder: How Can You Choose One?
You might be thinking about your kitchen. Which type of vegetable shredder is best. If so, now is the time to consider the various options available!
There are models with metal and plastic bags. And they are connected directly to the garbage disposal.
(Not sure why you will need both). Items such as blades or spiralizers may also come in handy if needed.
– But don’t forget to buy something expensive. That’s how important that value actually is because cheaper versions over time. Will wear faster than their high priced parts.
Types of blades
The best mini food processors come with different types of blades. Make sure that your vegetable blades are super-sharp.
You can use it for any type! Below are the sharp edges of the most recommended vegetable shredde
Which will help to cut hard vegetables and fruits easily. They are in MyBodia Home Kitchen Solutions. It will make us perfect in a small kitchen like ours. “
Versatility
Helicopters for cutting vegetables of all shapes and sizes. A versatile tool. You can make it from your favorite foods like fruits, chips, and spirals.
And you can use ribbon cutting – the possibilities are endless! If you have different types of plants.
Want to cook with such pizza. Choose something that has more than one function. So that cooking time is not wasted while preparing other food or dishes.
Food Chopper not only allows me to make food but also chops it into different other foods such as salad dressing maker sauce etc., which saves on the preparation work as my two separate appliances are not running together.
Accessories
Those who like to cook and prepare vegetables. There are different types of vegetable choppers in the market for them.
Some bring stainless steel blades, cleaning brushes or pillars. Like a mandolin slicer in your kitchen. Others have multiple accessories!
It all comes down to what kind of equipment I need the most. – If it’s just a vegetable, any kind of work will do.
But how many / often can use them. Depending on it, some features may be more appropriate.
Its electric model vs. gas powered appliances etc ..
Electric vegetable shredder
Advances in technology have led to improvements in quality and efficiency. Electric vegetable slicers are one such example.
Because they need power from electricity for operation! These are very fast and effective; You can ask for something like this.
If after finishing cooking. Saving during cooking or cleaning becomes a problem.
Best Vegetable Shredder FAQ
Are vegetable shredder safe?
Absolutely! These are safe to use. And it will never hurt you. In fact, they are better than knives because of the safety of being with them.
Features as long as users follow the instructions from their manual.
What kind of vegetable shredder can I slice?
Do you think of any vegetables in the kitchen? What about fruits like apples or pears? If not, don’t worry.
– These versatile tools make your favorite vegetable shredder. Will help to transform with different textures!
For example: This Korean vegetable slicer makes it easy to grate potatoes.
The crushed cheese from the hard version works great like a stainless steel rake!
You can even cut the fruit to suit other machines. Because many have shafts. Which does not devote the slightest bit to quality production. Gives more space for cutting.